Setting up Jenkins CI/CD pipeline and deploying Flask application to AWS EC2


What is Jenkins?
Jenkins is an open-source continuous integration/continuous delivery and deployment (CI/CD) automation DevOps tool written in Java. It is used to implement CI/CD workflows, called pipelines.
CI/CD pipeline helps to automate the deployment of any application into the server
Prerequisites:
We will need an AWS account to complete this project. Create a free tier AWS Account. Click here.
GitHub repository link: Click here.
Setting up EC2 instance
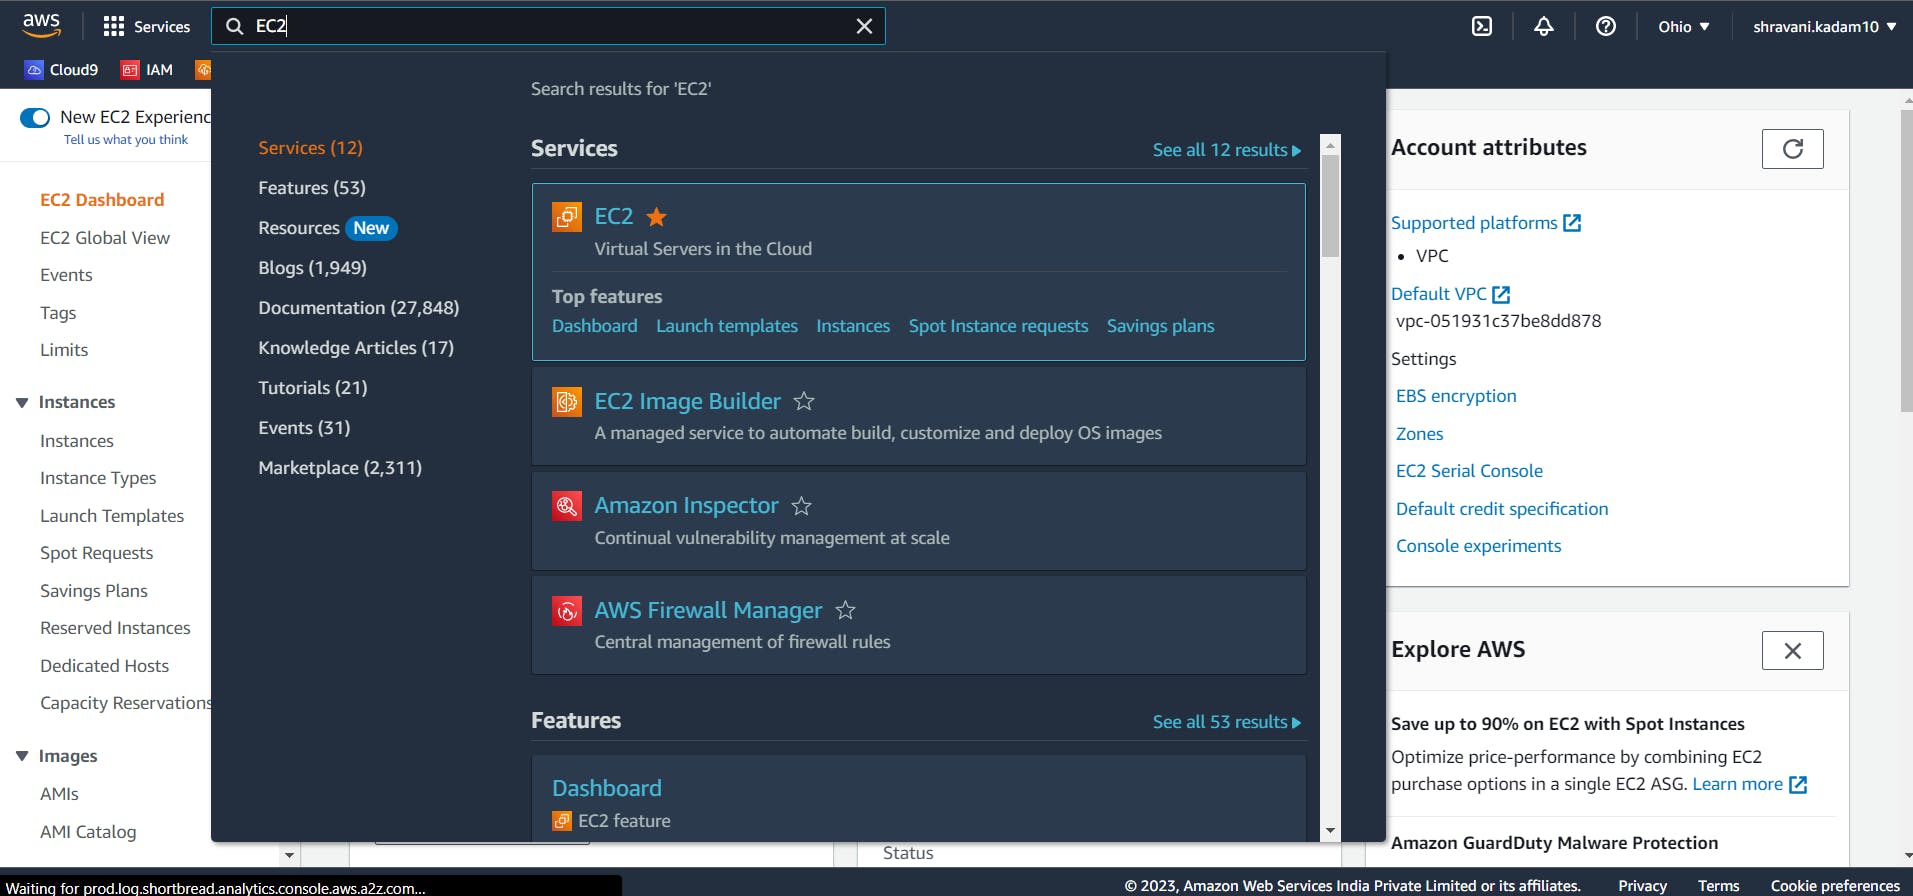
Search for EC2 in the search bar
Click on Launch Instance
Give a name to your Instance
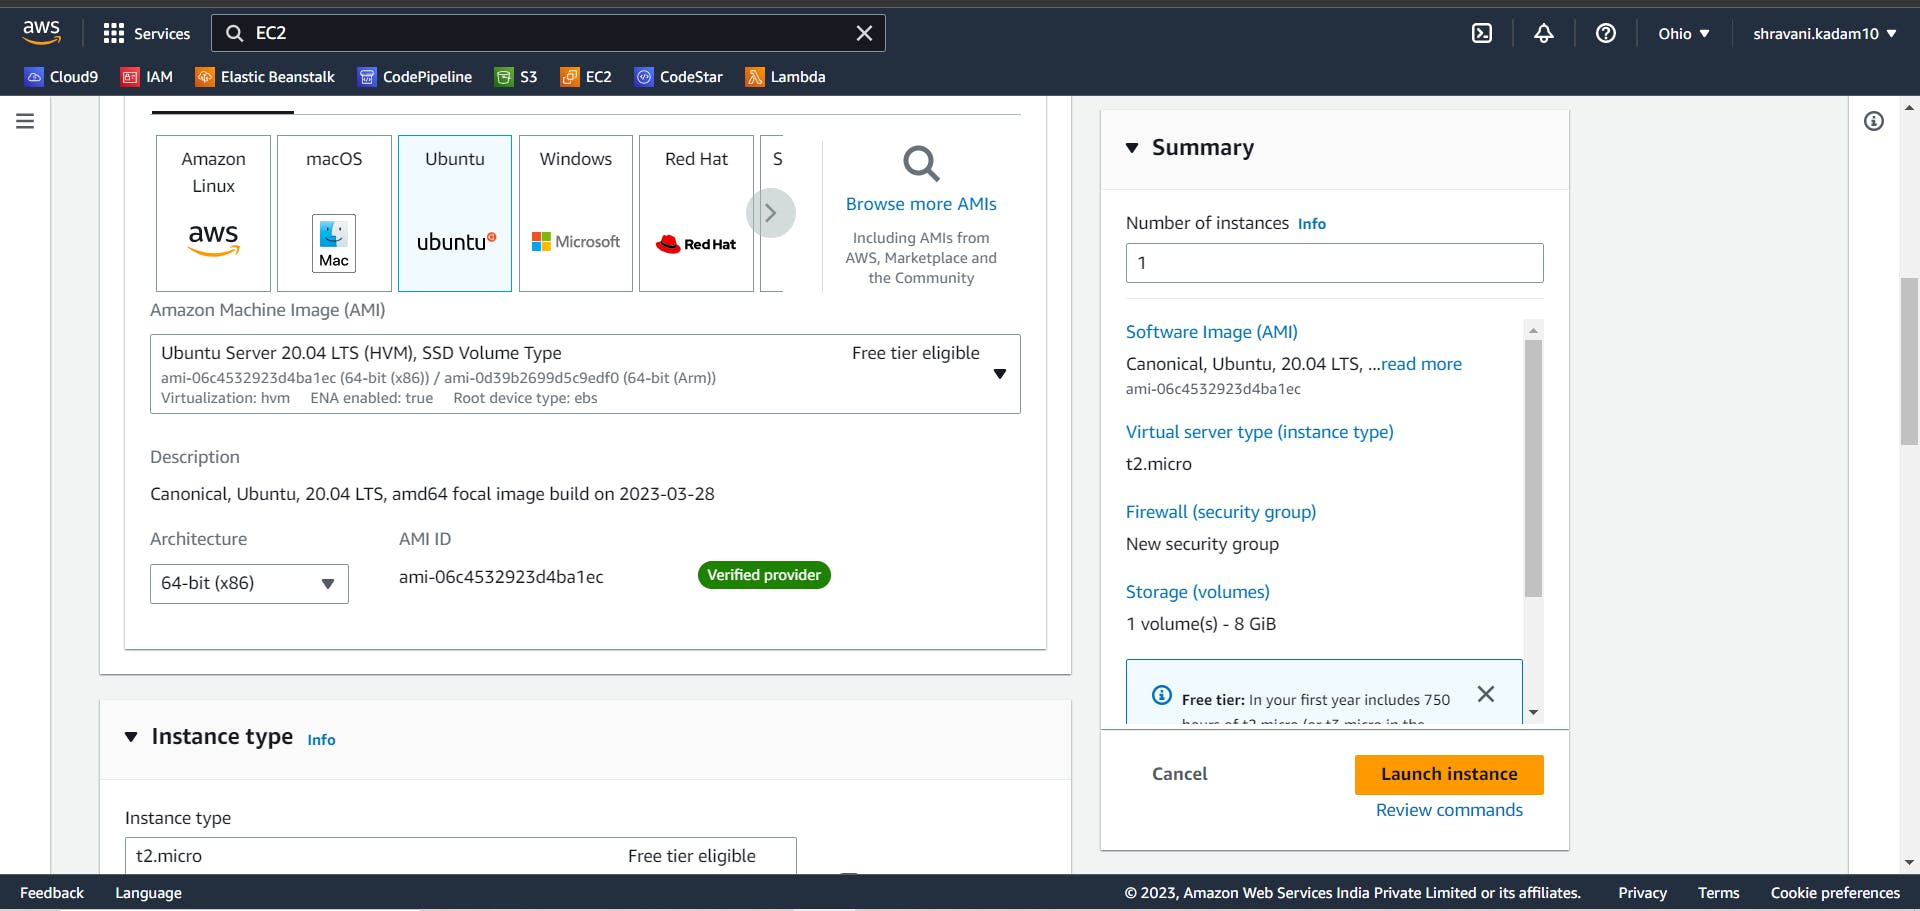
Click on Ubuntu and select Ubuntu 20.04 LTS (Free tier eligible)
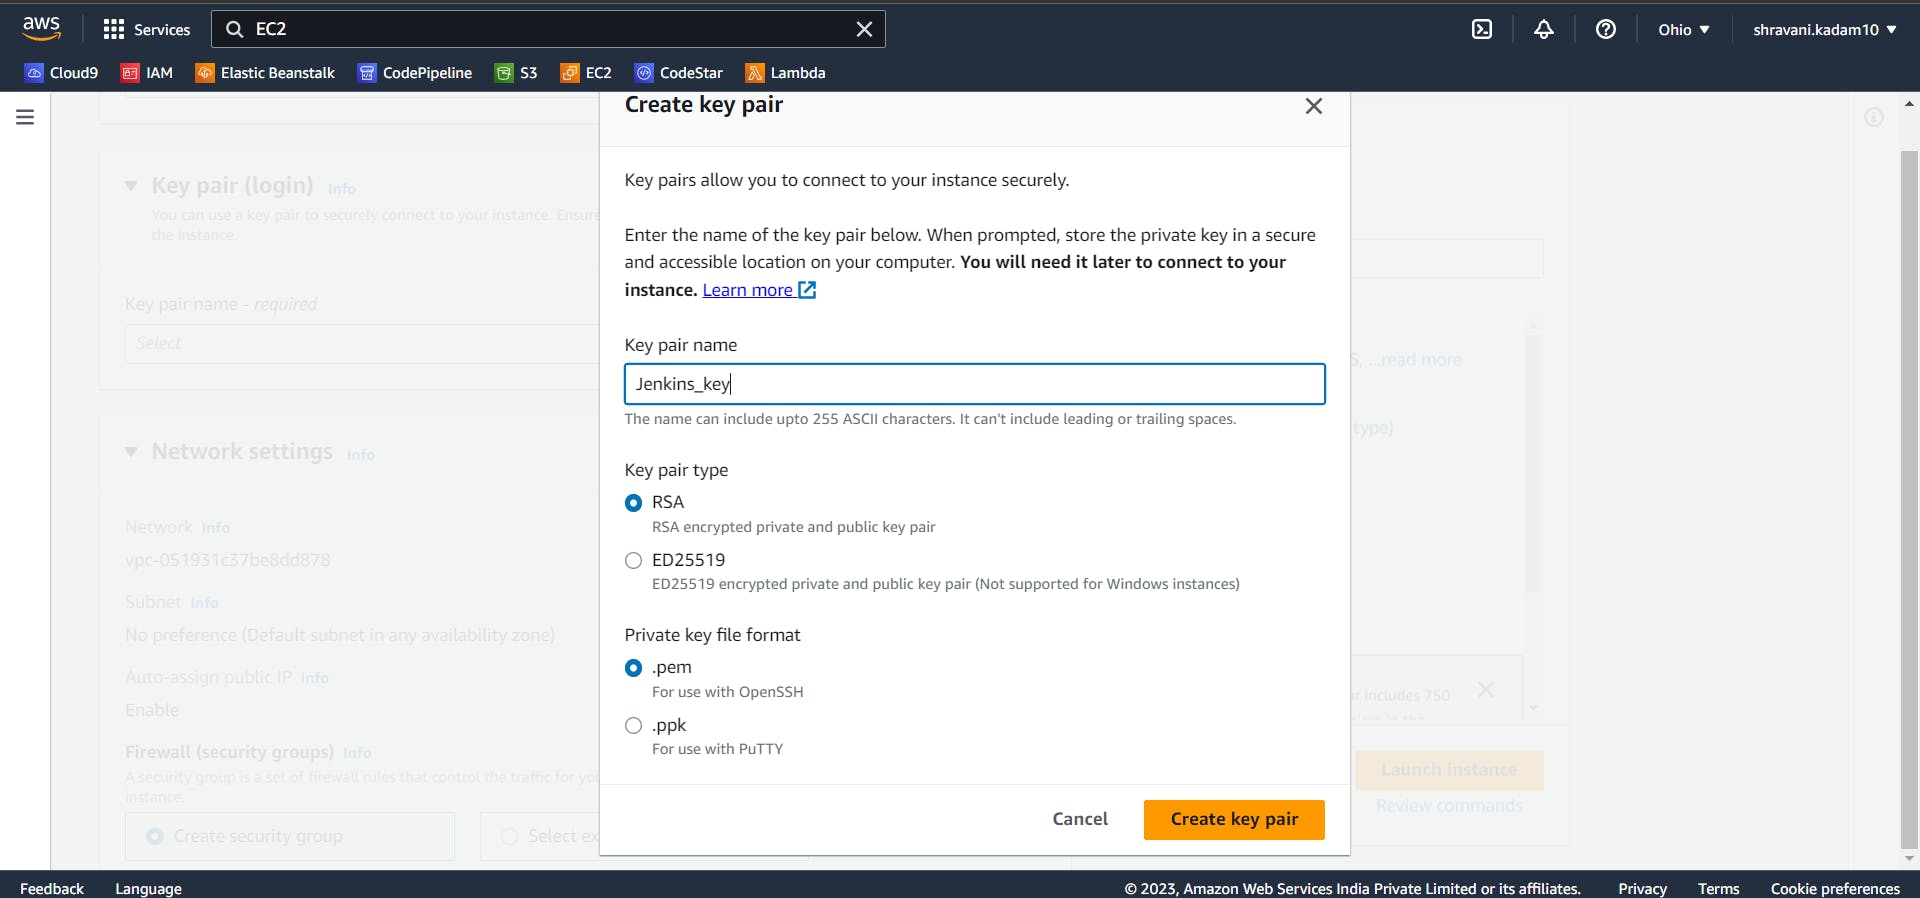
In the key-pair login, select (create new key-pair). Give a name to your key pair and click on Create. ( Make sure you download the key pair as it will be used further while connecting to the ssh ). If you are using puTTY, select .ppk
Click on Launch instance
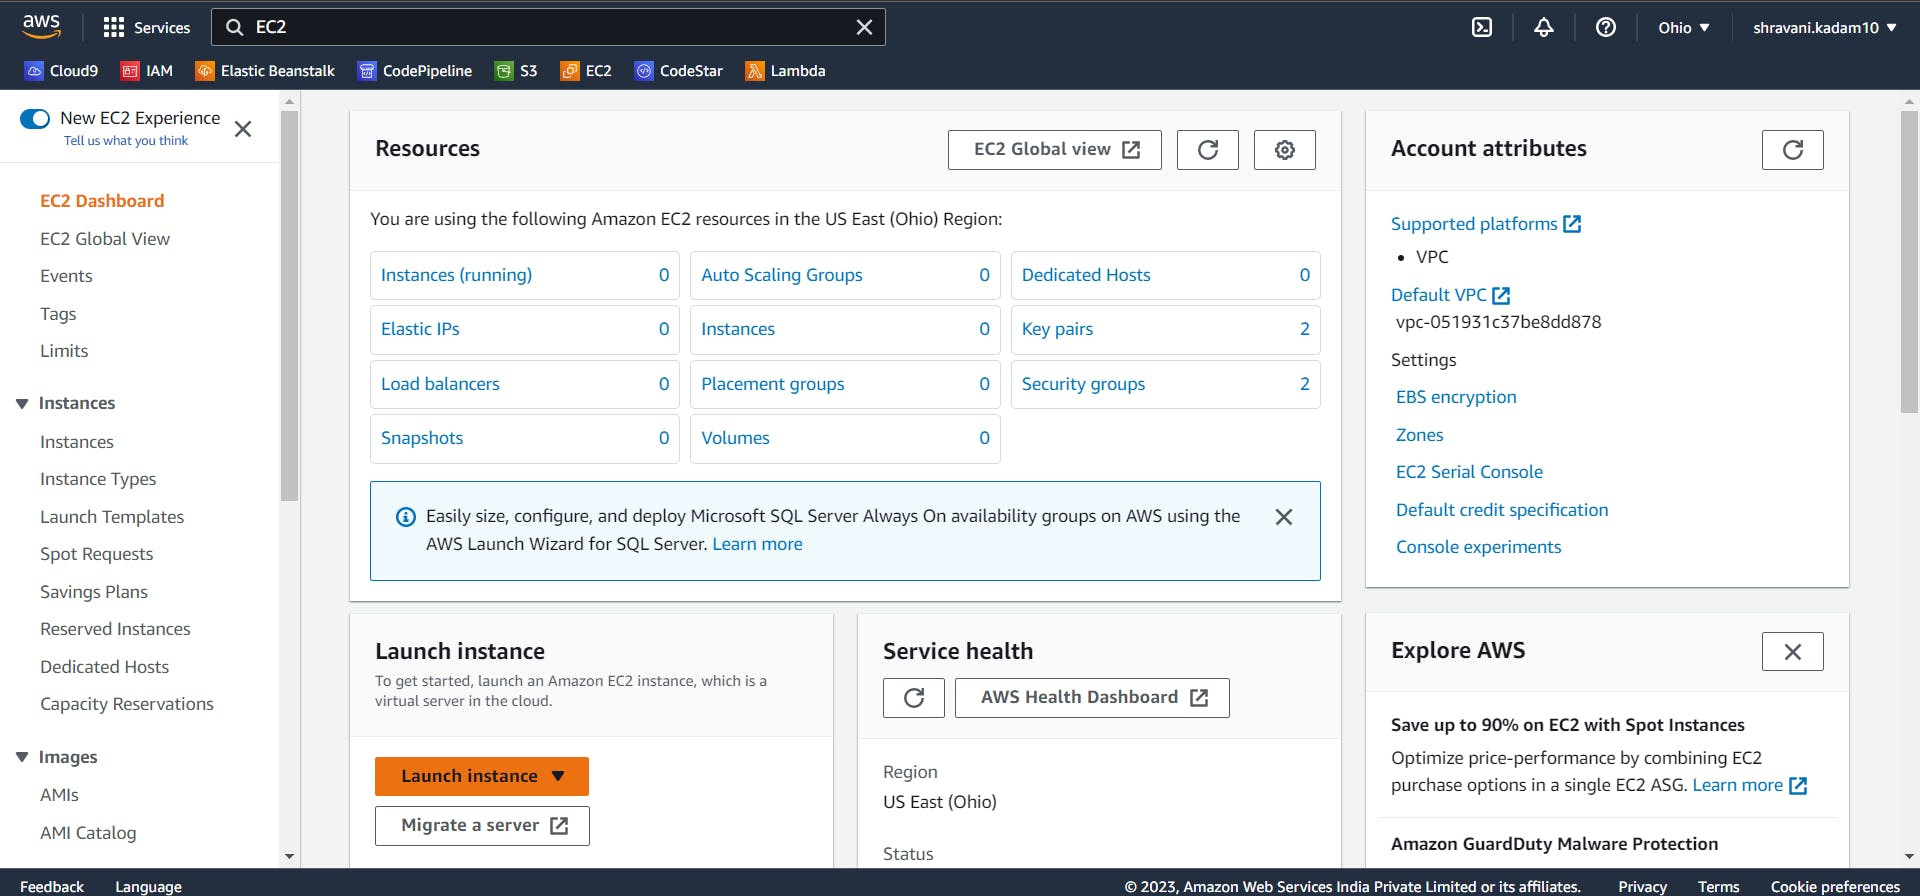
Go to your instances page, you can now see a newly created instance in the EC2 dashboard.
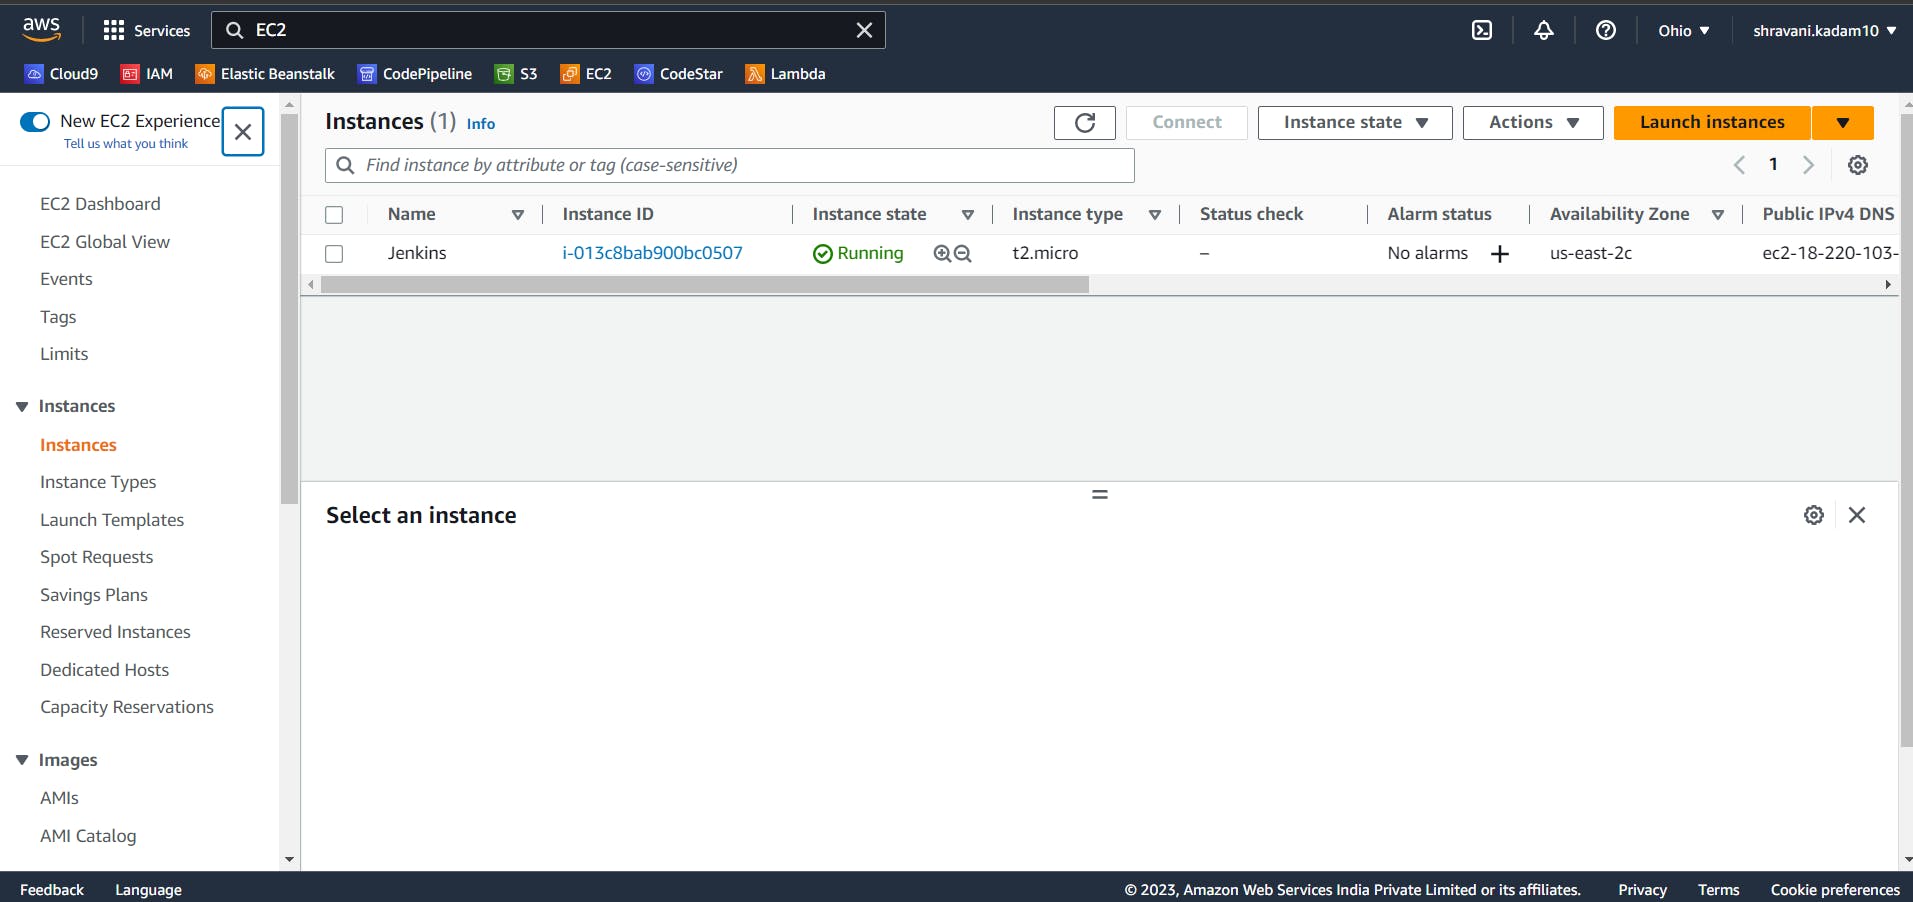
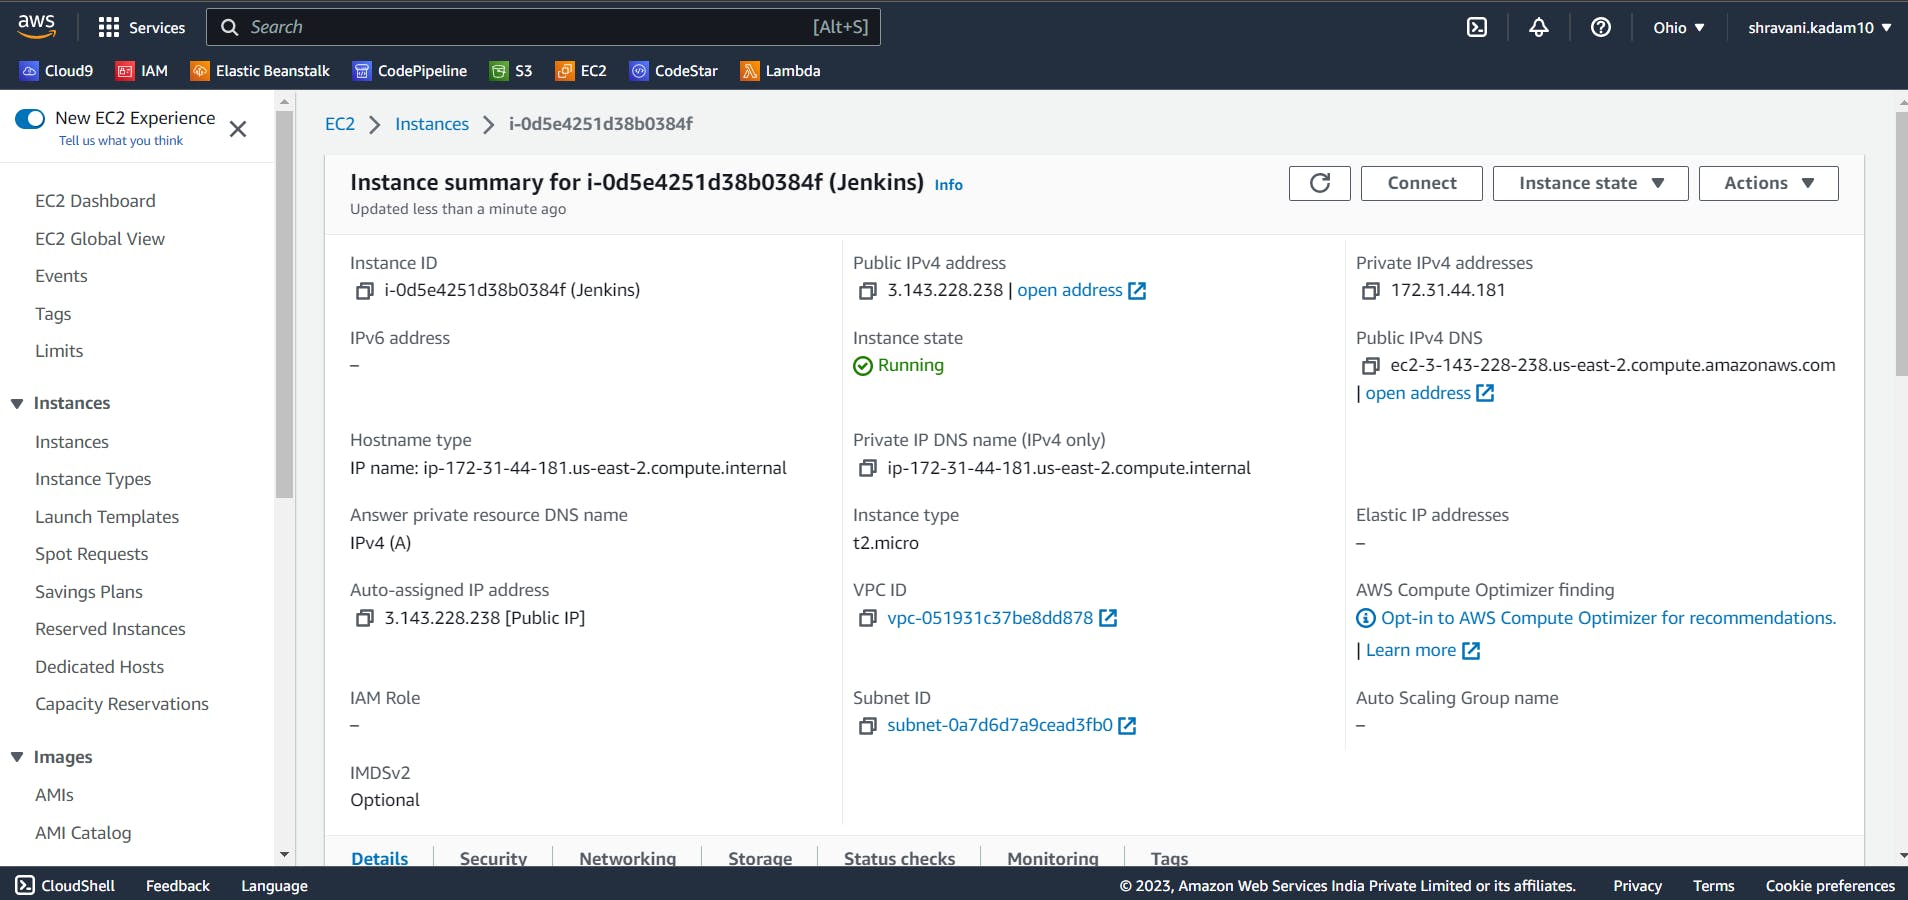
Click on the Instance ID and it will give you all the details of the instance.
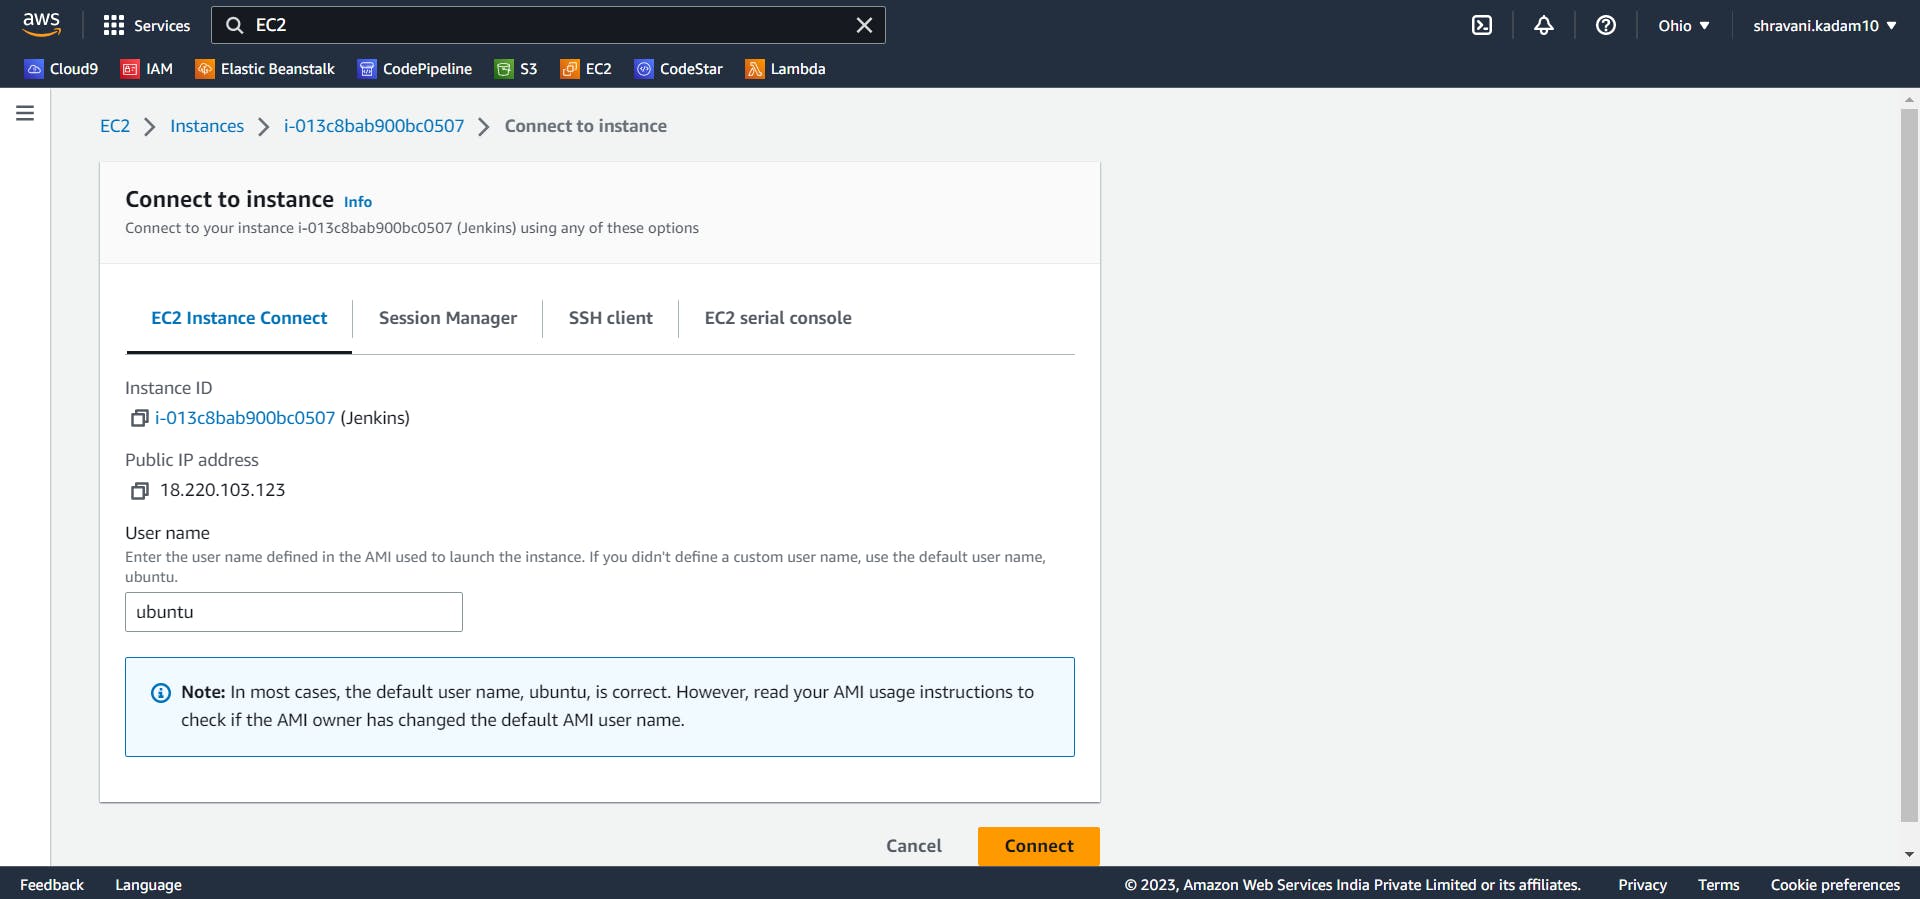
Click on Connect.
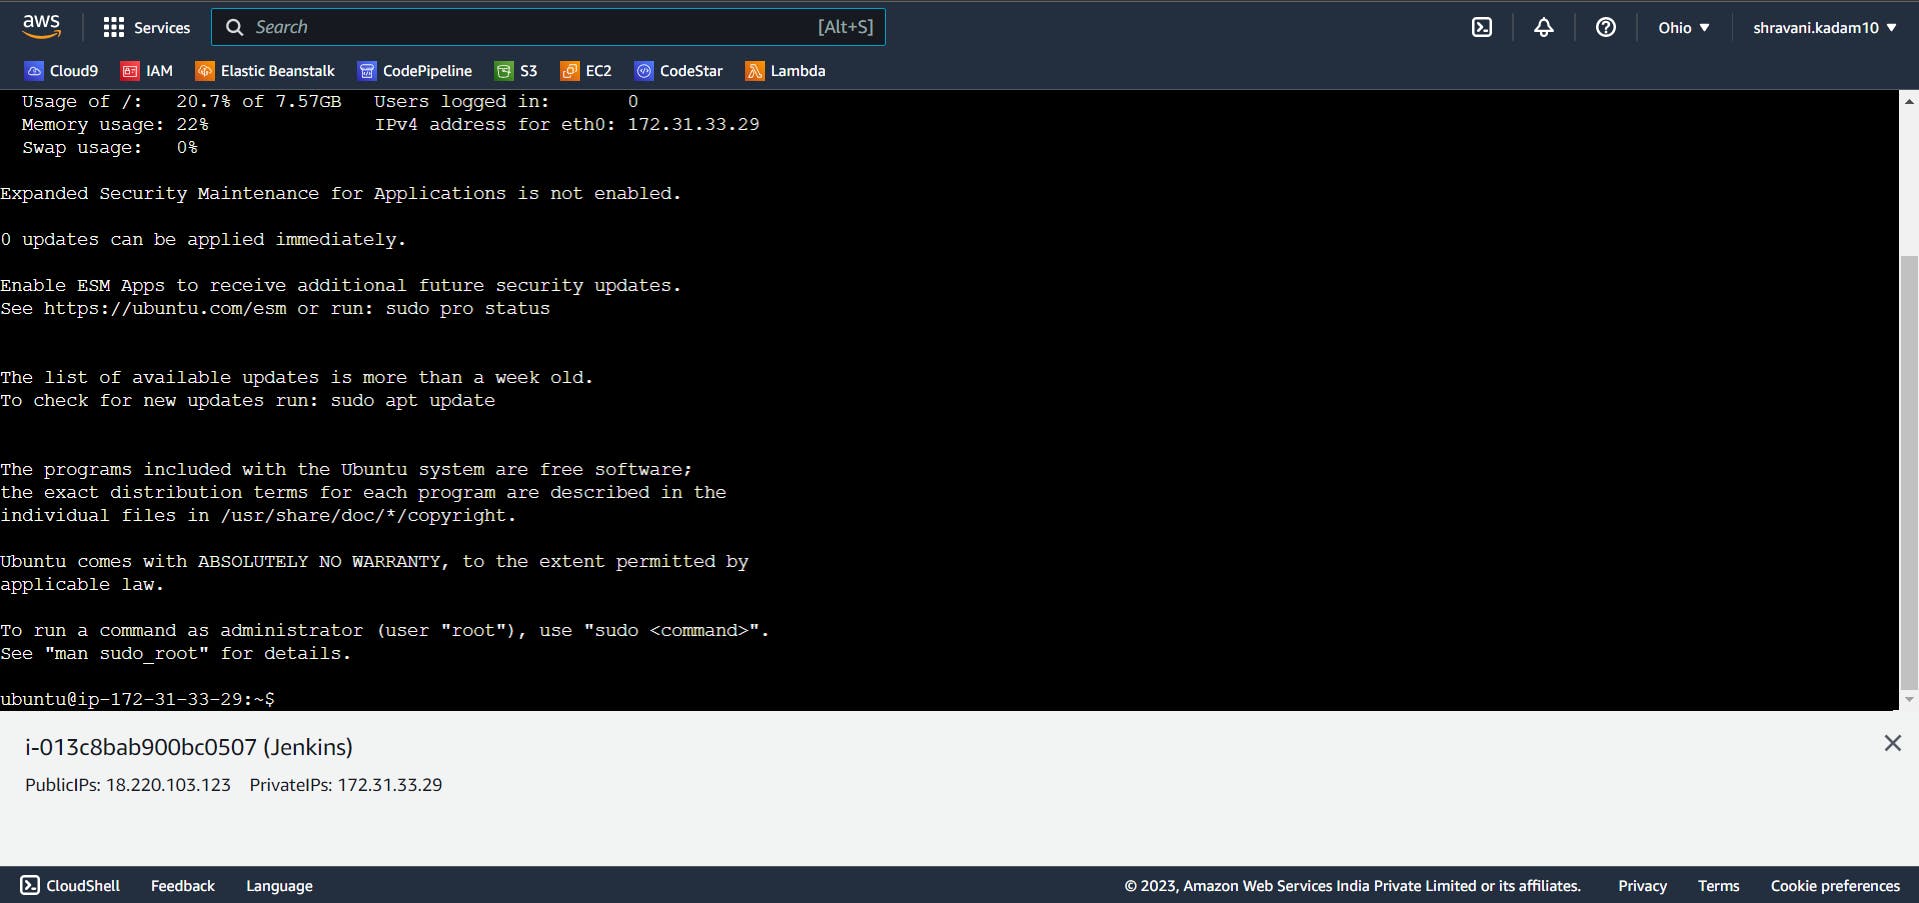
There are various ways to connect to this EC2 instance. In our case, we will be using SSH to connect the instance with the OS terminal.
Jenkins setup and installation...
Run the following commands in the terminal
sudo su
apt update
We need to install Java to run Jenkins
apt install openjdk-11-jre
java -version
Jenkins Installation

Debian/Ubuntu LTS release
$ curl -fsSL https://pkg.jenkins.io/debian-stable/jenkins.io-2023.key | sudo tee \
  /usr/share/keyrings/jenkins-keyring.asc > /dev/null
$ echo deb [signed-by=/usr/share/keyrings/jenkins-keyring.asc] \
  https://pkg.jenkins.io/debian-stable binary/ | sudo tee \
  /etc/apt/sources.list.d/jenkins.list > /dev/null
Debian/Ubuntu weekly release
$ curl -fsSL https://pkg.jenkins.io/debian/jenkins.io-2023.key | sudo tee \
  /usr/share/keyrings/jenkins-keyring.asc > /dev/null
$ echo deb [signed-by=/usr/share/keyrings/jenkins-keyring.asc] \
  https://pkg.jenkins.io/debian binary/ | sudo tee \
  /etc/apt/sources.list.d/jenkins.list > /dev/null
apt-get update
apt-get install jenkins
Enable and Start Jenkins
systemctl enable jenkins
systemctl start jenkins
Check the status of Jenkins
systemctl status jenkins
Output :

Copy the Public IP address of the instance we have created.

You can access Jenkins using the public DNS url at port 8080.
Make sure that the security group for your instance allows inbound traffic on port 8080
<Public IPv4 DNS address>:8080
3.143.228.238:8080
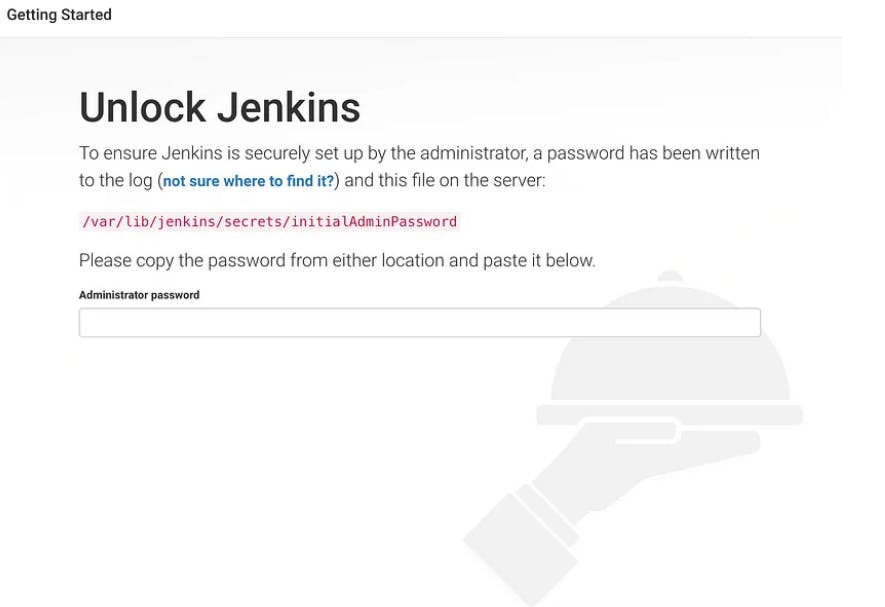
You can locate the Administrator password using the below command in your instance.
sudo cat /var/lib/jenkins/secrets/initialAdminPassword
Paste the password key into the above screen and continue creating a user.
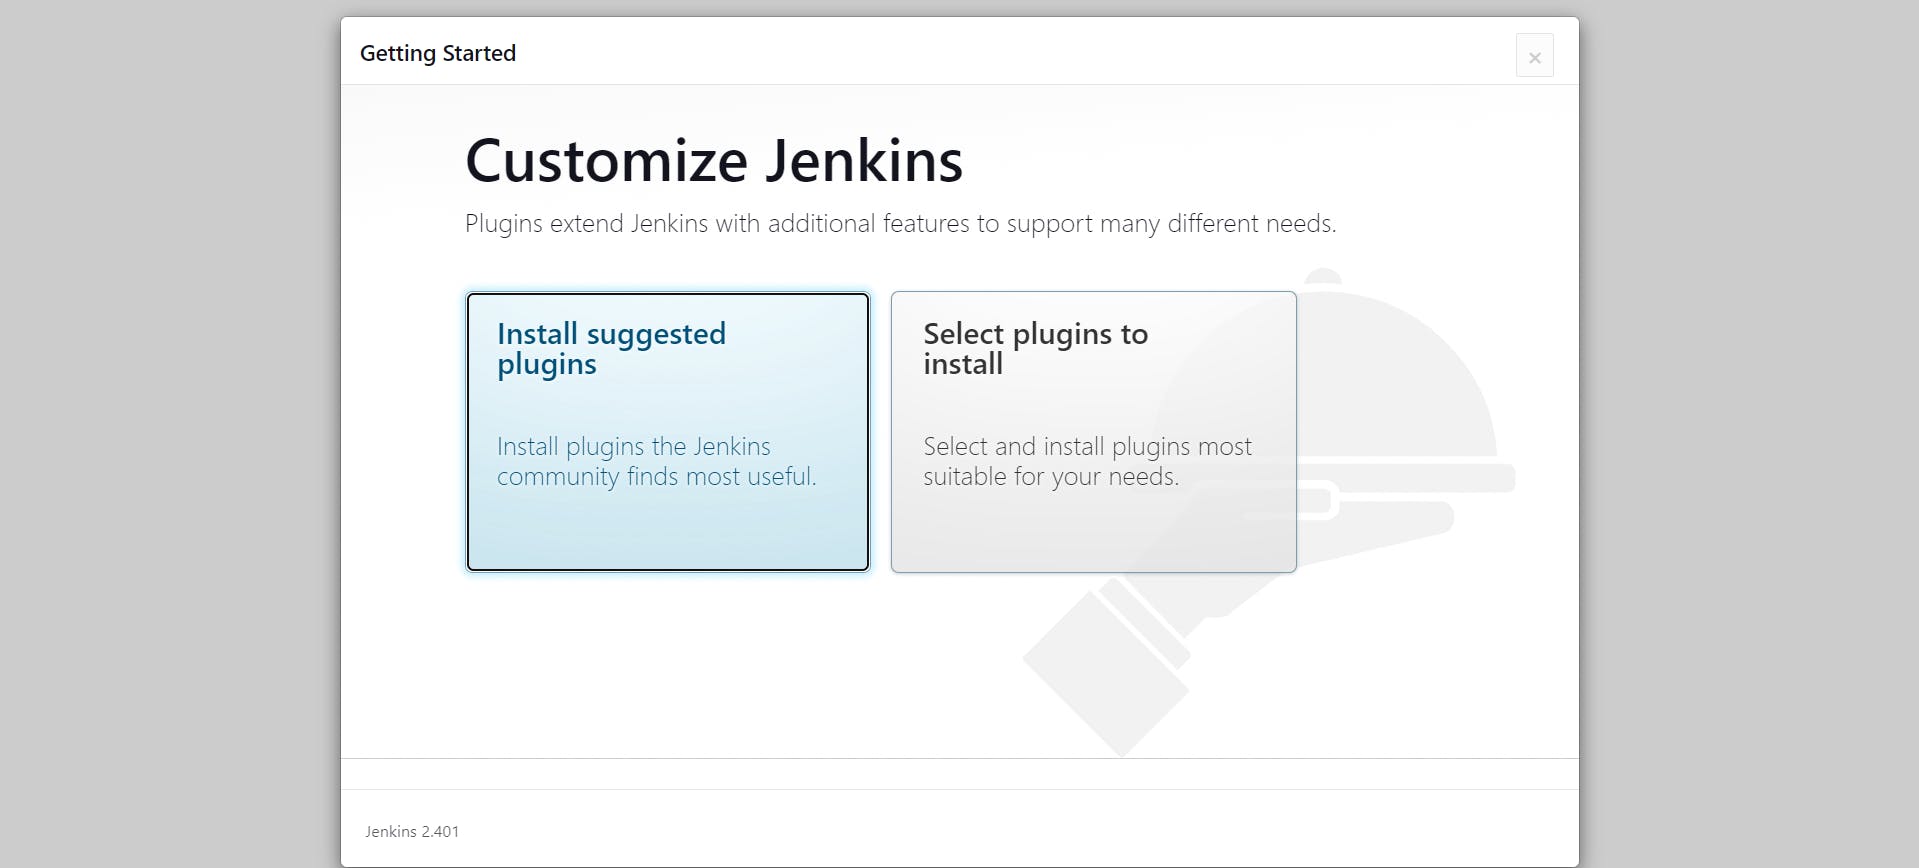
Next, click on the Install Suggested Plugins to configure the Standard Jenkins installation.
Create a first admin user. Enter details to create a User.
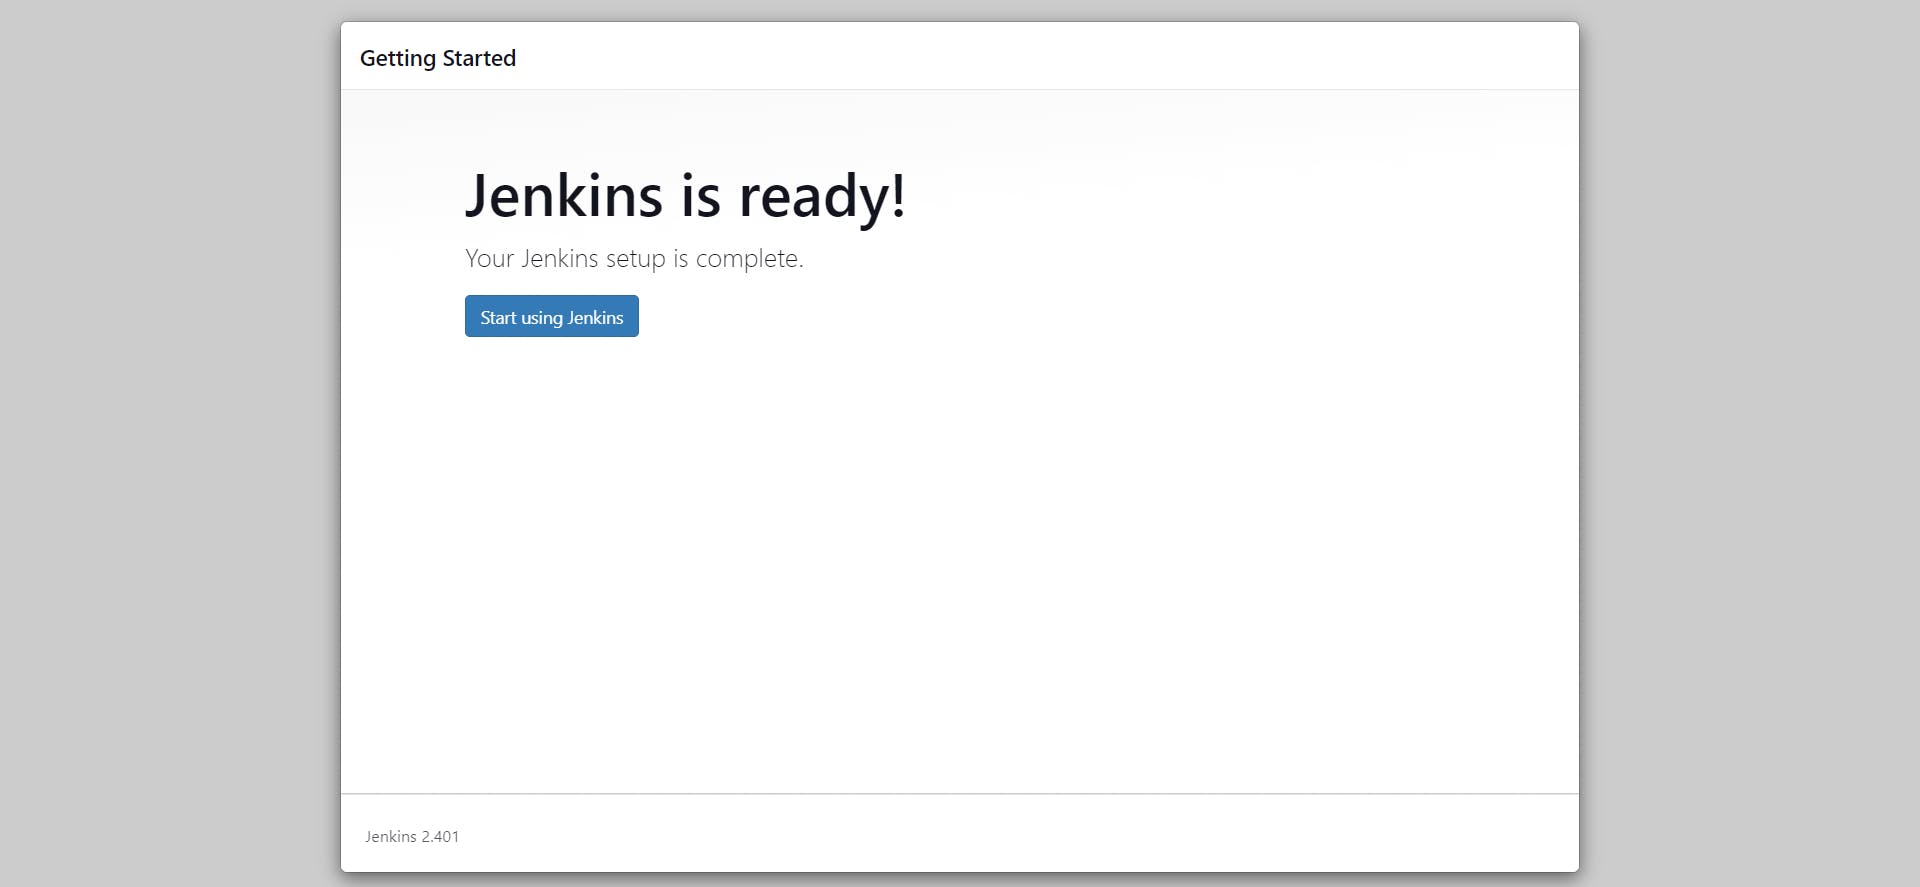
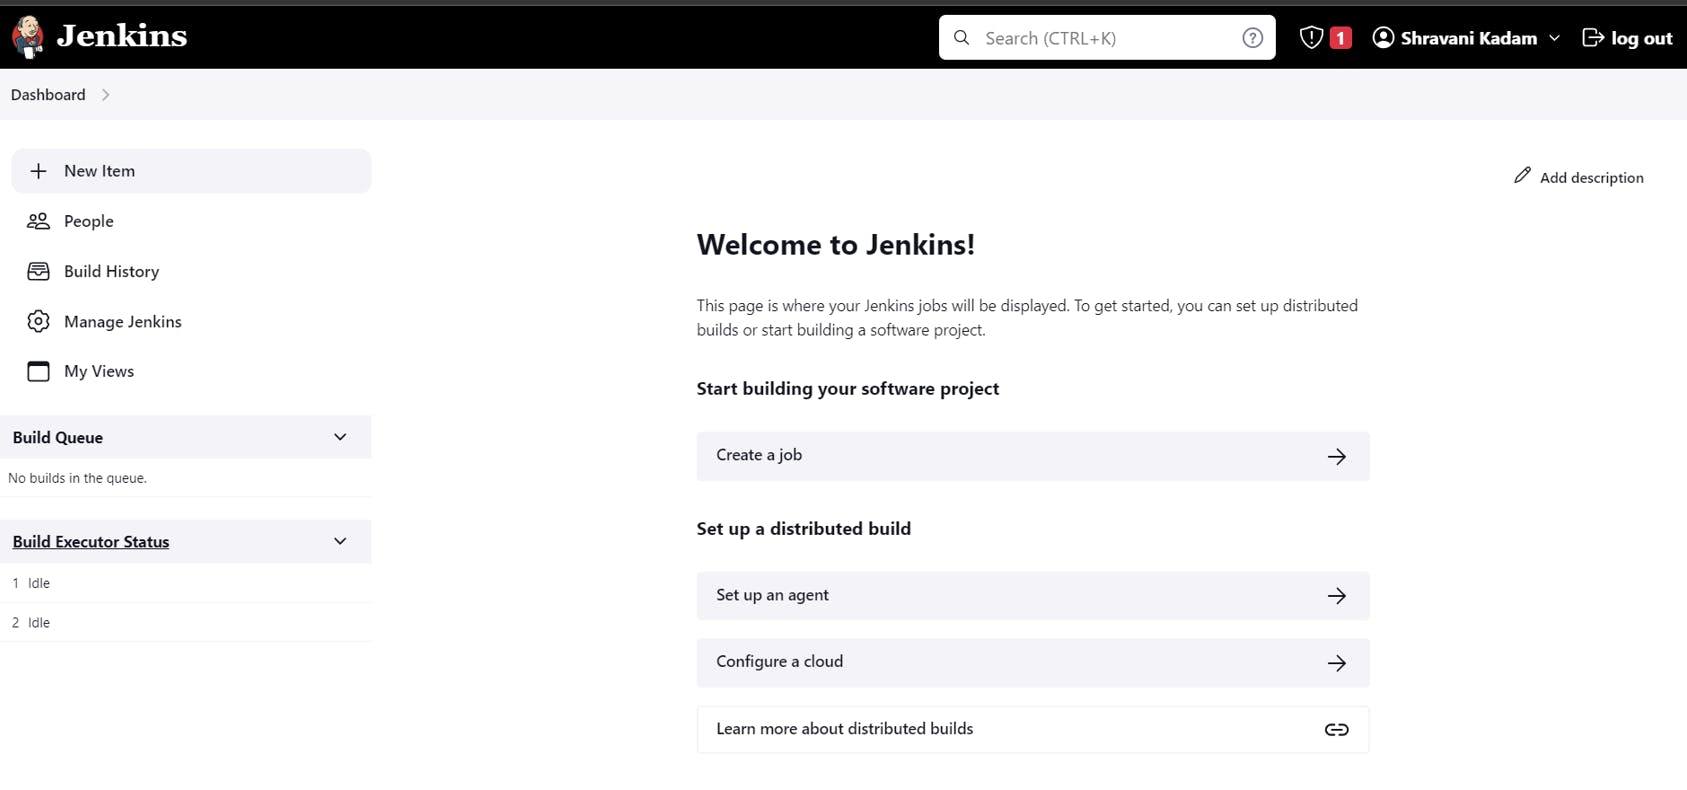
Once the setup is complete, you will be taken to the Jenkins dashboard.
Creating Docker Container
Let's now containerize our application!!
Docker lets you build, test and deploy applications quickly.
It packages software into standardized units called containers that have everything the software needs to run including library, system tools, code an d runtime.
Running Docker on AWS provides a highly reliable, low-cost way to build, ship, and run distributed applications at any scale.
Install Docker using the following command
sudo apt install docker.io
Start the Docker service
sudo service docker start
sudo usermod -a -G docker ($user)
Create, Build the Dockerfile and Run the Docker Container
touch Dockerfile
Use nano to edit the Dockerfile you just created and add the following content
nano Dockerfile
FROM python:3-alpine3.15
WORKDIR /app
COPY . /app
RUN pip install -r requirements.txt
EXPOSE 3000
CMD python ./index.py
Save the file and Exit...
Create the index.py file and requirements.txt file
touch index.py
nano index.py
from flask import Flask
helloworld = Flask(__name__)
@helloworld.route ("/")
def run ():
    return "{\"message\":\"Hey there Python\"}"

if __name__ == "__main__":
    helloworld.run(host="0.0.0.0", port=int("3000"), debug= True)
Save and Exit
touch requirements.txt
nano requirements.txt
flask
Save and Exit
Build the Docker image from your Dockerfile
docker build -t shravani10k/hey-python-flask:0.0.1.RELEASE .
Run the newly built image. The -p 3000:3000 option maps the exposed port 3000 on the container to port 3000 on the host system.
docker container run -d -p 3000:3000 shravani10k/hey-python-flask:0.0.1.RELEASE
Open a browser and point to the server that is running Docker and hosting your container.
If you are using an EC2 instance, this is the Public DNS value for the server, which is the same address you use to connect to the instance with SSH. Make sure that the security group for your instance allows inbound traffic on port 3000.
In our case, the public IP address is: 3.143.228.238
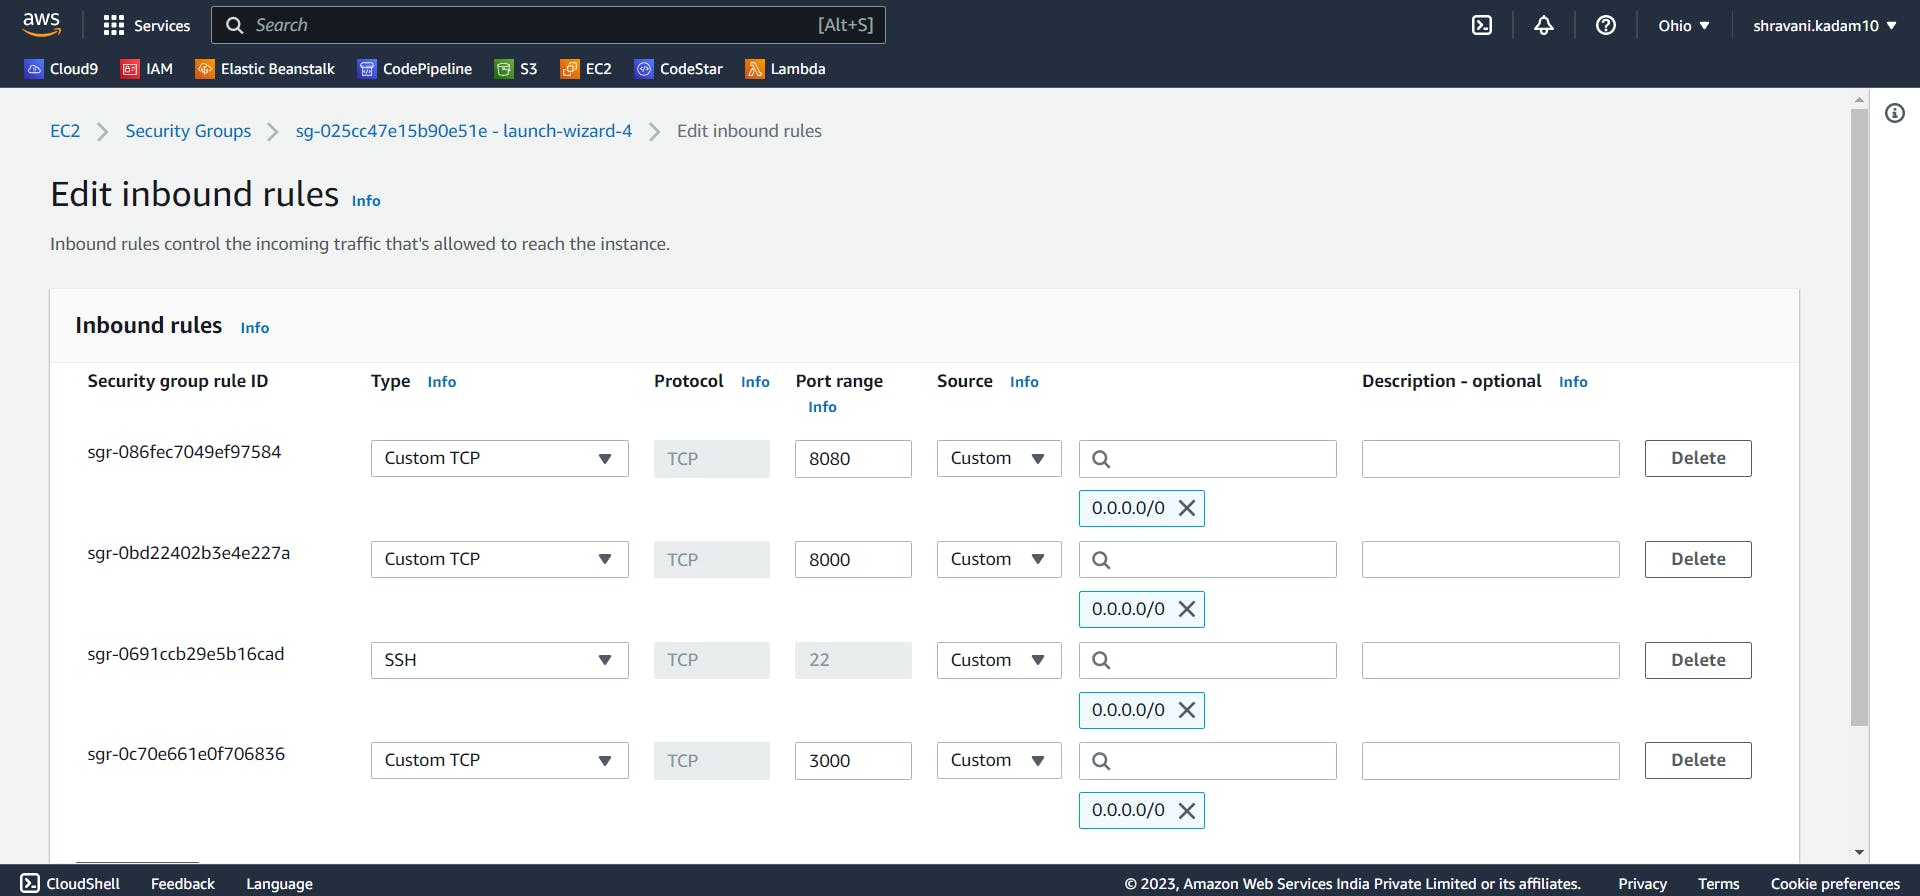
To allow the inbound traffic,
Click on Instance_ID on your EC2 Dashboard
Click on Security
Click on any one of the security group
Select edit Inbound rules
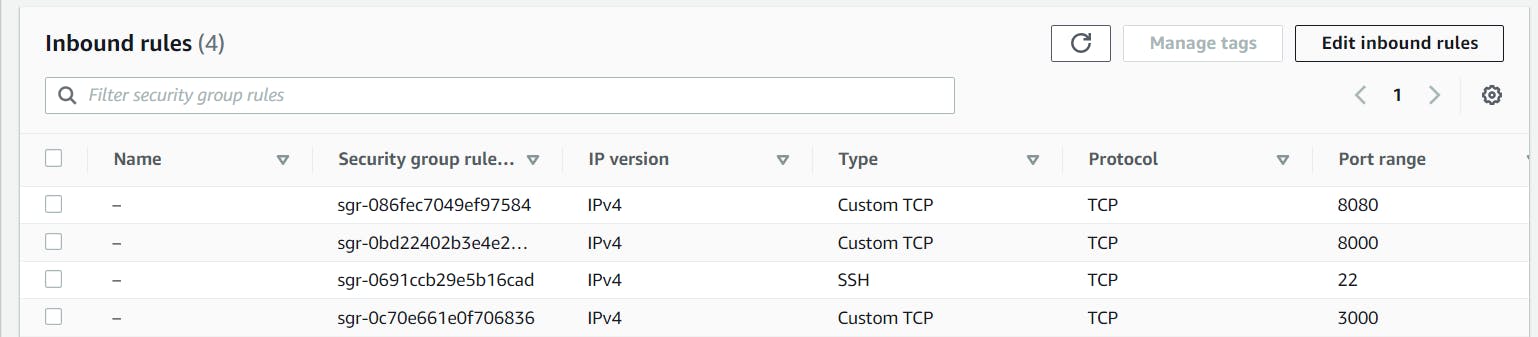
Add the ports and Click on Save
You can access your application using the public DNS url at port 3000.
<Public IPv4 DNS address>:30003.143.228.238:8080
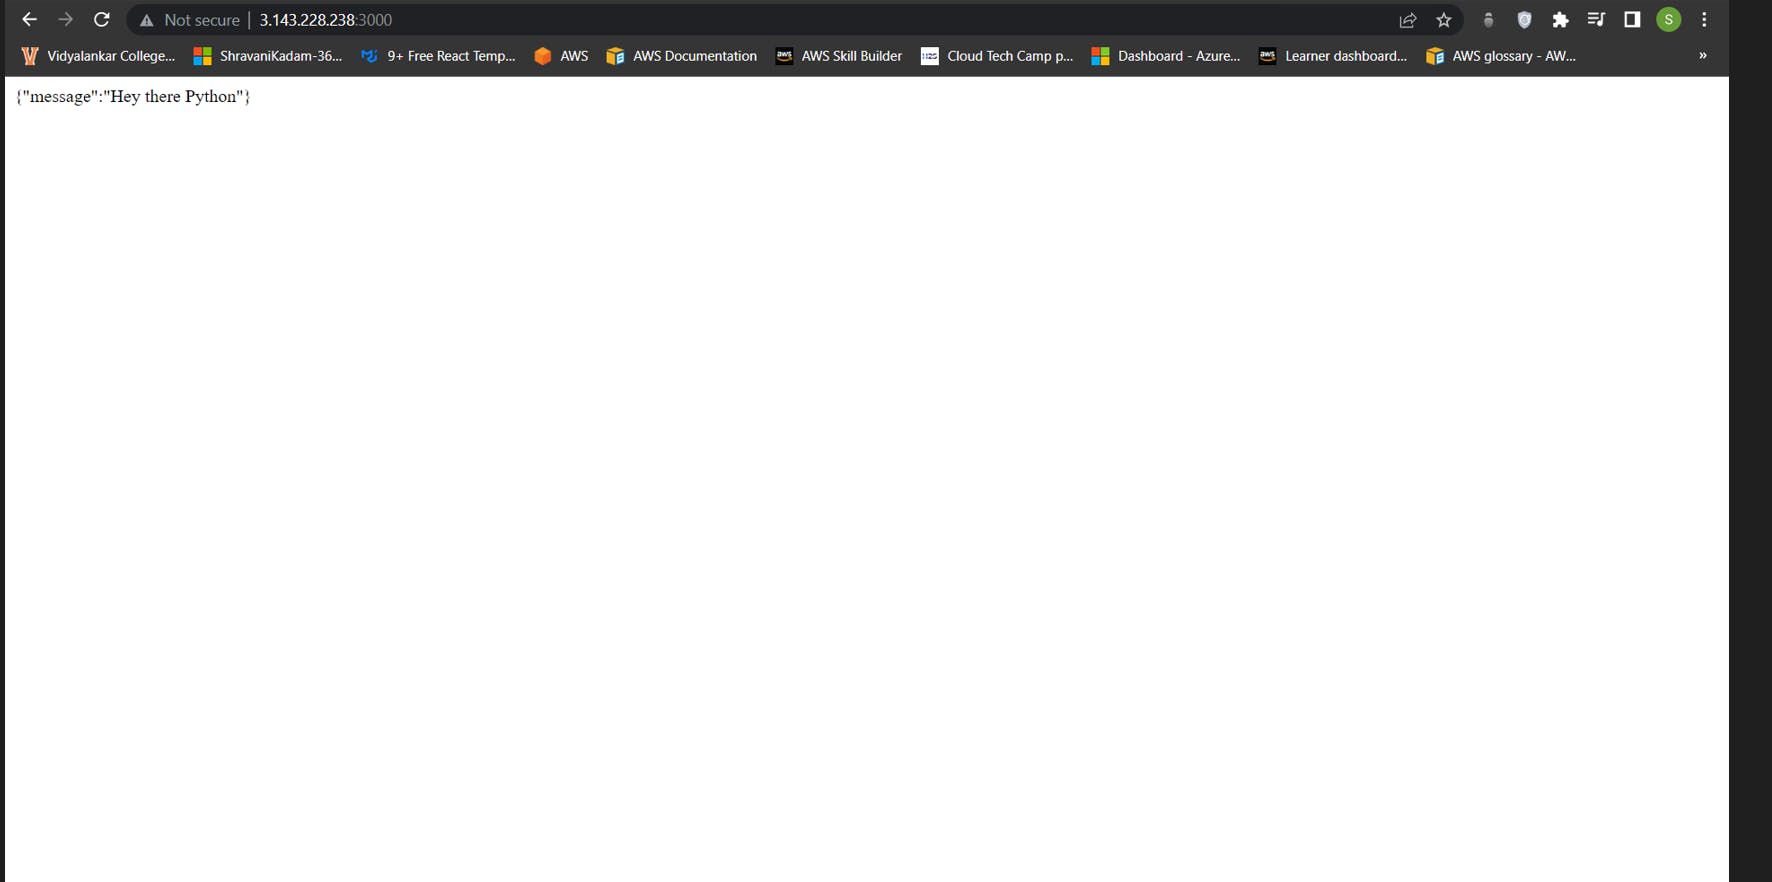
You should see a web page with your message as “Hey there Python” statement.
Setting up Jenkins CI/CD for Automation...
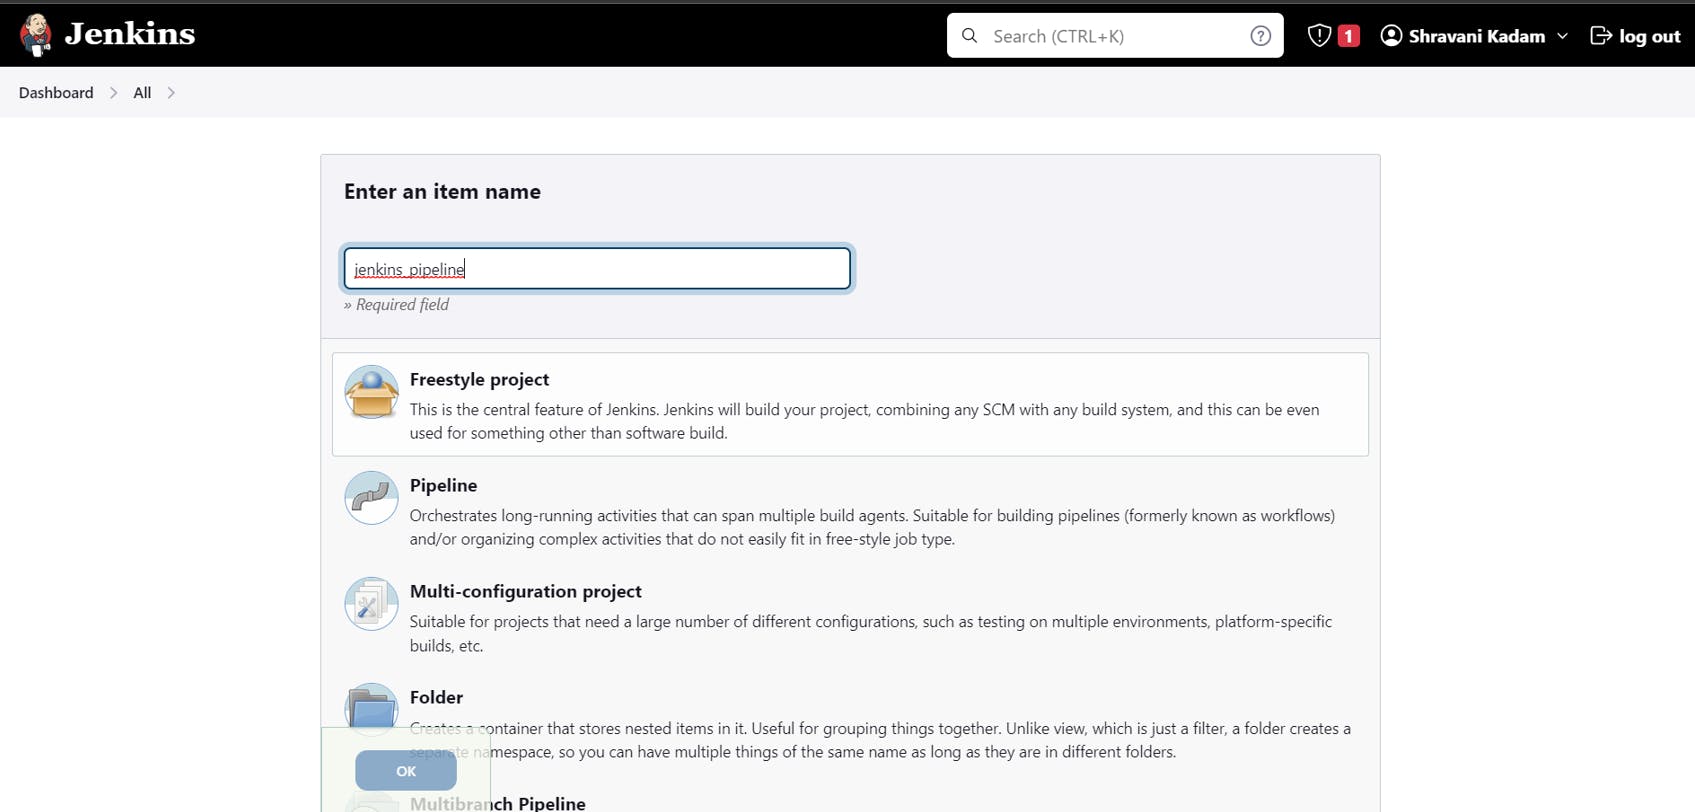
In the Jenkins Dashboard, click on New Item and Enter an item name..
Click on OK
Now let us create a Public and Private key used for integration between Github and Jenkins..
In SSH terminal, enter the following commands
ssh-keygen

ls
For accessing the Public key, enter the following command
sudo cat shravani.pub
Save the Public key somewhere else, we will need it in future

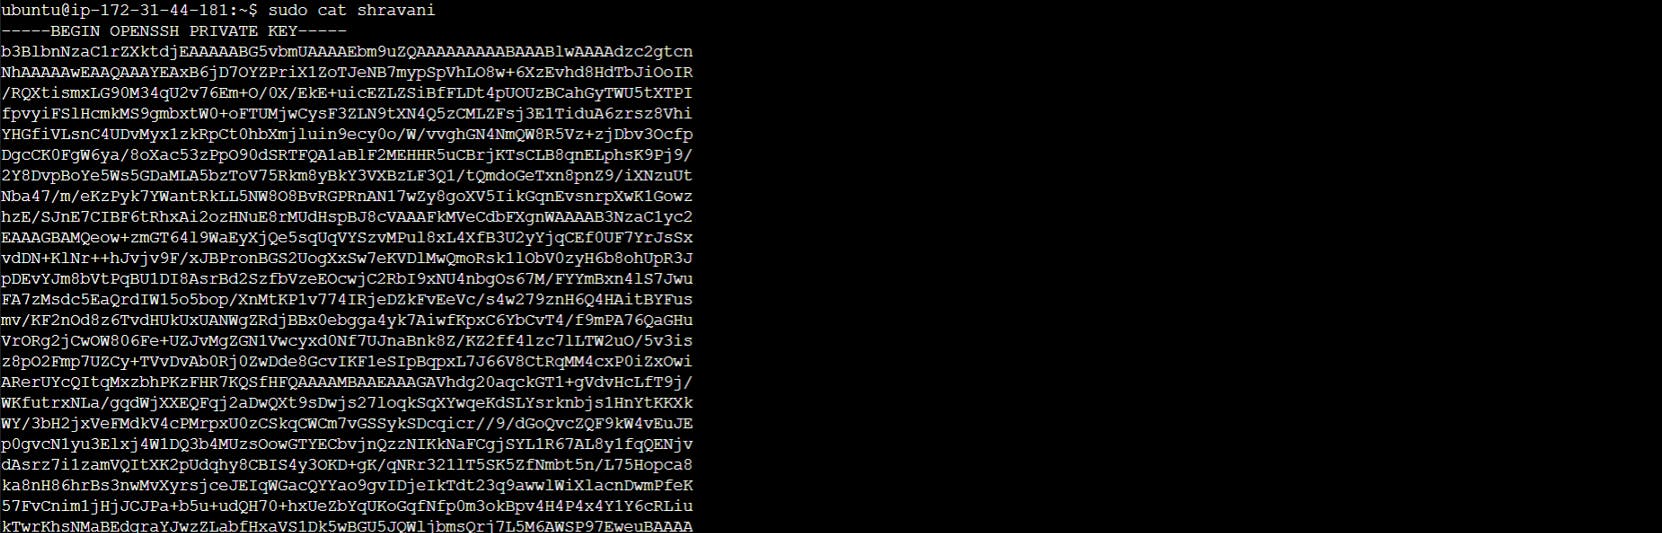
For accessing the Public key, enter the following command
sudo cat shravani
Connect your Jenkins with Github:
Go to your Github account
Click on Settings
Click on SSH and GPG keys
Give a title and paste the Public key we generated earlier

Configure your Jenkins Build now
Go to your Jenkins project
Click on Configure
Add a description to your Project

Check the Github project check box and add the project URL
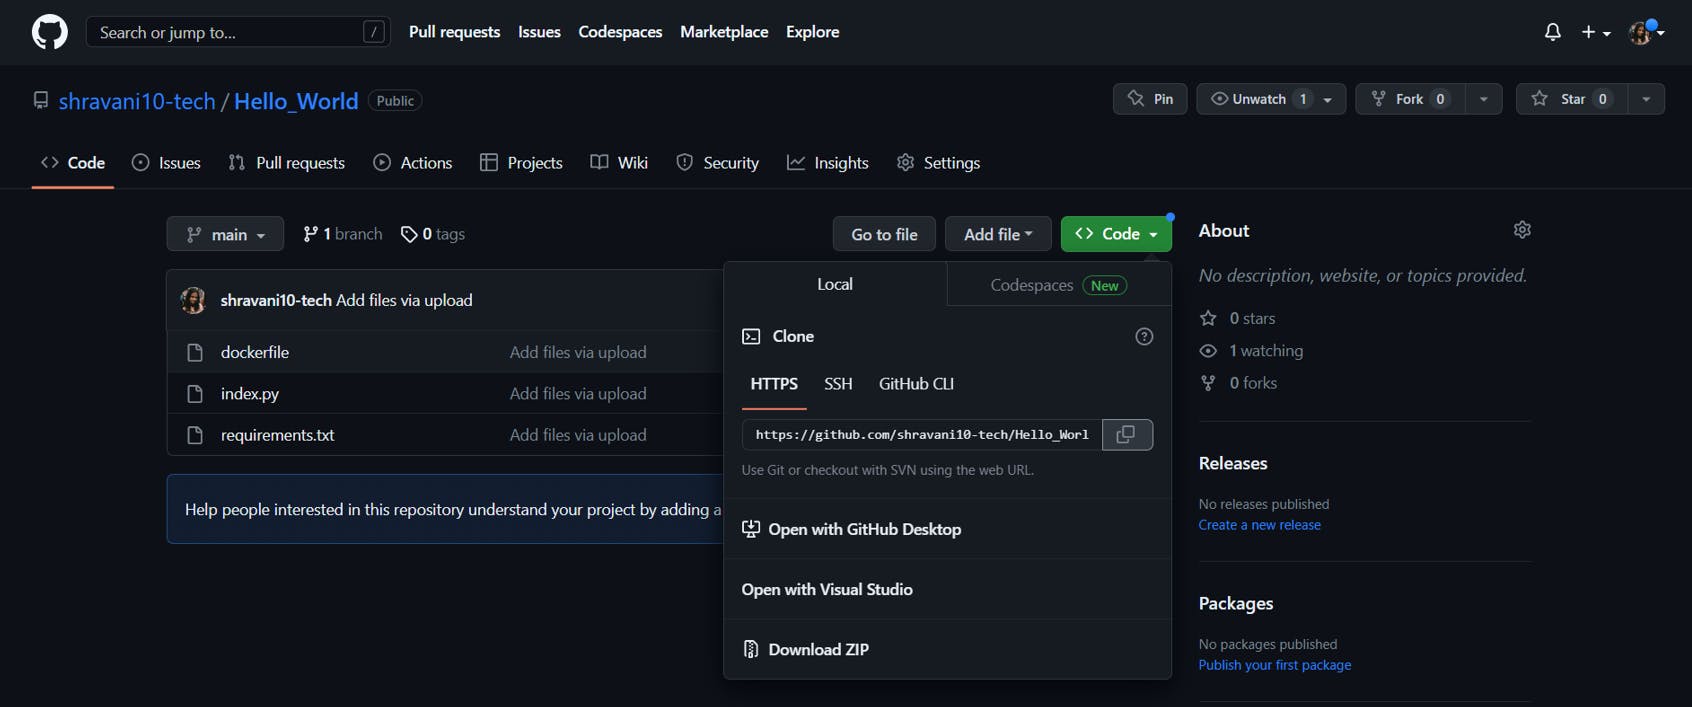
Choose the Git radio button and enter the Repository URL
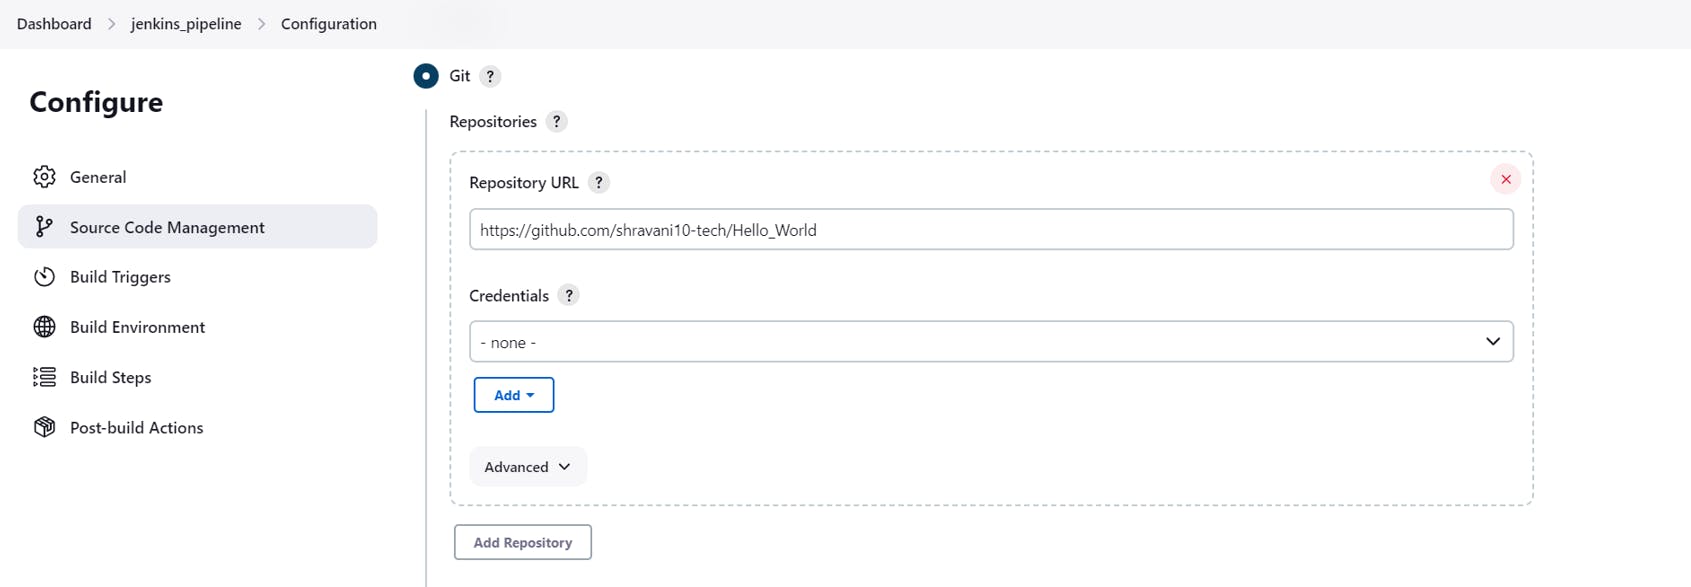
Next click on Add Credentials
Select kind as SSH username with private key
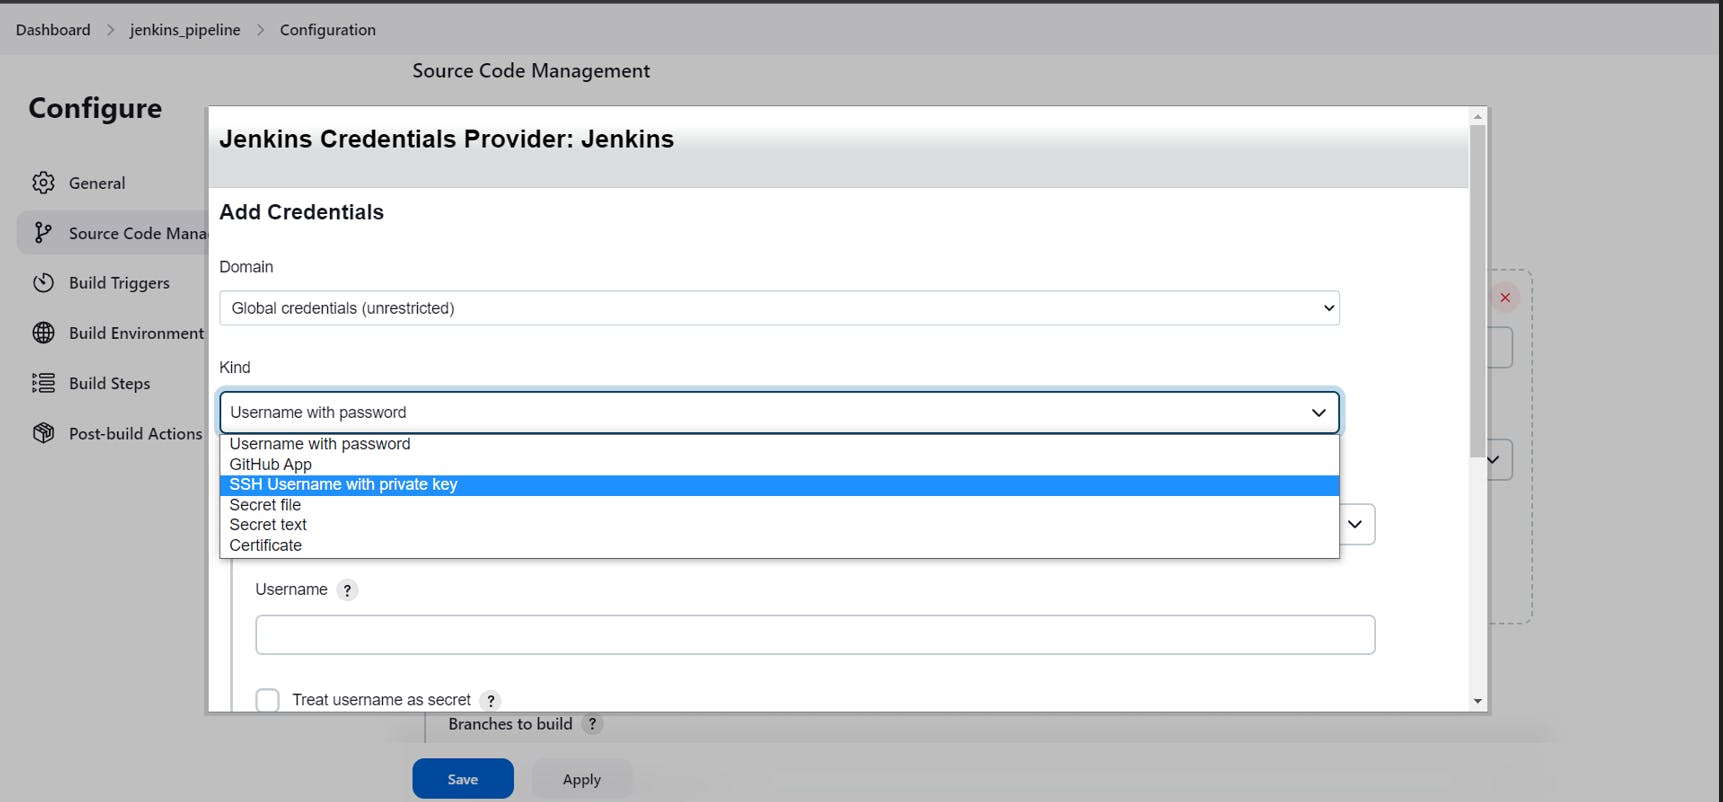
Add the private key we generated earlier
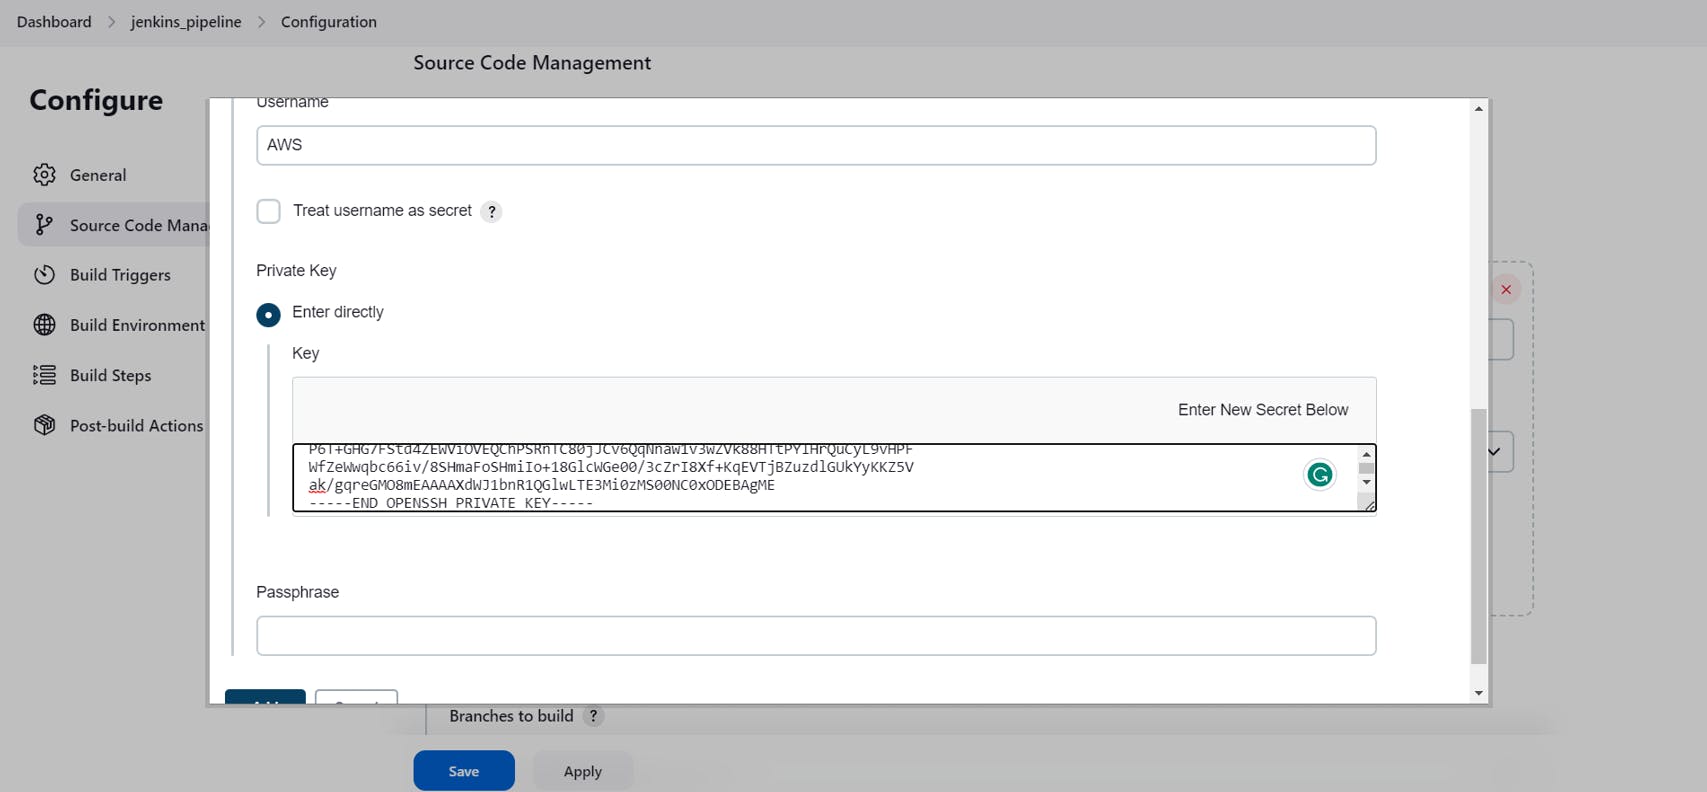
Click on Add
Now, select the credentials as the Username mentioned.
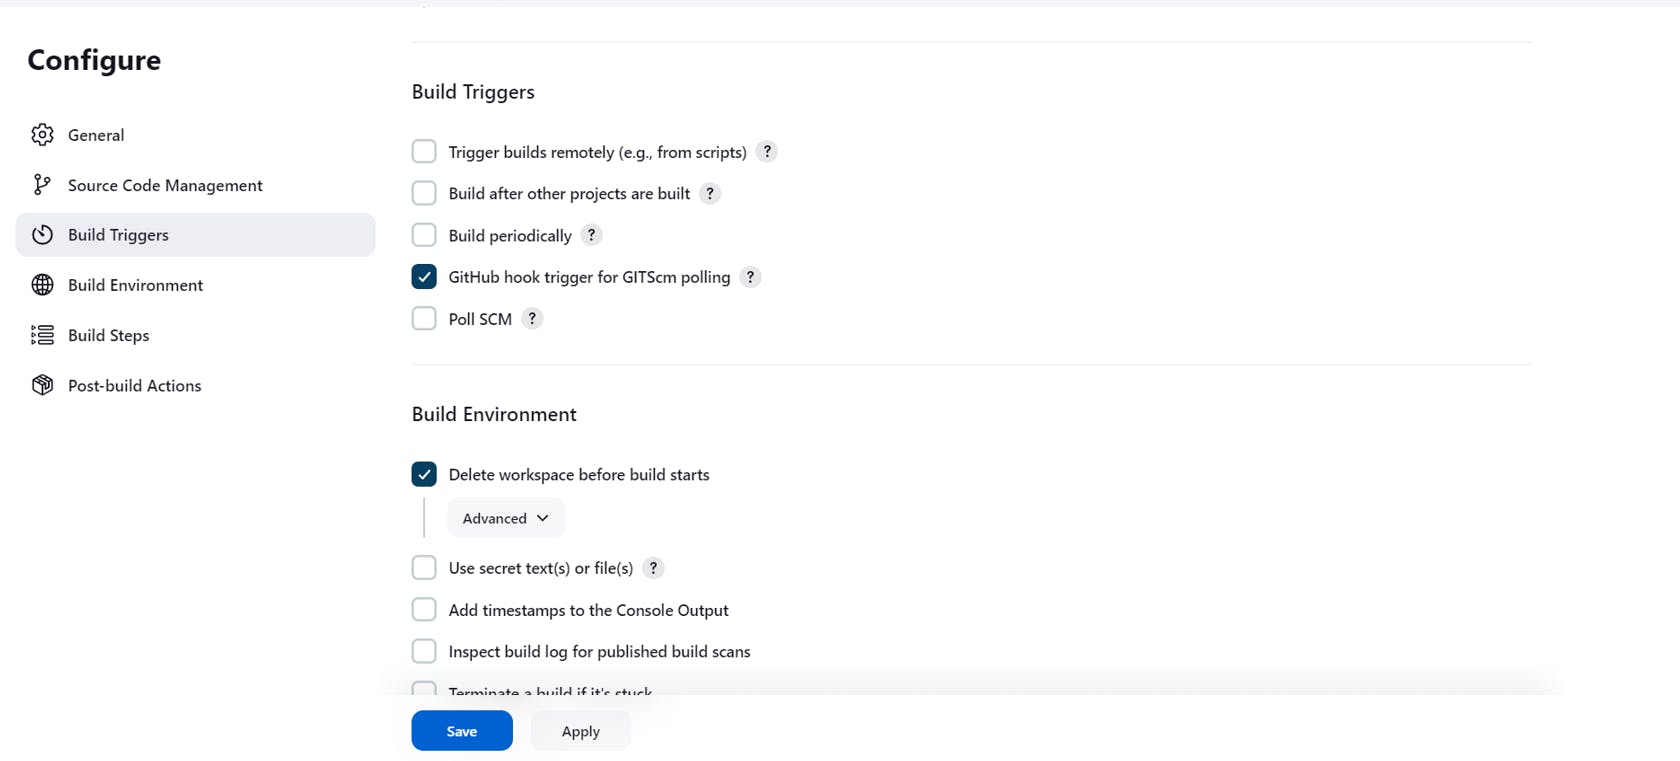
In the Build Trigger, select GitHub hook trigger, and in the Build Environment select Delete workspace before build starts
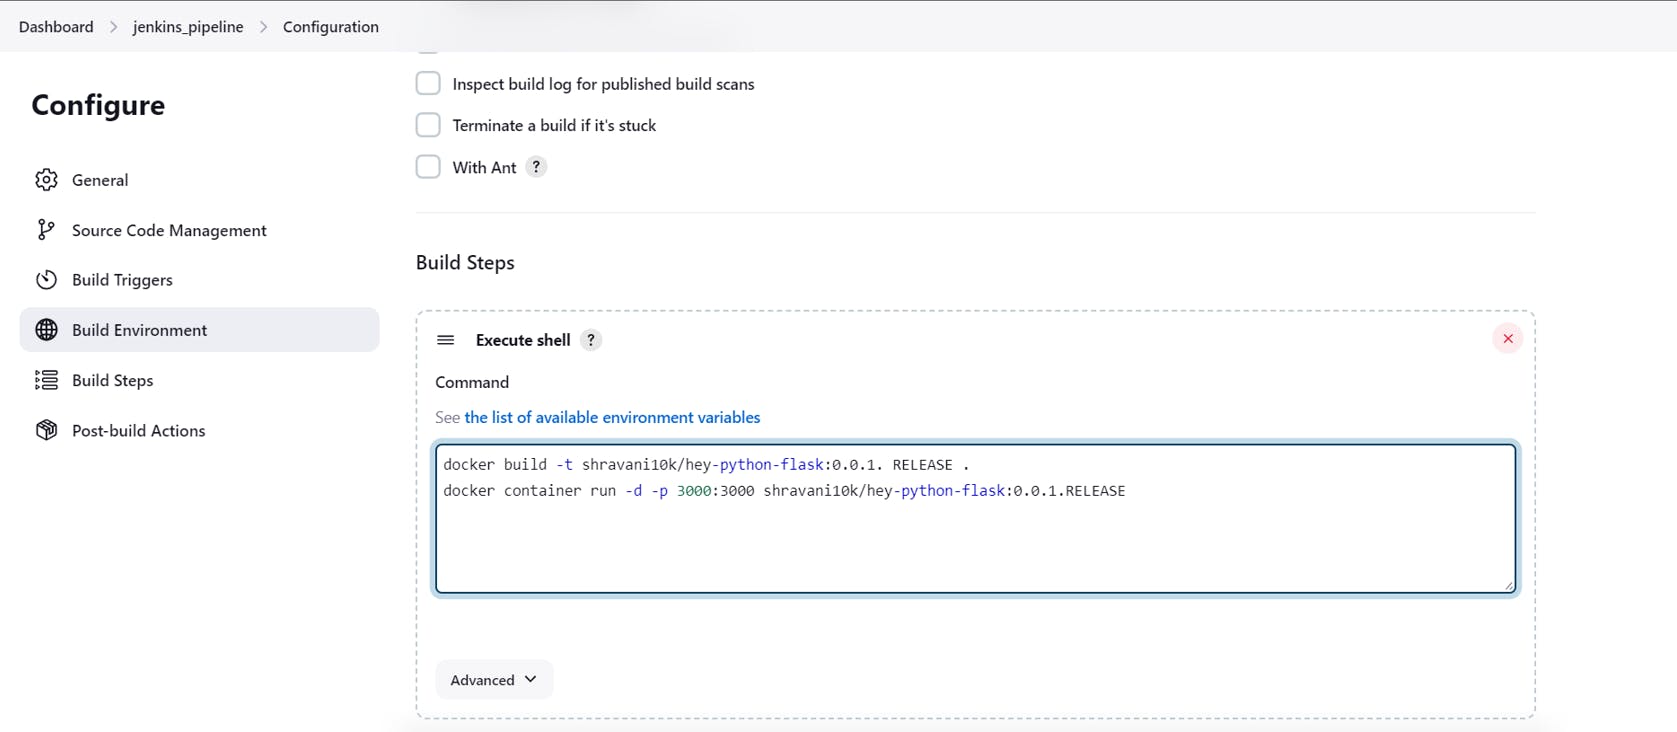
In the execute the shell write the below script which will be executed whenever a build is triggered.
docker build -t shravani10k/hey-python-flask:0.0.1.RELEASE .

docker container run -d -p 3000:3000 shravani10k/hey-python-flask:0.0.1.RELEASE
Next for Jenkins to detect every change in the Github repository. You need to add the Jenkins URL to the Github repo as the webhooks.
For that go to your GitHub repository, Click settings, and select Web Hooks sections. Click on Add Webhook.
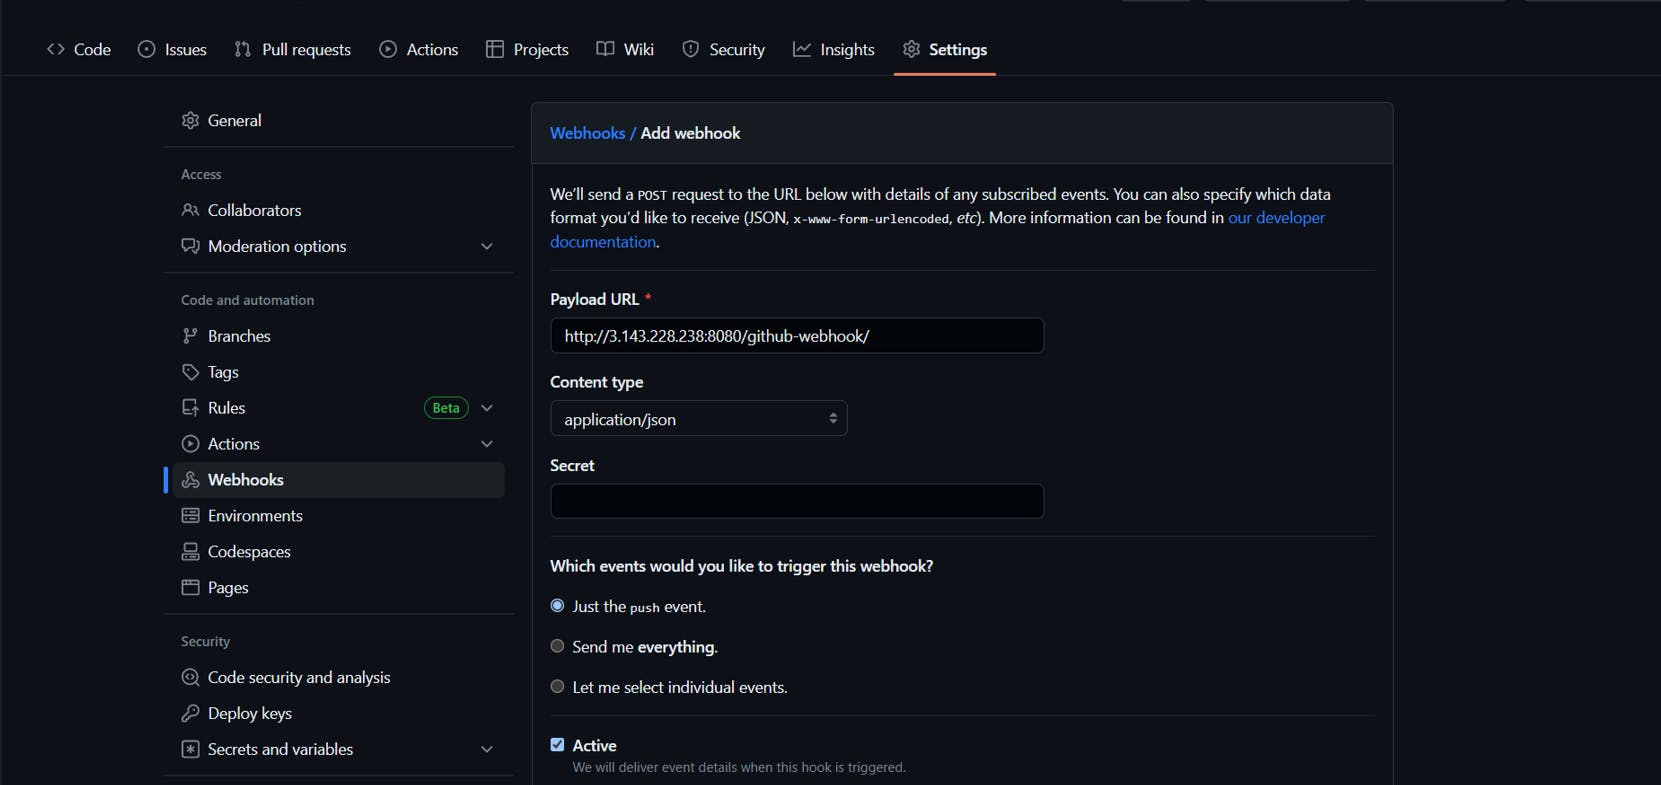
The URL mentioned above is the Public IP address and Jenkins port
The payload URL should in the following format
<public dns address>:8080/github-webhook/
Now if you change any file in your GitHub repository. It will automatically trigger a build in Jenkins Dashboard. Now navigate to port 3000 to check the deployment.
Back to your Jenkins Dashboard, Click on Save and Build now....
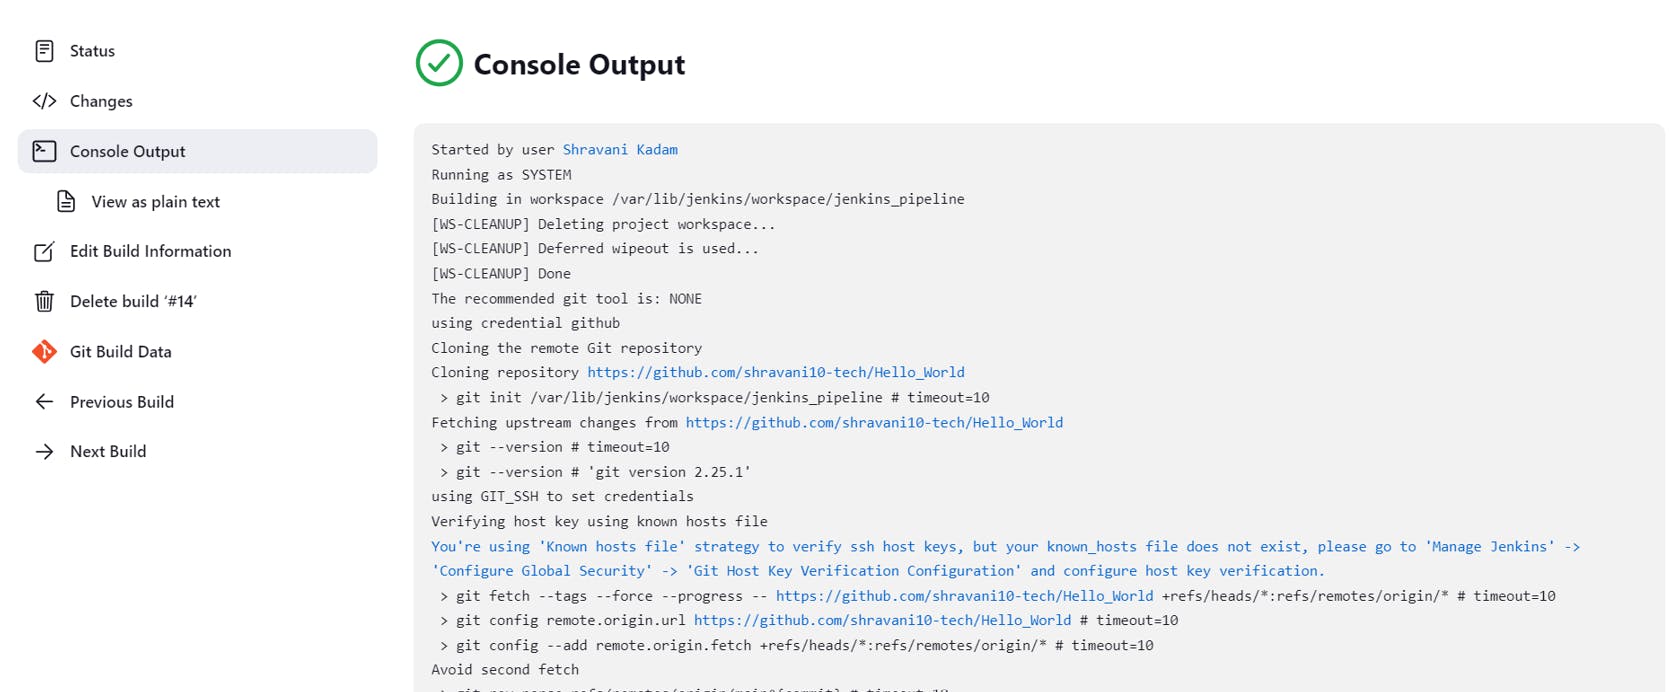
Click on console output and check your Build
You can access your application using the public DNS url at port 3000.
<Public IPv4 DNS address>:3000
We have successfully deployed our application on AWS EC2 using Jenkins 🎉🤖🎊 🎉
Thank you for reading, if you have anything to add please send a response or add a note!