

Table of contents
- What is EKS?
- Prerequisites
- Setting up EC2 Instance
- Jenkins Installation
- Creating Amazon EKS cluster
- Installing AWS CLI
- Installing eksctl
- Installing kubectl
- Creating IAM Role with Administrator Access
- Docker Installation
- Installing Docker, docker pipeline and Kubernetes CLI plugins in Jenkins
- Creating a Maven Variable under global tool configuration in Jenkins
- Creating a Pipeline
- Verify your Pipeline Script
- Verifying deployments to K8s
In the previous blog, we learned what Microservices are and deployed a microservice application using docker. In this blog let us understand EKS and ECR and deploy microservices into EKS using Jenkins
What is EKS?
Amazon Elastic Kubernetes Service (Amazon EKS) is a managed Kubernetes service that makes it easy to run Kubernetes on AWS and on-premises. Kubernetes is an open-source system for automating the deployment, scaling, and management of containerized applications.
Amazon EKS automatically manages the availability and scalability of the Kubernetes control plane nodes.
Amazon EKS lets you run your Kubernetes applications on both Amazon Elastic Compute Cloud (Amazon EC2) and AWS Fargate.
In this blog, we will be using Amazon Elastic Compute Cloud ( Amazon EC2 )
Prerequisites
We will need an AWS account to complete this project. Create a free tier AWS Account. Click here.
GitHub repository link: Click here.
Setting up EC2 Instance
Search for EC2 in the search bar
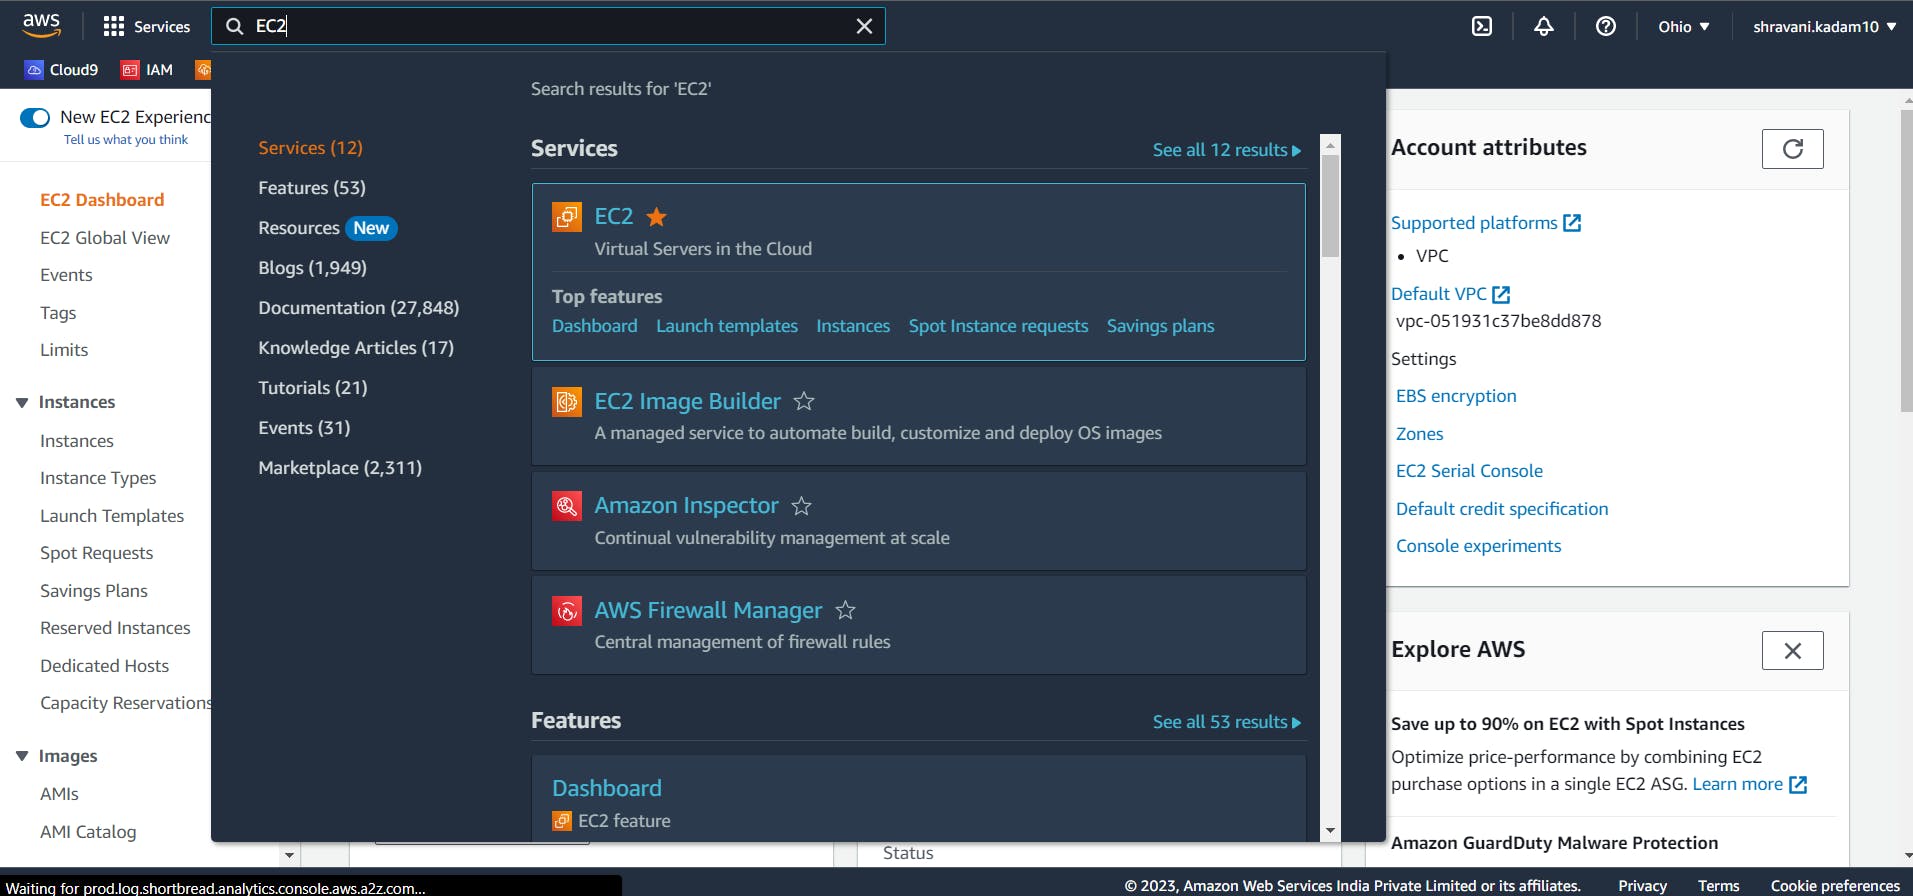
Click on Launch Instance

Give a name to your Instance
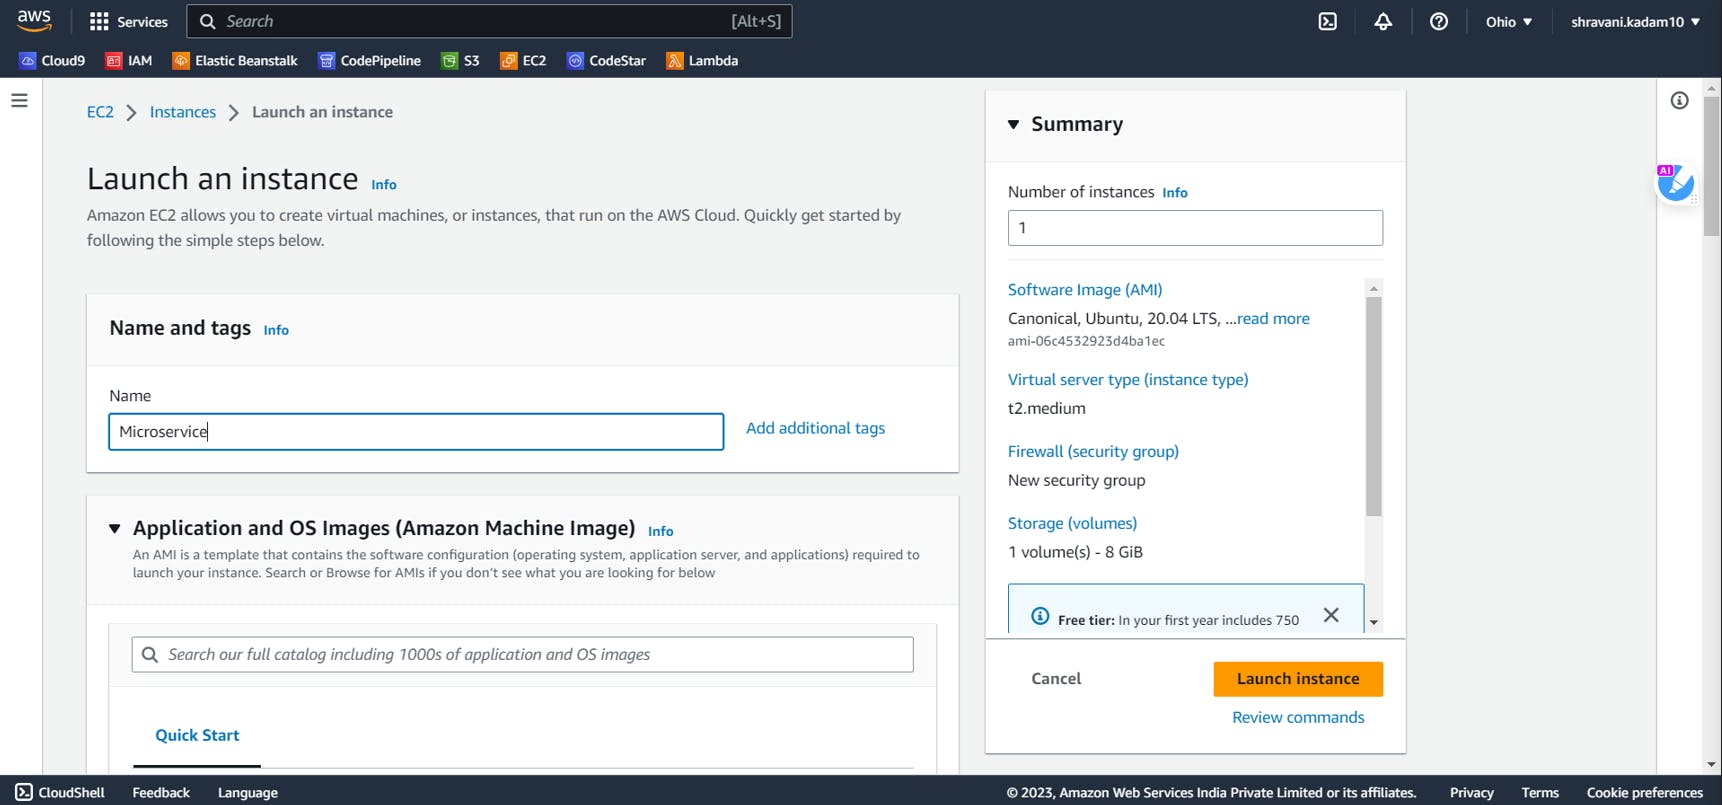
Click on Ubuntu and select Ubuntu 20.04 LTS (Free tier eligible)
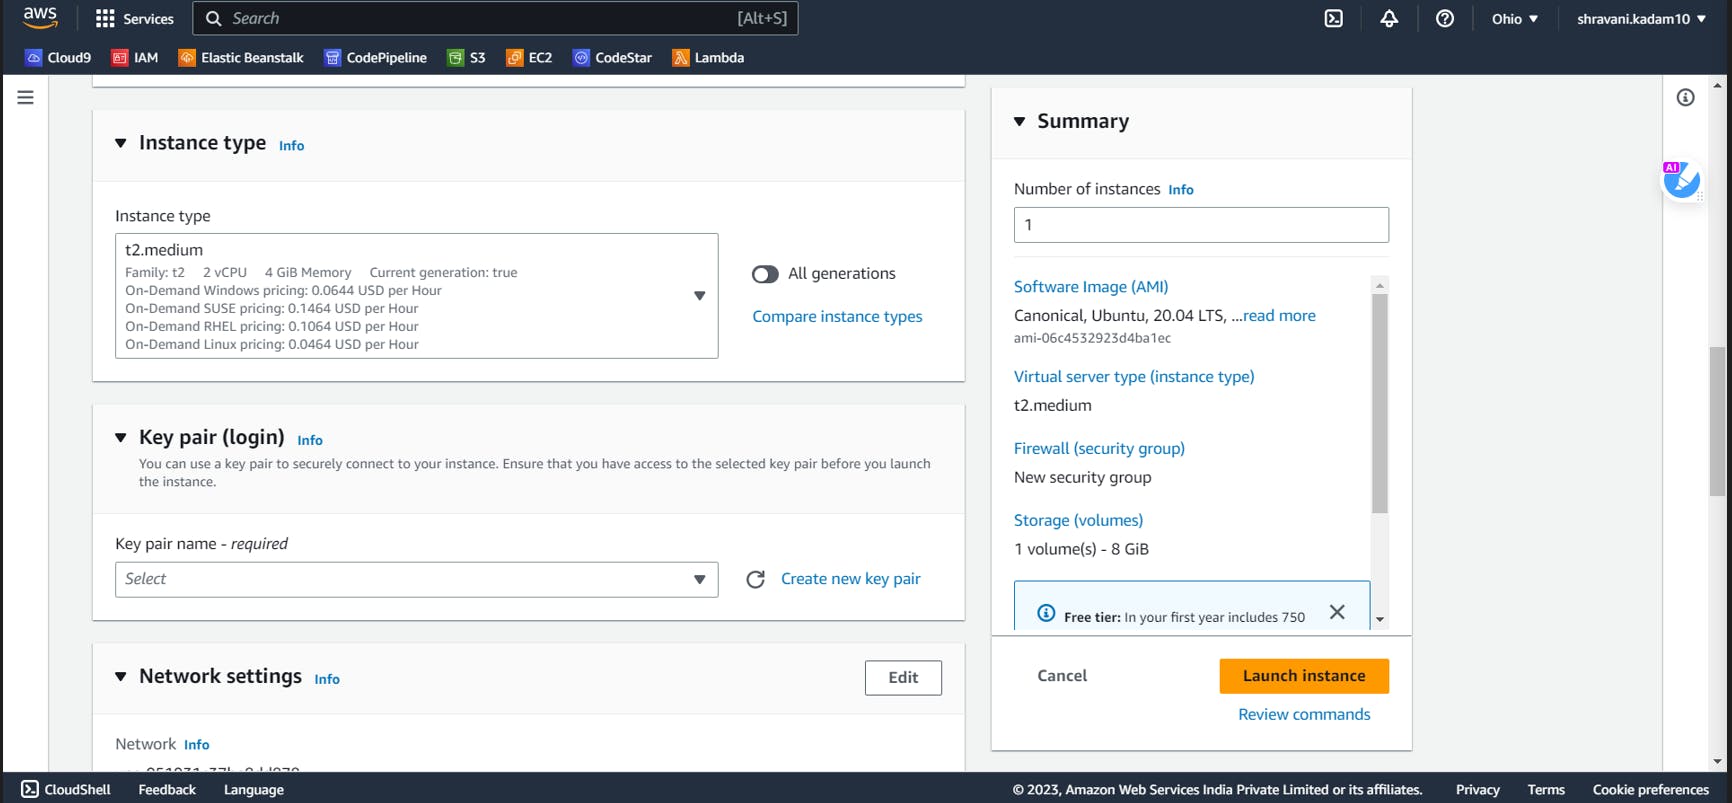
Select instance type as t2.medium
Create a new key pair (login)
In the key-pair login, select (create new key-pair). Give a name to your key pair and click on Create. ( Make sure you download the key pair as it will be used further while connecting to the ssh ). If you are using puTTY, select .ppk
Next, Click on launch instance and wait for your instance to be in a Running state

Next, click on Instance ID
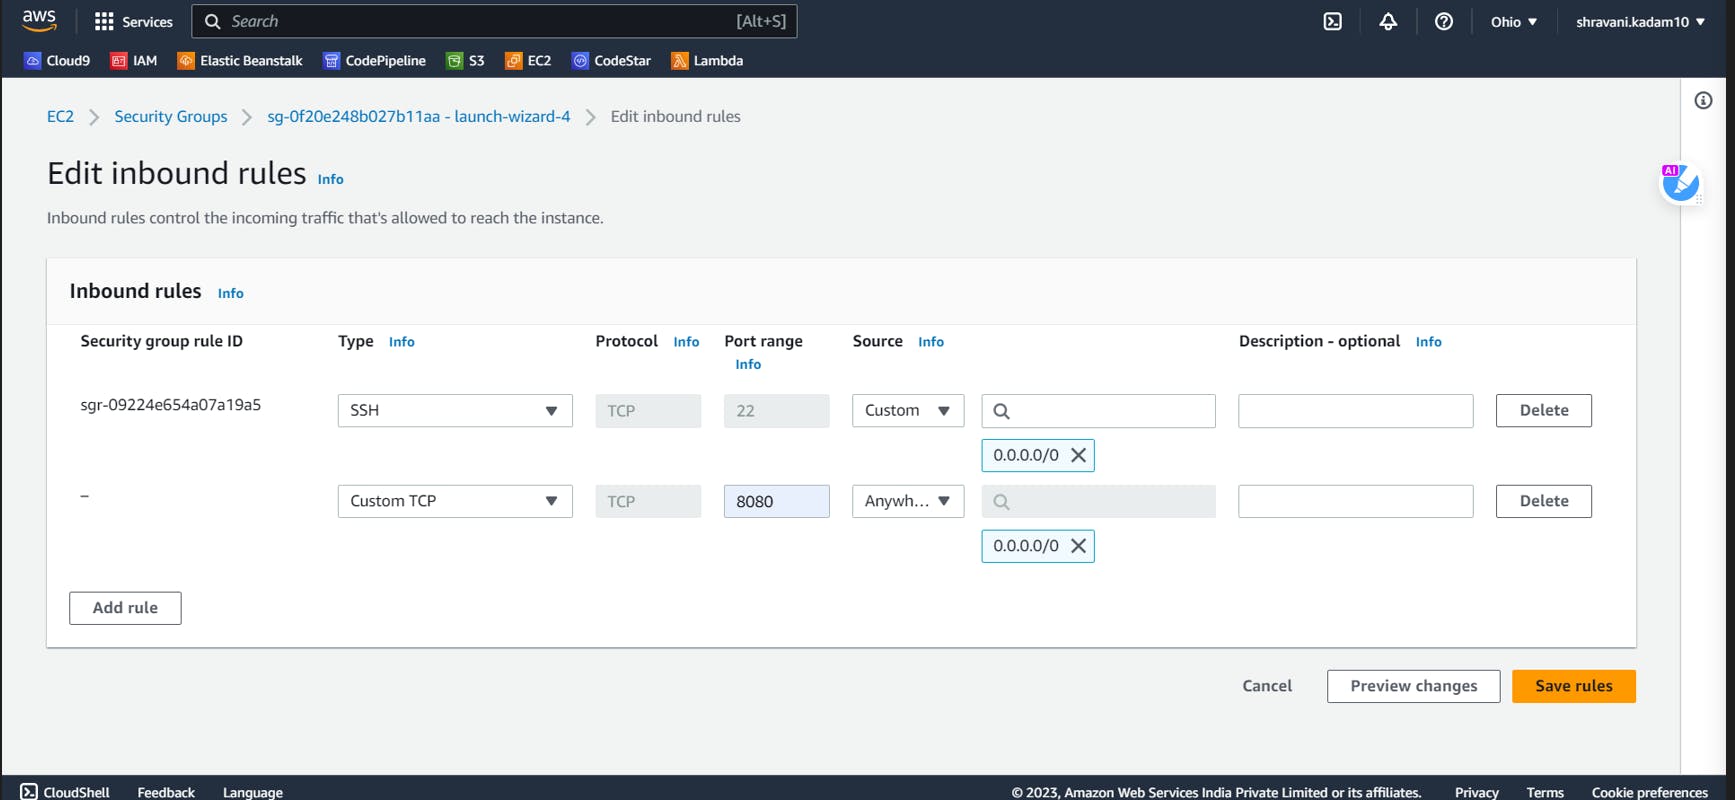
Go to the Security Groups and edit the Inbound rules
Add port 8080 to the rule and click on Save ( We will need this port to run Jenkins )
Next, go to your instance dashboard, select the instance and Click on Connect

Enter the following commands
sudo hostname Jenkins
sudo apt-get update
sudo apt install maven -y
Maven will automatically install the Java file required for Jenkins here
mvn --version

java --version

Maven is written in Java and is used to build projects written in C#, Scala, Ruby, etc. Based on the Project Object Model (POM), this tool has made the lives of Java developers easier while developing reports, checks build and testing automation setups.
Jenkins Installation

Debian/Ubuntu LTS release
curl -fsSL https://pkg.jenkins.io/debian-stable/jenkins.io-2023.key | sudo tee \
  /usr/share/keyrings/jenkins-keyring.asc > /dev/null
echo deb [signed-by=/usr/share/keyrings/jenkins-keyring.asc] \
  https://pkg.jenkins.io/debian-stable binary/ | sudo tee \
  /etc/apt/sources.list.d/jenkins.list > /dev/null
Debian/Ubuntu weekly release
curl -fsSL https://pkg.jenkins.io/debian/jenkins.io-2023.key | sudo tee \
  /usr/share/keyrings/jenkins-keyring.asc > /dev/null
echo deb [signed-by=/usr/share/keyrings/jenkins-keyring.asc] \
  https://pkg.jenkins.io/debian binary/ | sudo tee \
  /etc/apt/sources.list.d/jenkins.list > /dev/null
sudo apt-get update
sudo apt-get install jenkins -y
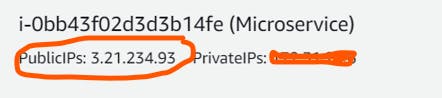
Copy the Public IP address of the instance we have created.
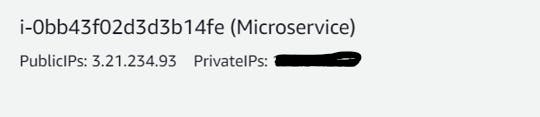
You can access Jenkins using the public DNS url at port 8080.
Make sure that the security group for your instance allows inbound traffic on port 8080
<Public IPv4 DNS address>:8080
3.21.234.93:8080

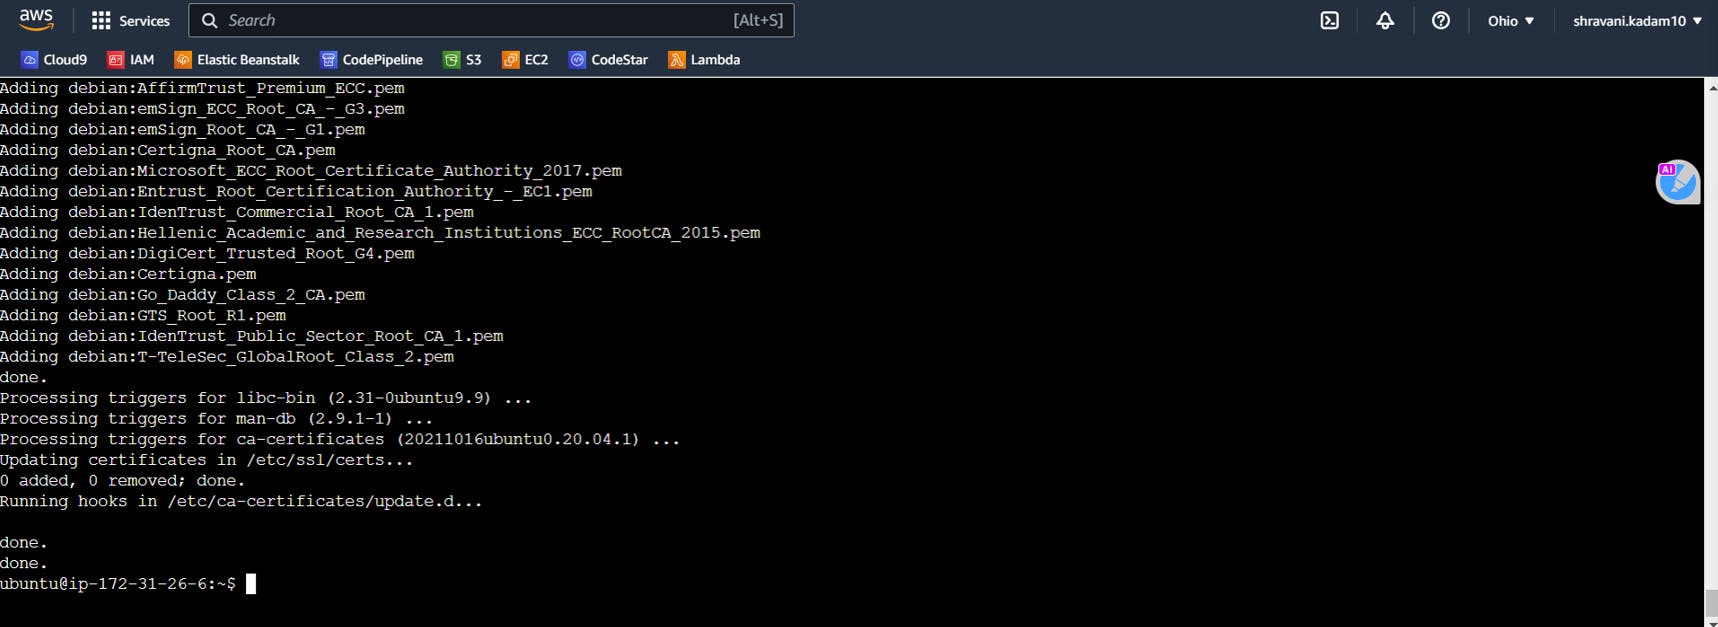
You can locate the Administrator password using the below command in your instance.
sudo cat /var/lib/jenkins/secrets/initialAdminPassword
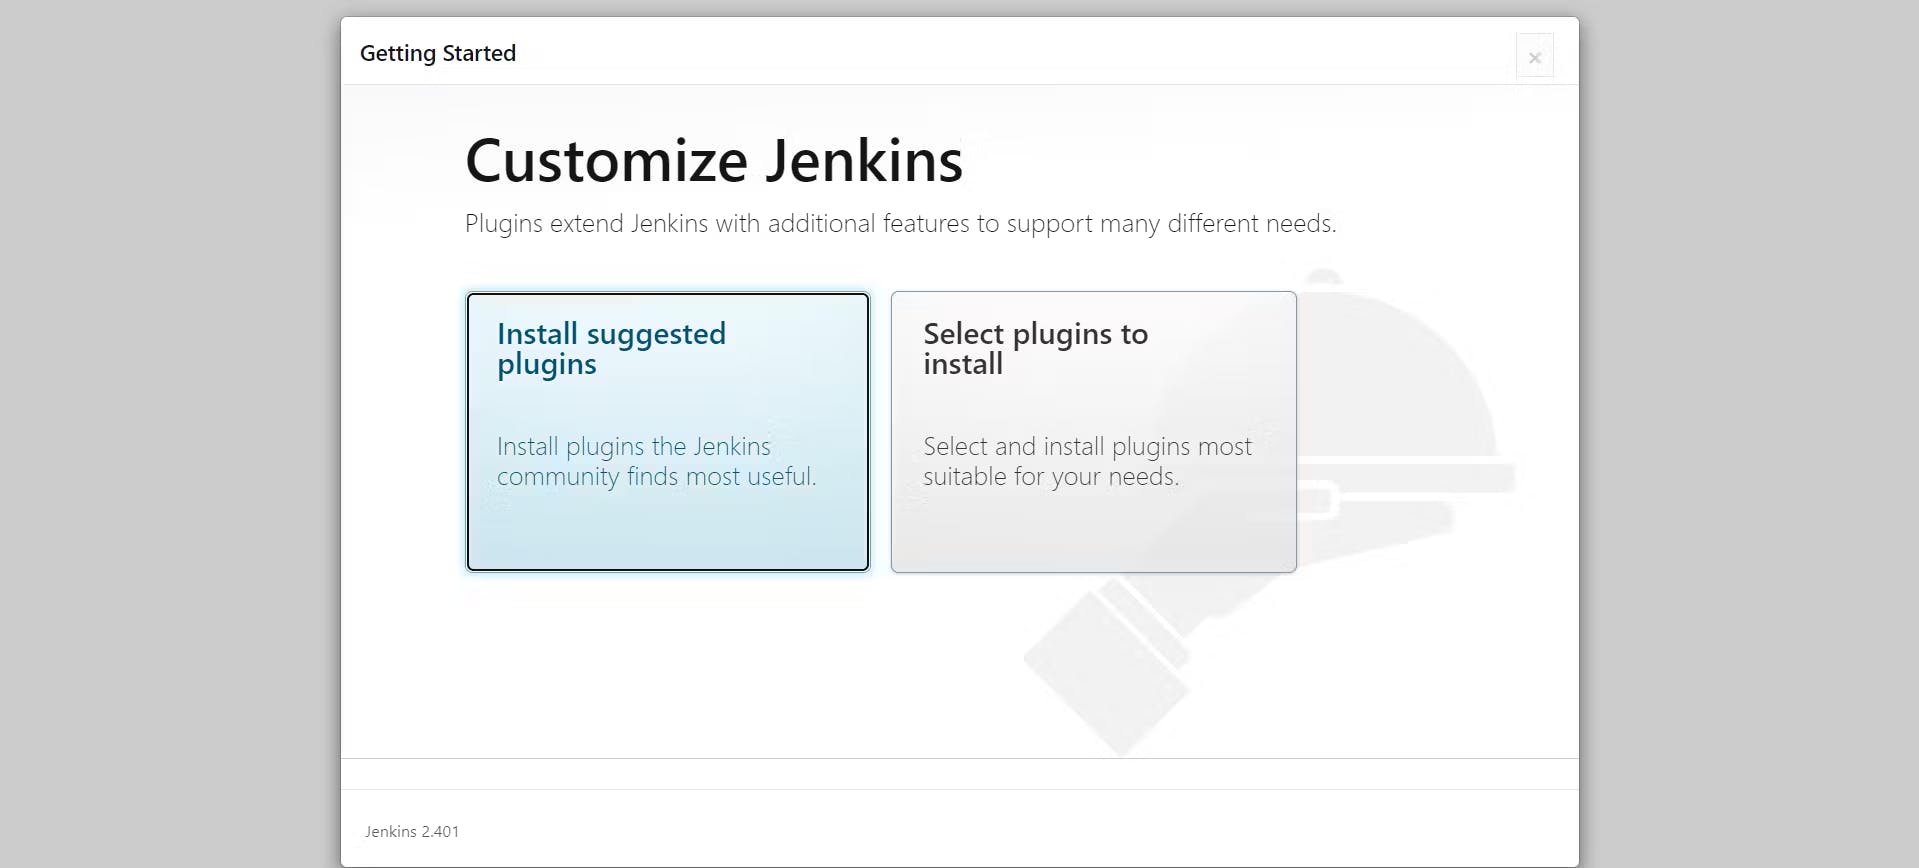
Paste the password key into the above screen and continue creating a user.
Next, click on the Install Suggested Plugins to configure the Standard Jenkins installation.
Create a first admin user. Enter details to create a User.

There you go!! You are ready to use Jenkins...
Creating Amazon EKS cluster
You must install and configure the following tools and resources that you need to create and manage an Amazon EKS cluster
Installing AWS CLI
Command line tools for working with AWS services, including Amazon EKS.
curl "https://awscli.amazonaws.com/awscli-exe-linux-x86_64.zip" -o "awscliv2.zip"
sudo apt install unzip
sudo unzip awscliv2.zip
sudo ./aws/install
aws --version

Installing eksctl
eksctl is a simple command line tool for creating and managing Kubernetes clusters on Amazon EKS. eksctl provides the fastest and easiest way to create a new cluster with nodes for Amazon EKS.
The eksctl tool uses CloudFormation under the hood, creating one stack for the EKS master control plane and another stack for the worker nodes.
curl --silent --location "https://github.com/weaveworks/eksctl/releases/latest/download/eksctl_$(uname -s)_amd64.tar.gz" | tar xz -C /tmp
sudo mv /tmp/eksctl /usr/local/bin
eksctl version

Installing kubectl
Kubernetes uses a command line utility called kubectl for communicating with the cluster API server. It is a tool for controlling Kubernetes clusters.
sudo curl --silent --location -o /usr/local/bin/kubectl https://s3.us-west-2.amazonaws.com/amazon-eks/1.22.6/2022-03-09/bin/linux/amd64/kubectl
sudo chmod +x /usr/local/bin/kubectl
kubectl version --short --client

Creating IAM Role with Administrator Access
This will allow EC2 instances to have full access to the AWS services and resources
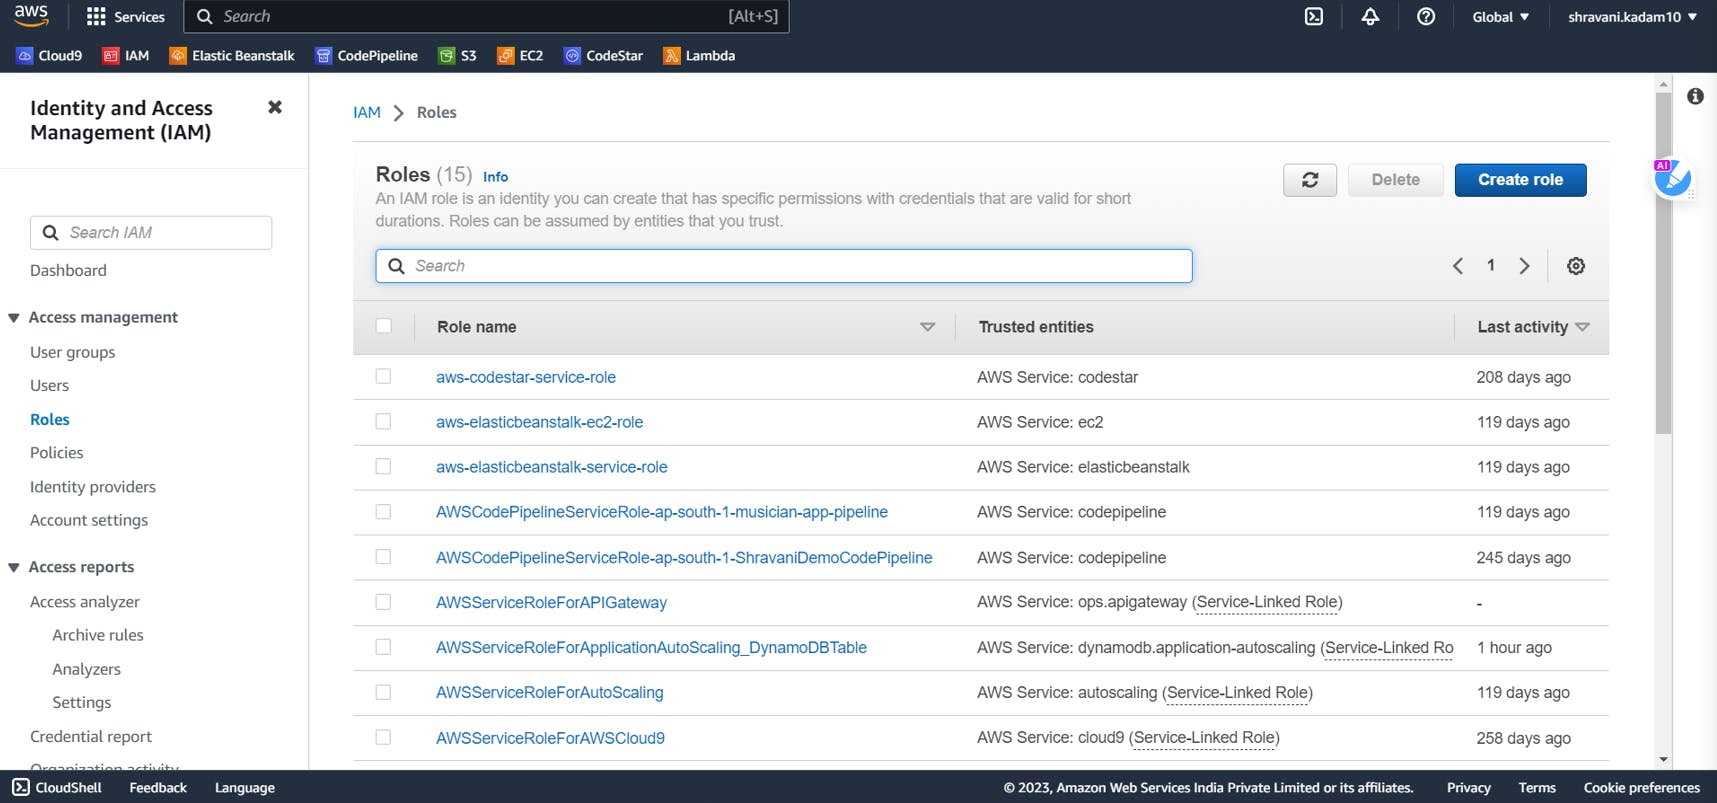
In the search bar, search for IAM

Click on roles and then click on Create role
Select AWS service and then select EC2
Click on Next
In the permissions policy, search for Administrator
Select AdministratorAccess
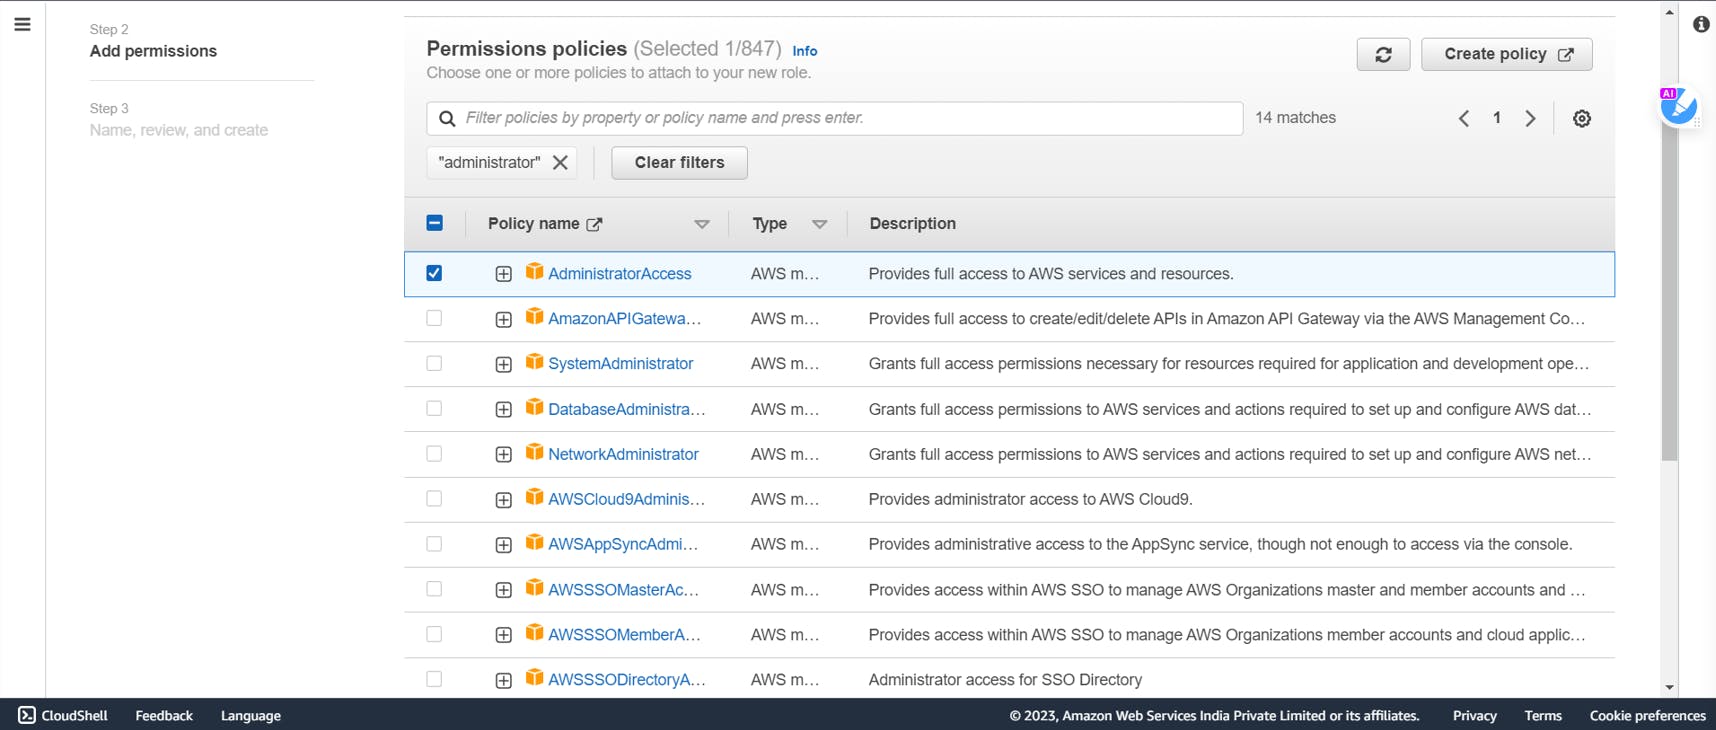
Click on next
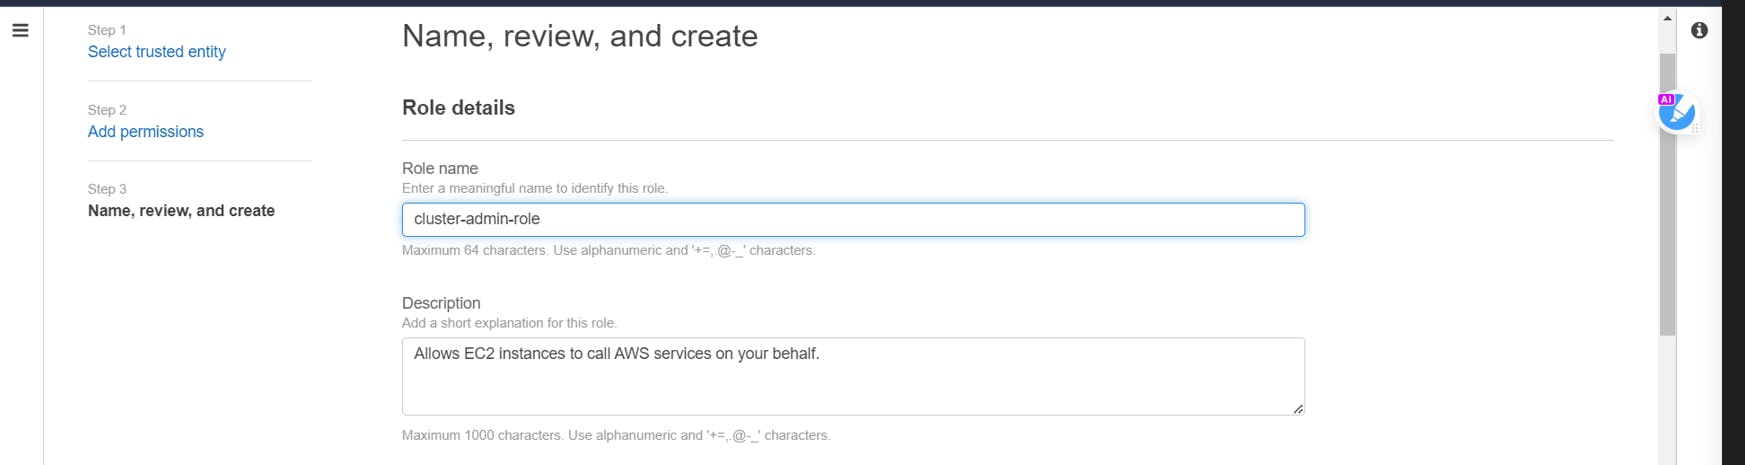
Give a name to your role and click on Create
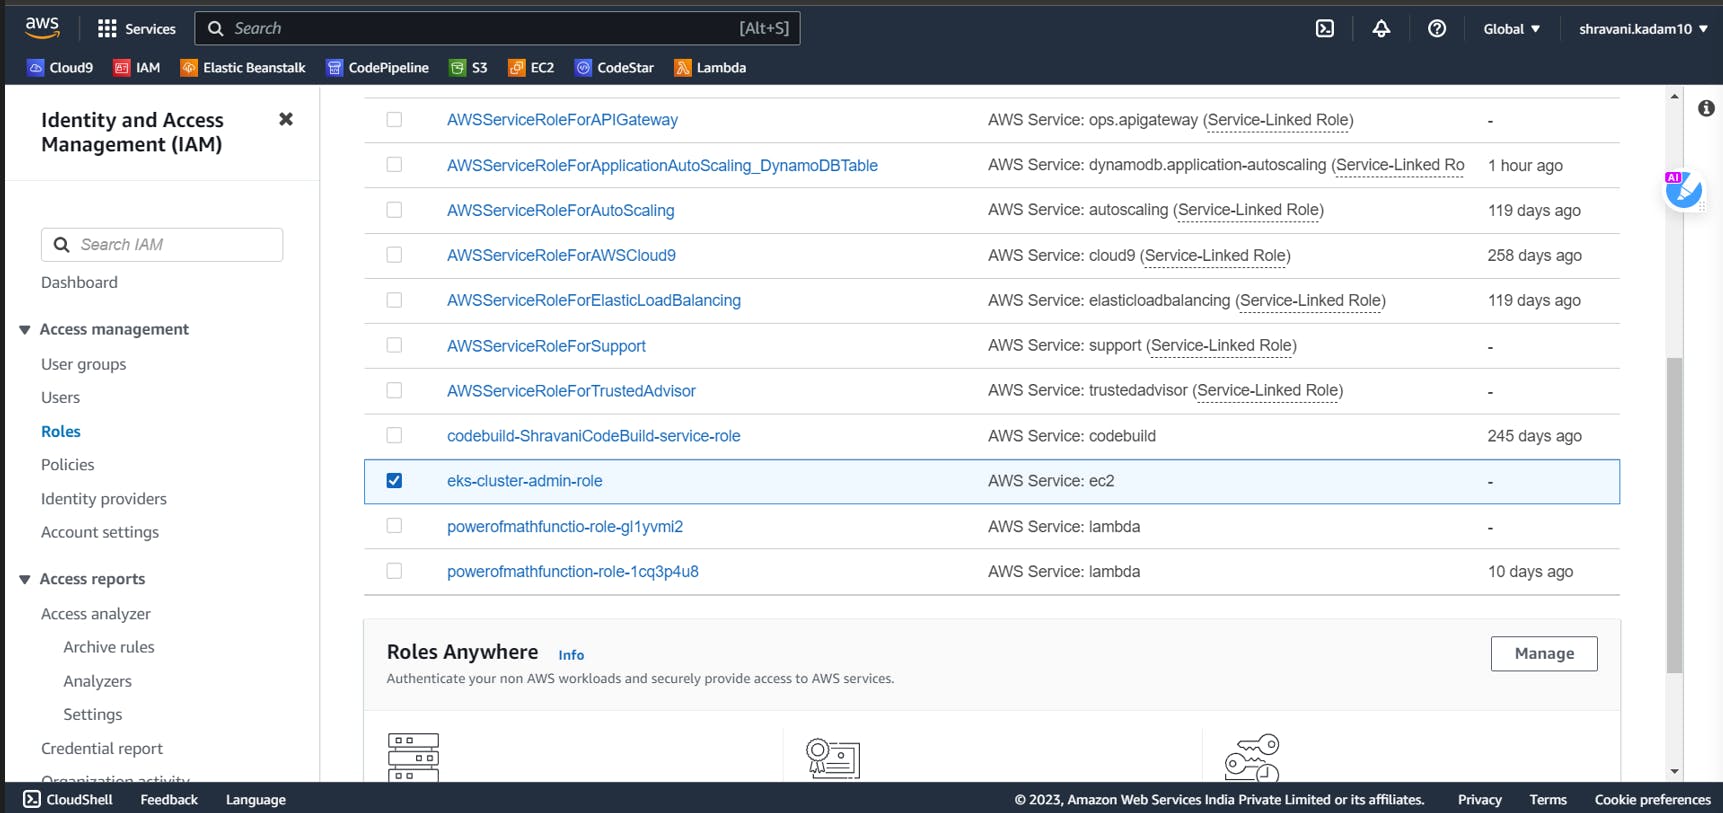
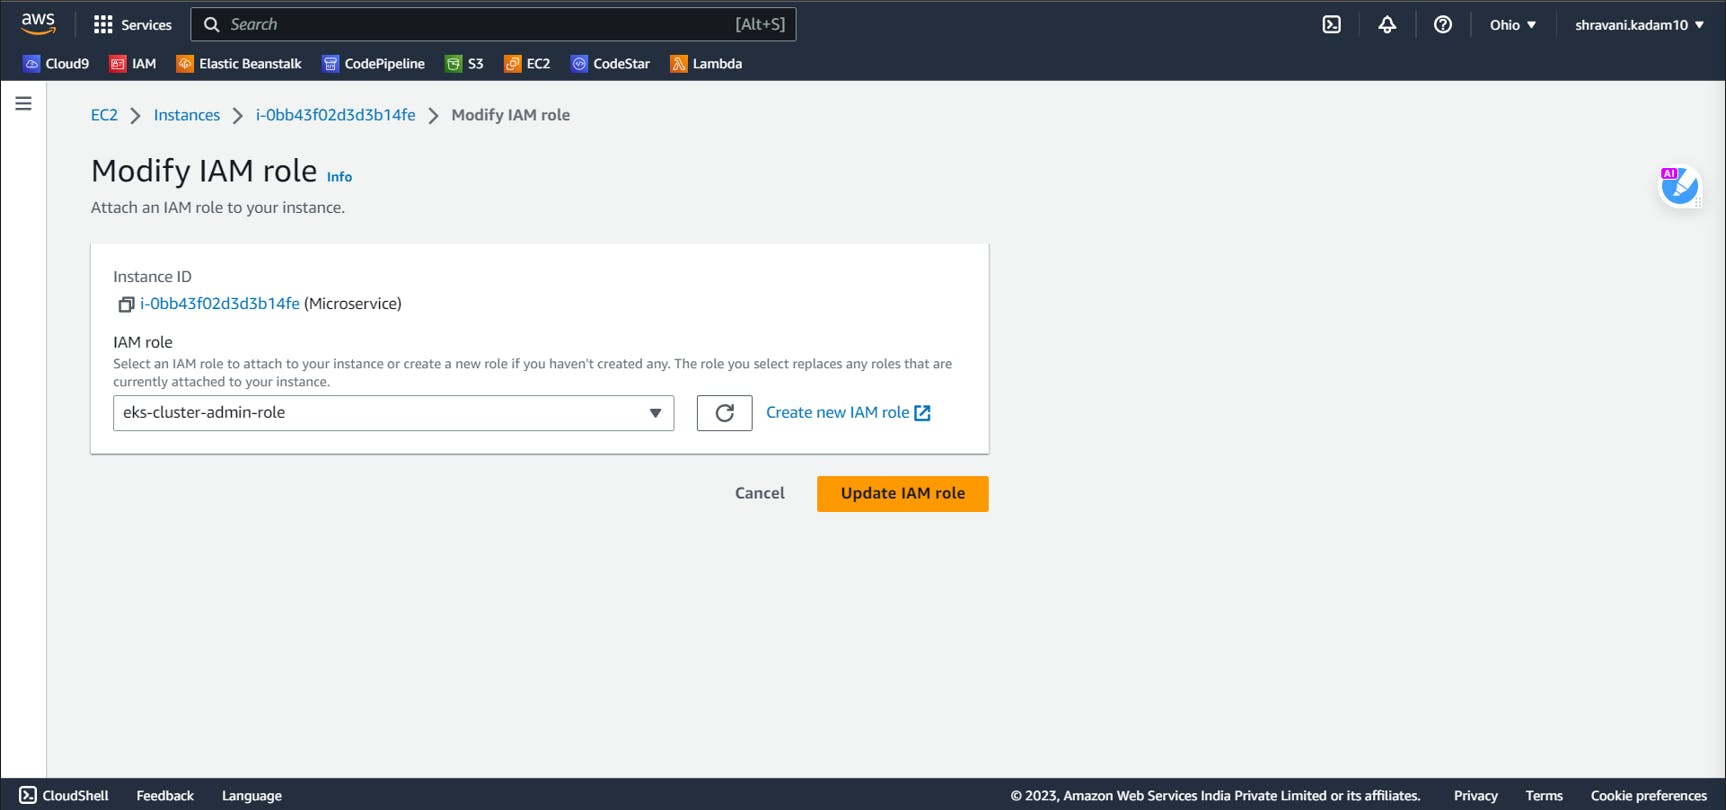
Now, go to your EC2 instance dashboard and click on Actions>>Security>>Modify IAM role

Select the role you just created and click on Update
Switch to Jenkins user
sudo su - jenkins

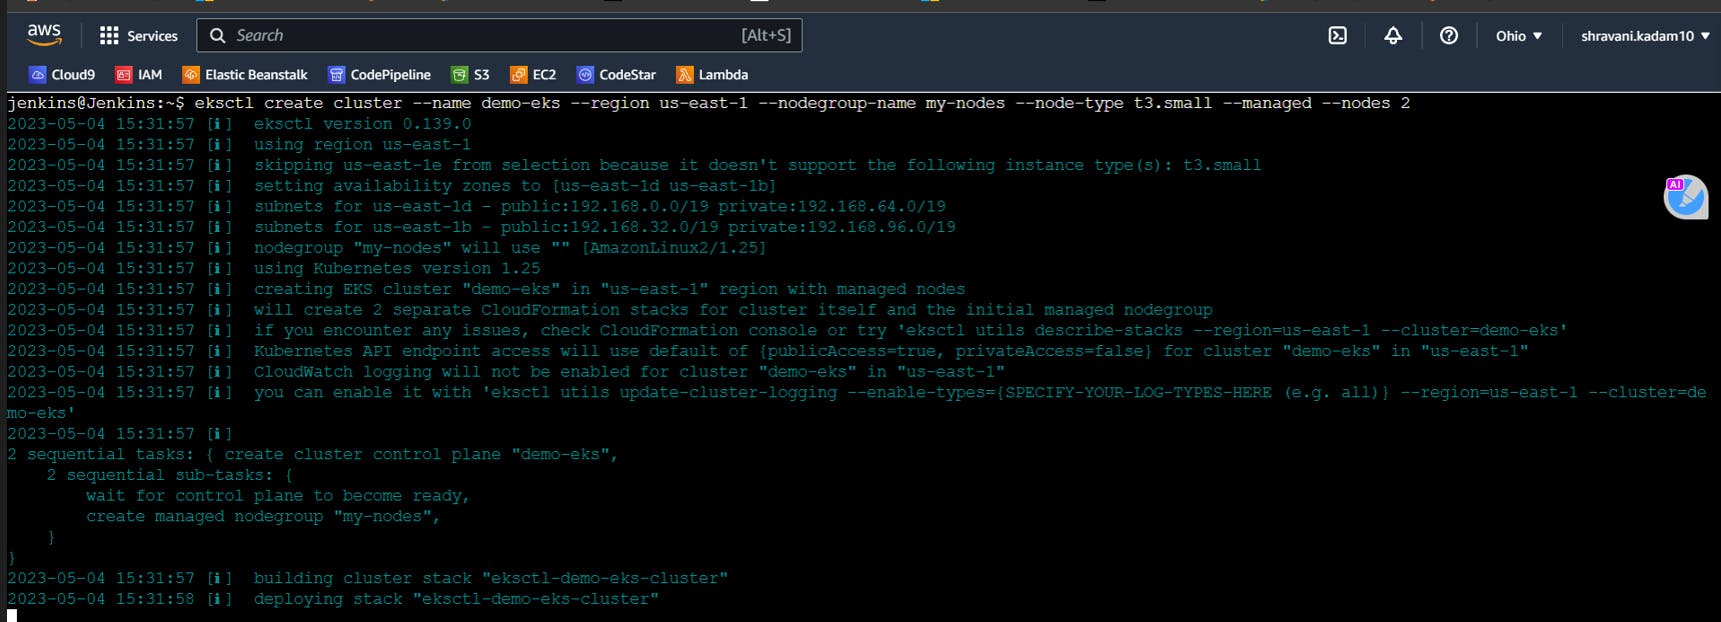
Run the following command for creating the Kubernetes Cluster with two worker nodes using eksctl
eksctl create cluster --name demo-eks --region us-east-2 --nodegroup-name my-nodes --node-type t3.small --managed --nodes 2
This might take 15-20 minutes for creation
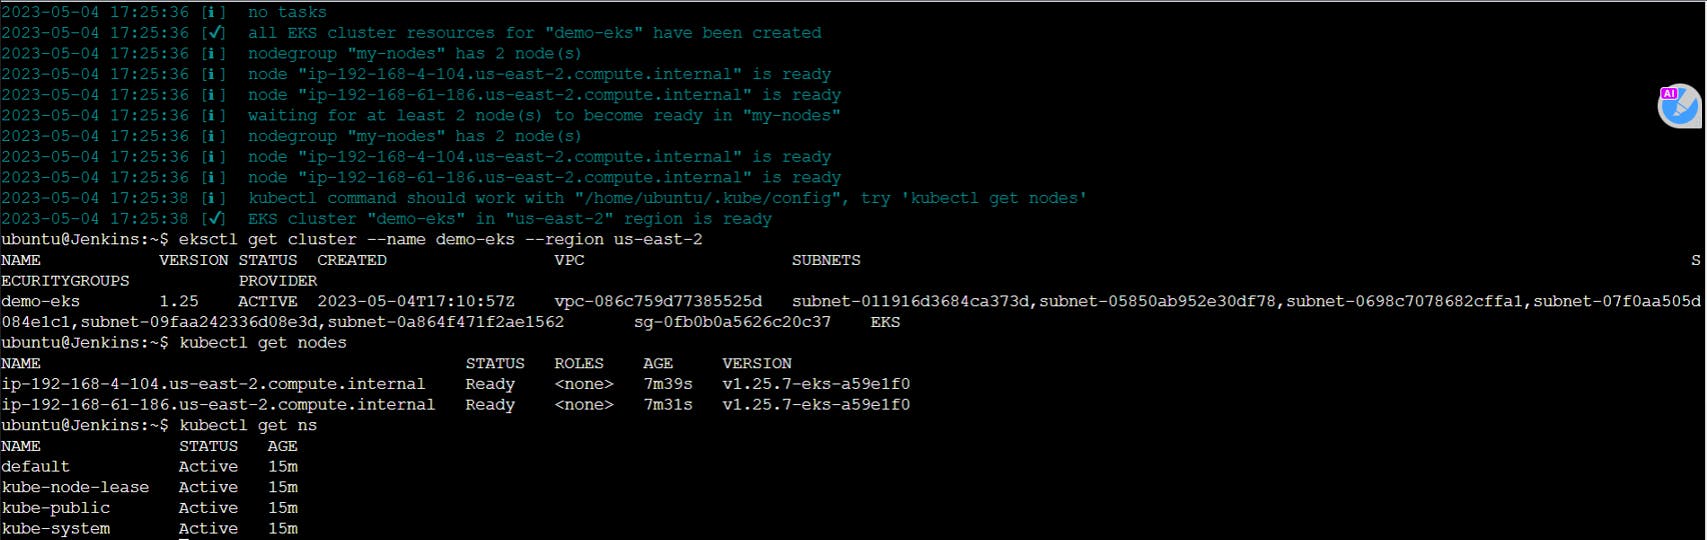
Verify if the cluster is created by the following commands
eksctl get cluster --name demo-eks --region us-east-2

kubectl get nodes

kubectl get ns
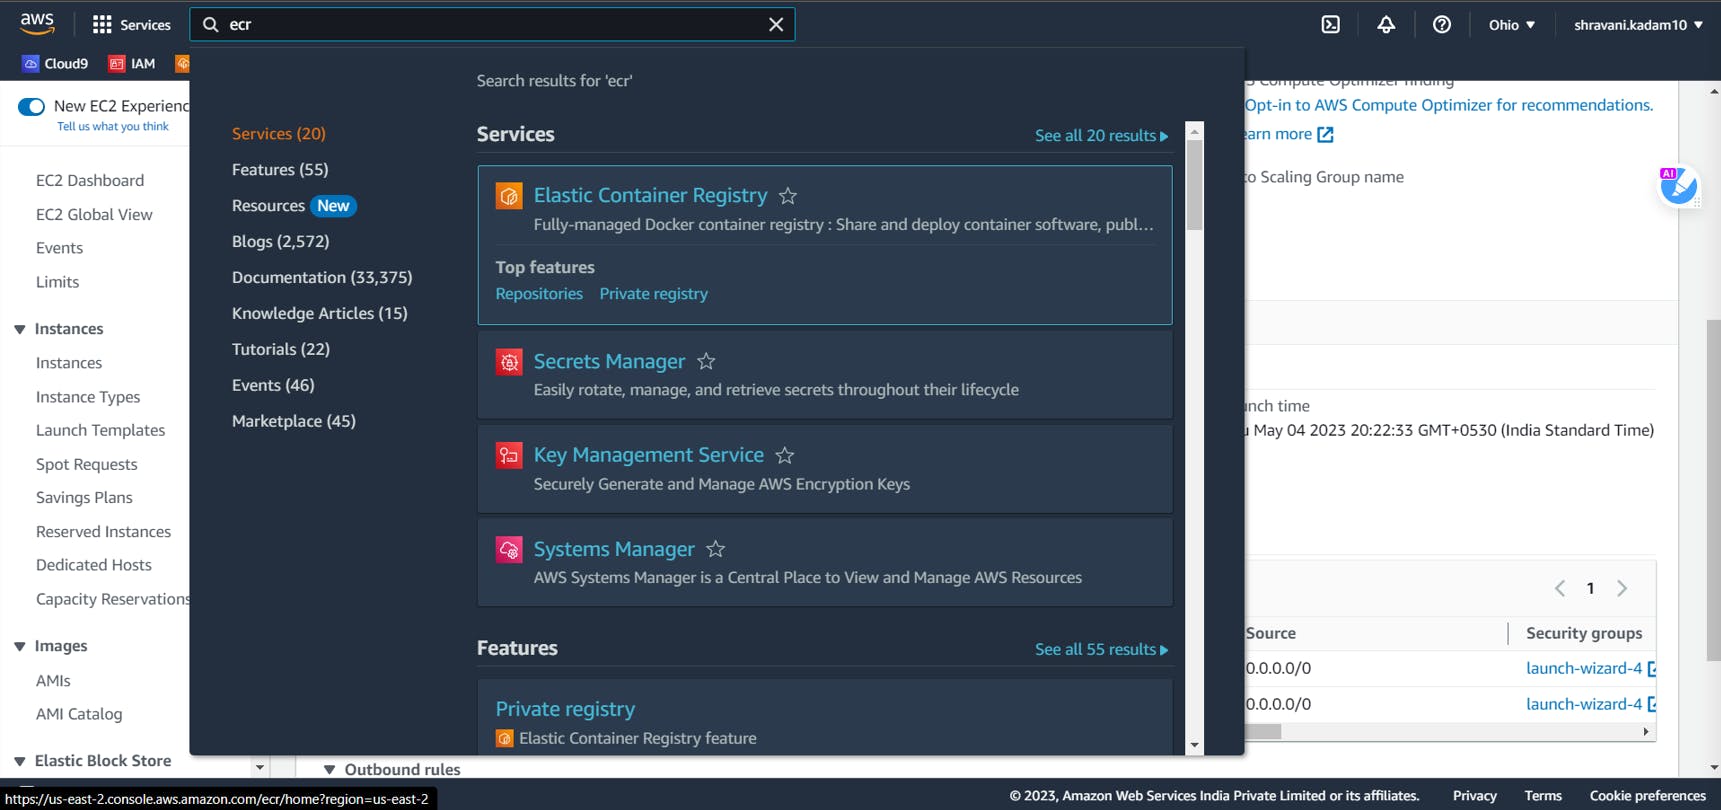
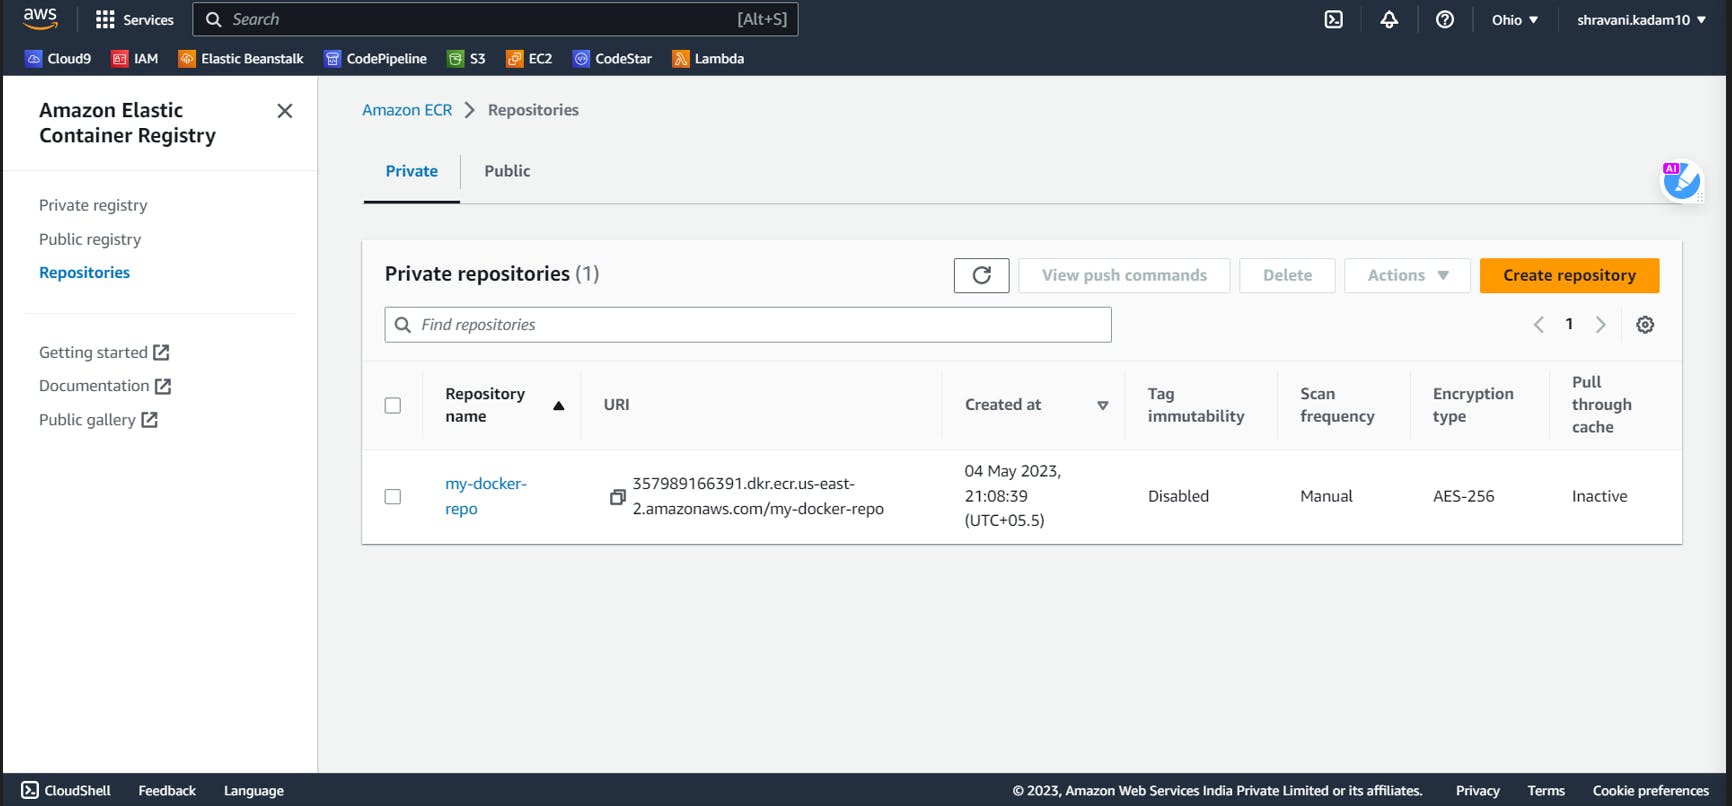
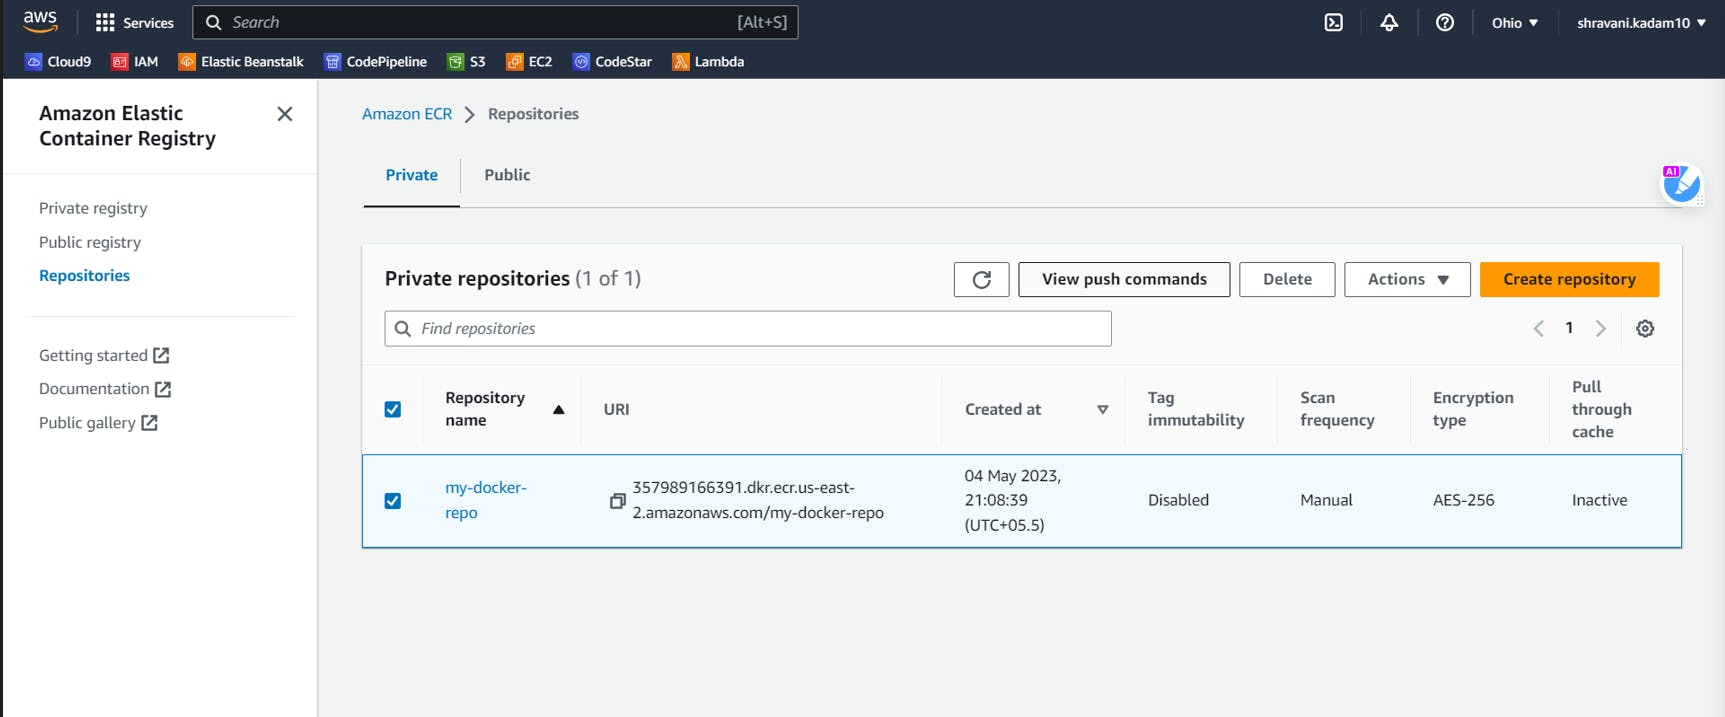
Now let us create ECR repository for our images.
Search for ECR int the search bar
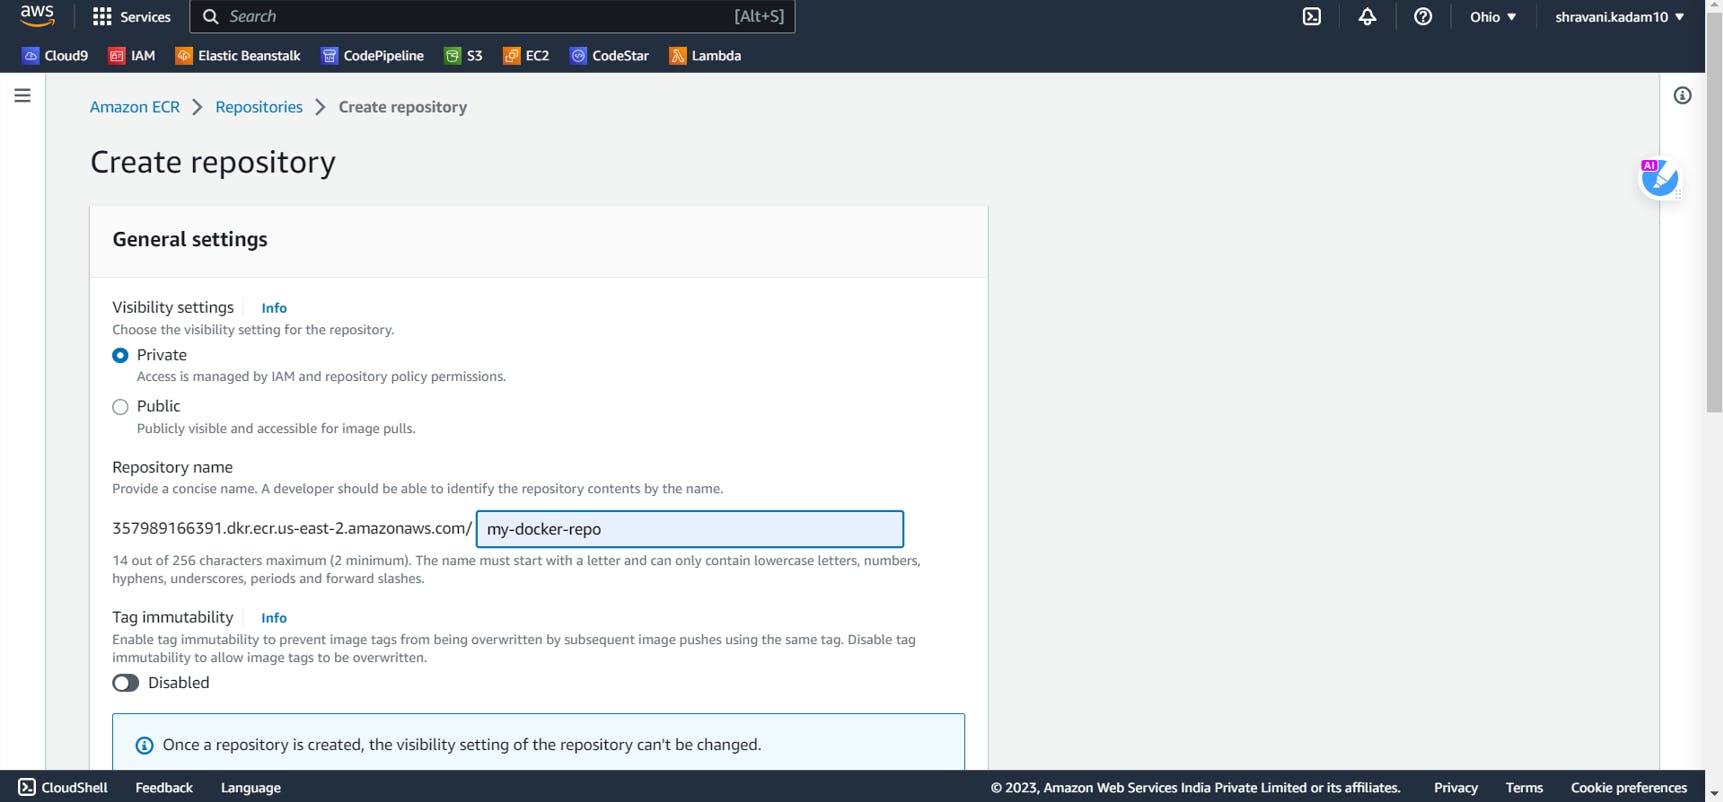
Click on create repository and give a name to your repository
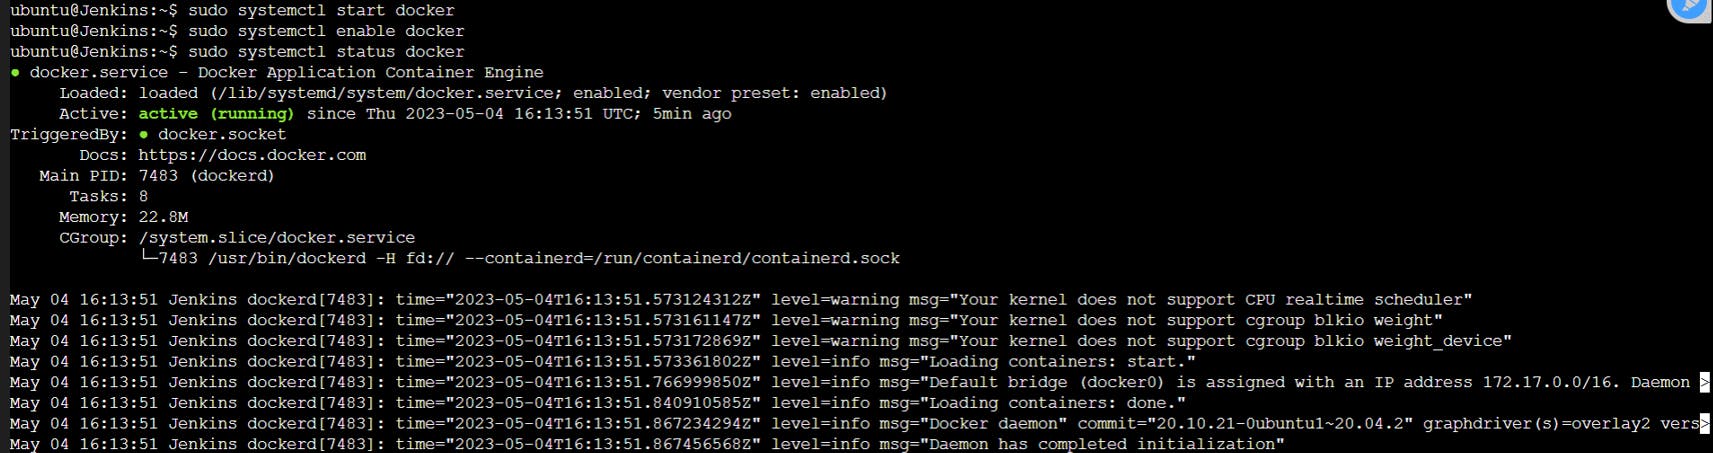
Docker Installation
sudo apt install docker.io -y
sudo usermod -aG docker $USER
sudo systemctl start docker
sudo systemctl enable docker
sudo systemctl status docker
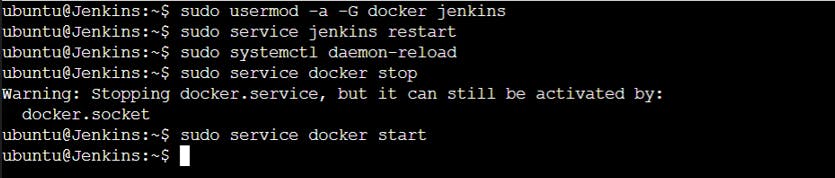
Add Jenkins user to docker group
sudo usermod -a -G docker jenkins
Restart Jenkins and Docker
sudo service jenkins restart
sudo systemctl daemon-reload
sudo service docker stop
sudo service docker start
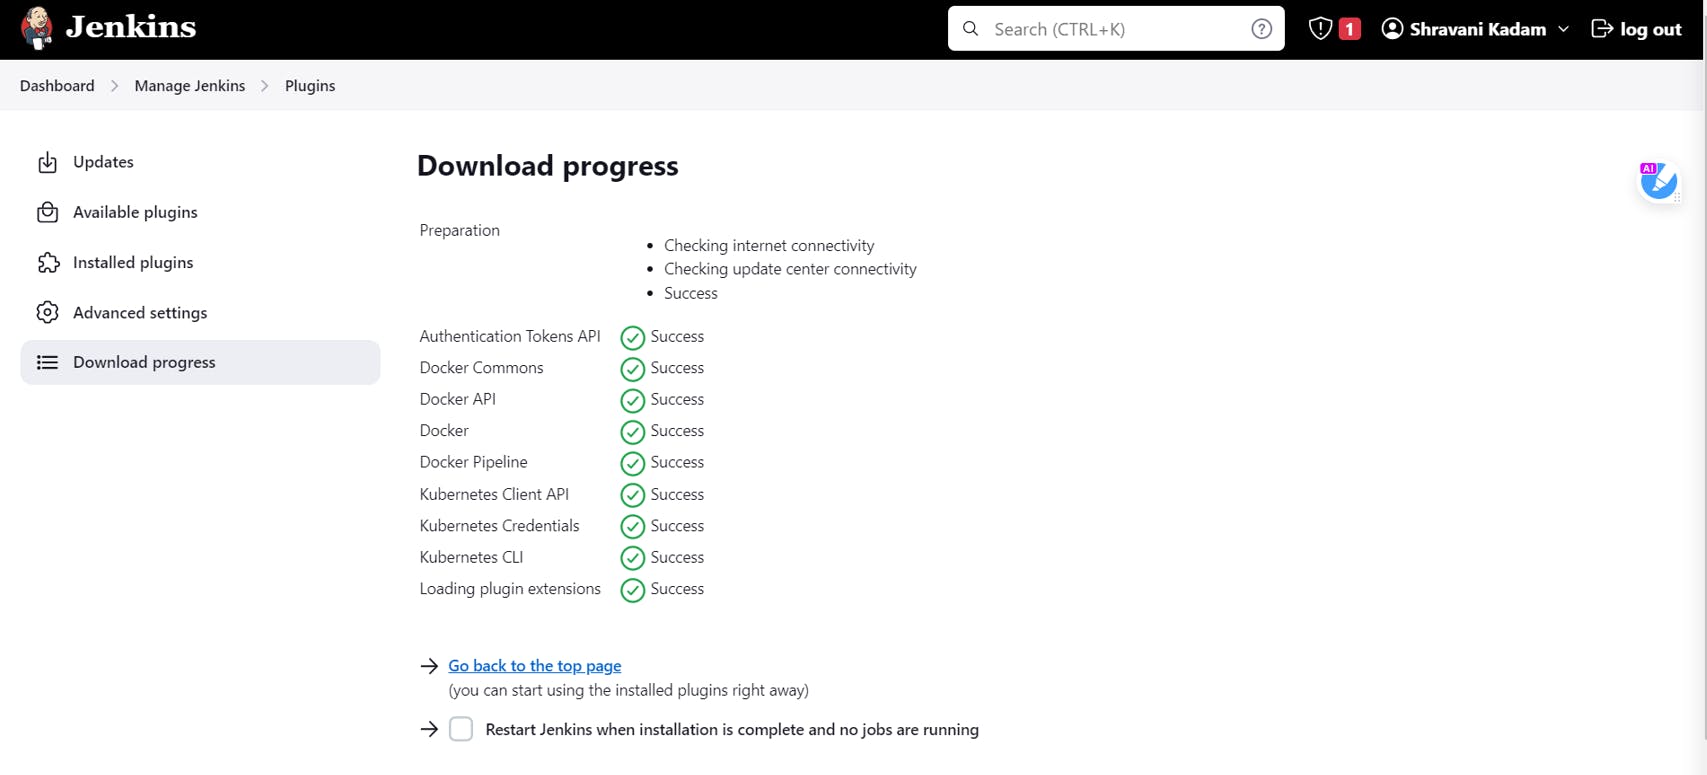
Installing Docker, docker pipeline and Kubernetes CLI plugins in Jenkins
In the Jenkins Dashboard, go to Manage Jenkins
Click on Plugins

Click on Available Plugins
Search for Docker, Docker Pipeline and Kubernetes CLI plugin
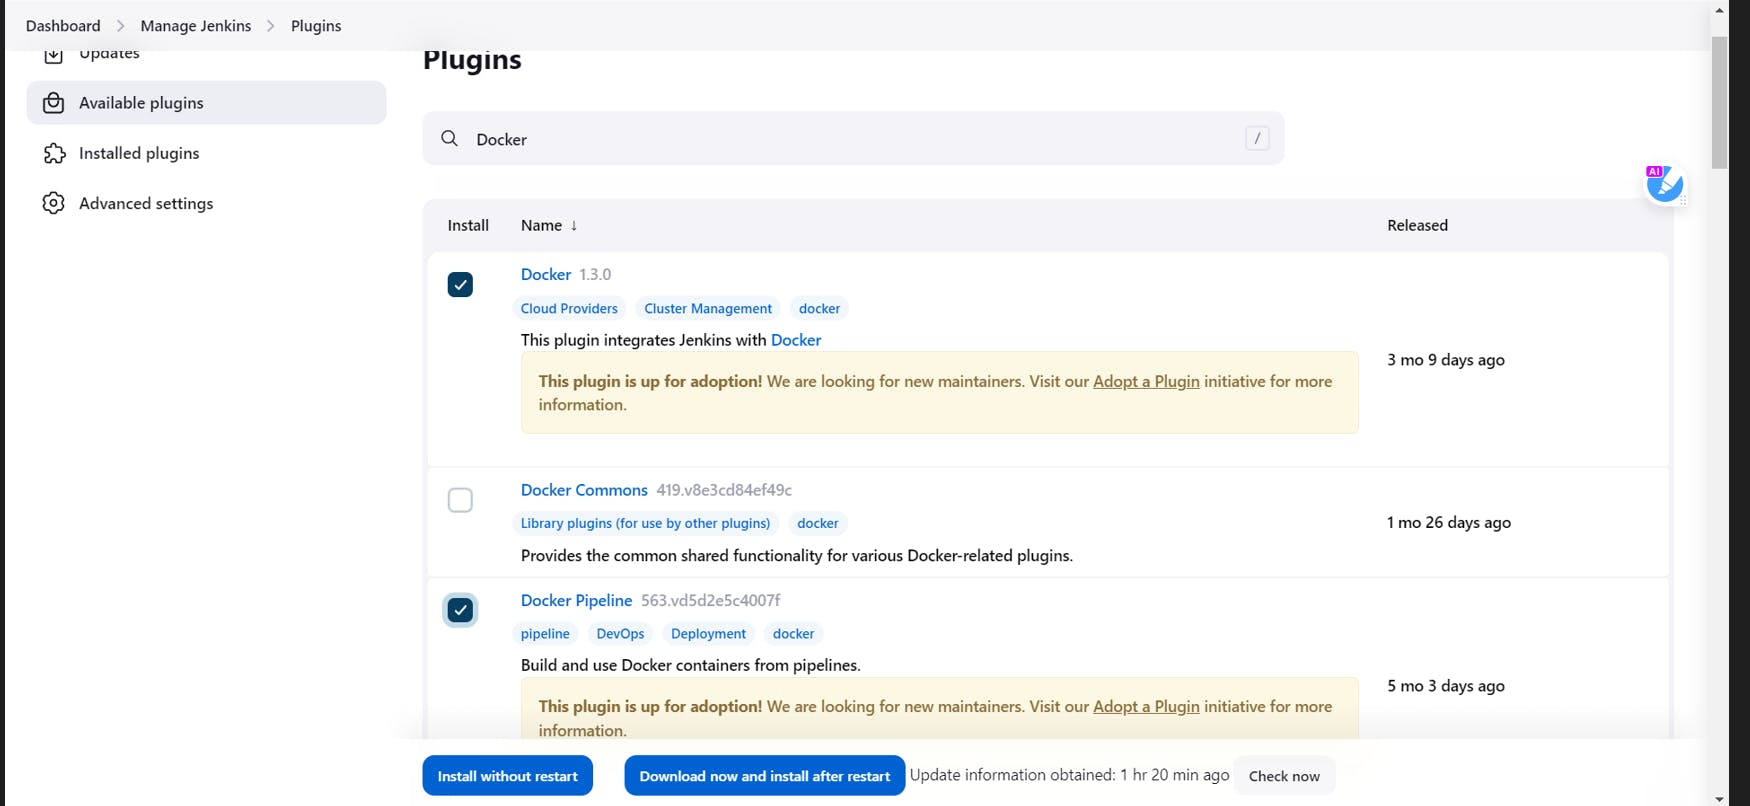

Click on Install without restart
Creating a Maven Variable under global tool configuration in Jenkins
Under Manage Jenkins, Click on tools

Under Maven Installation, Click on add Maven

Give a name and add a path to your Maven
Uncheck install automatically box
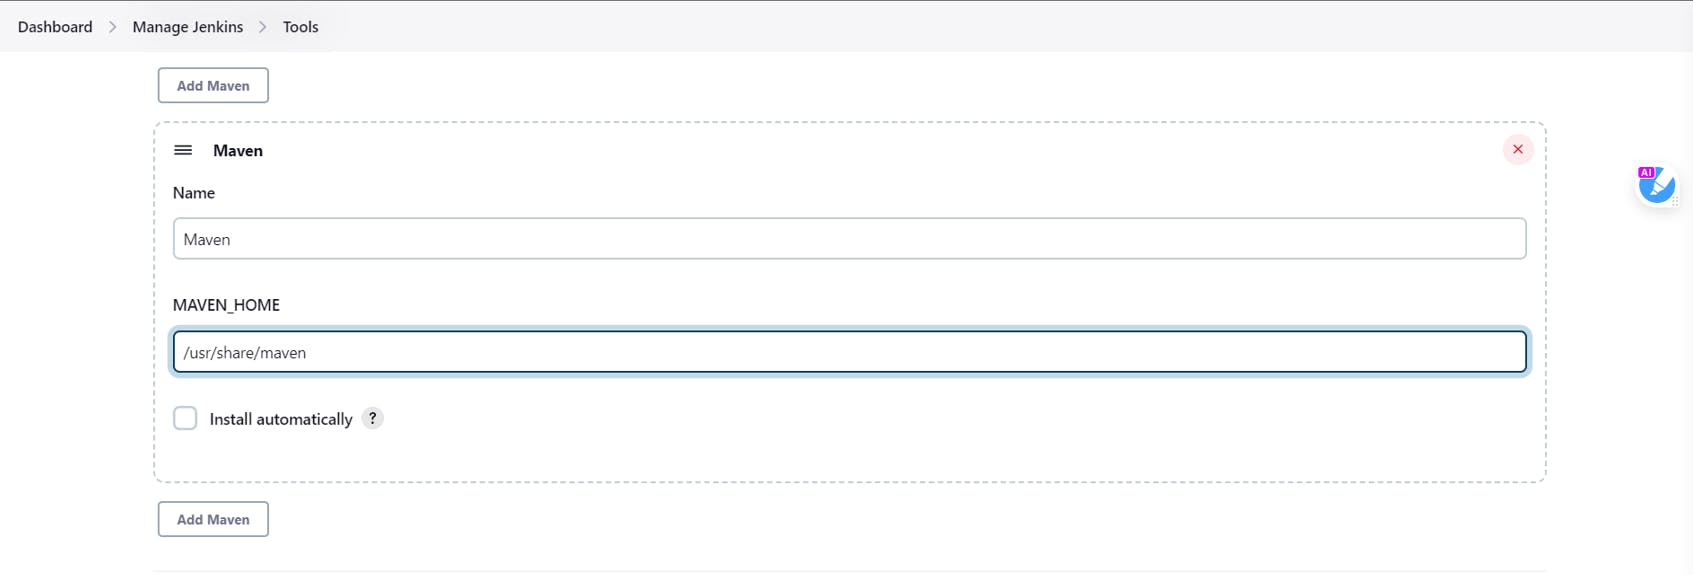
Click on Save
Creating a Pipeline
- In your Jenkins Dashboard, create a job, give a name to the job and select Pipeline.
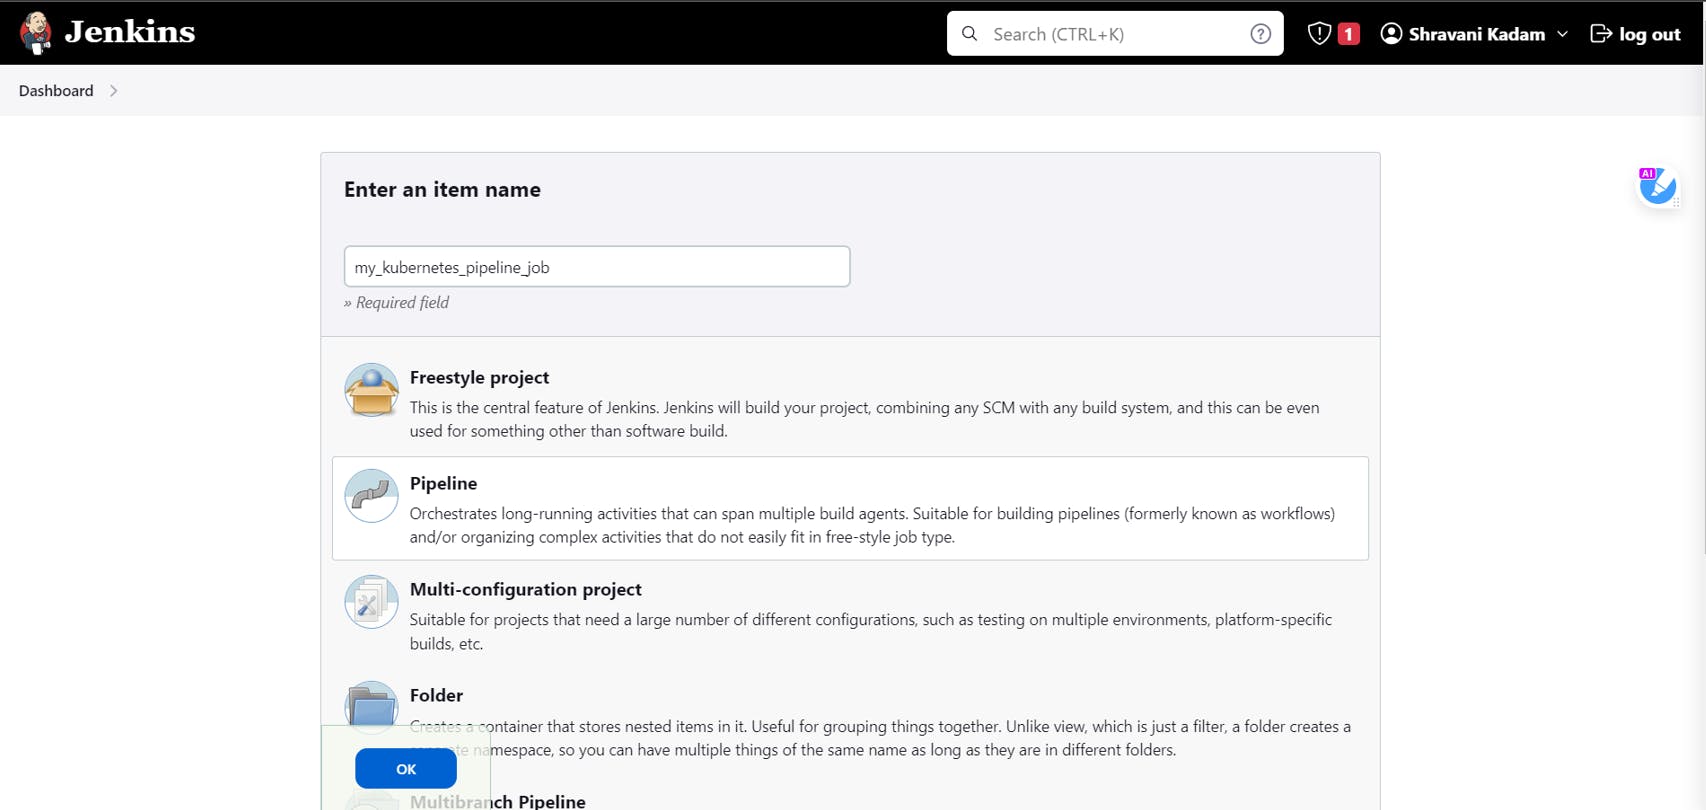
Click on OK
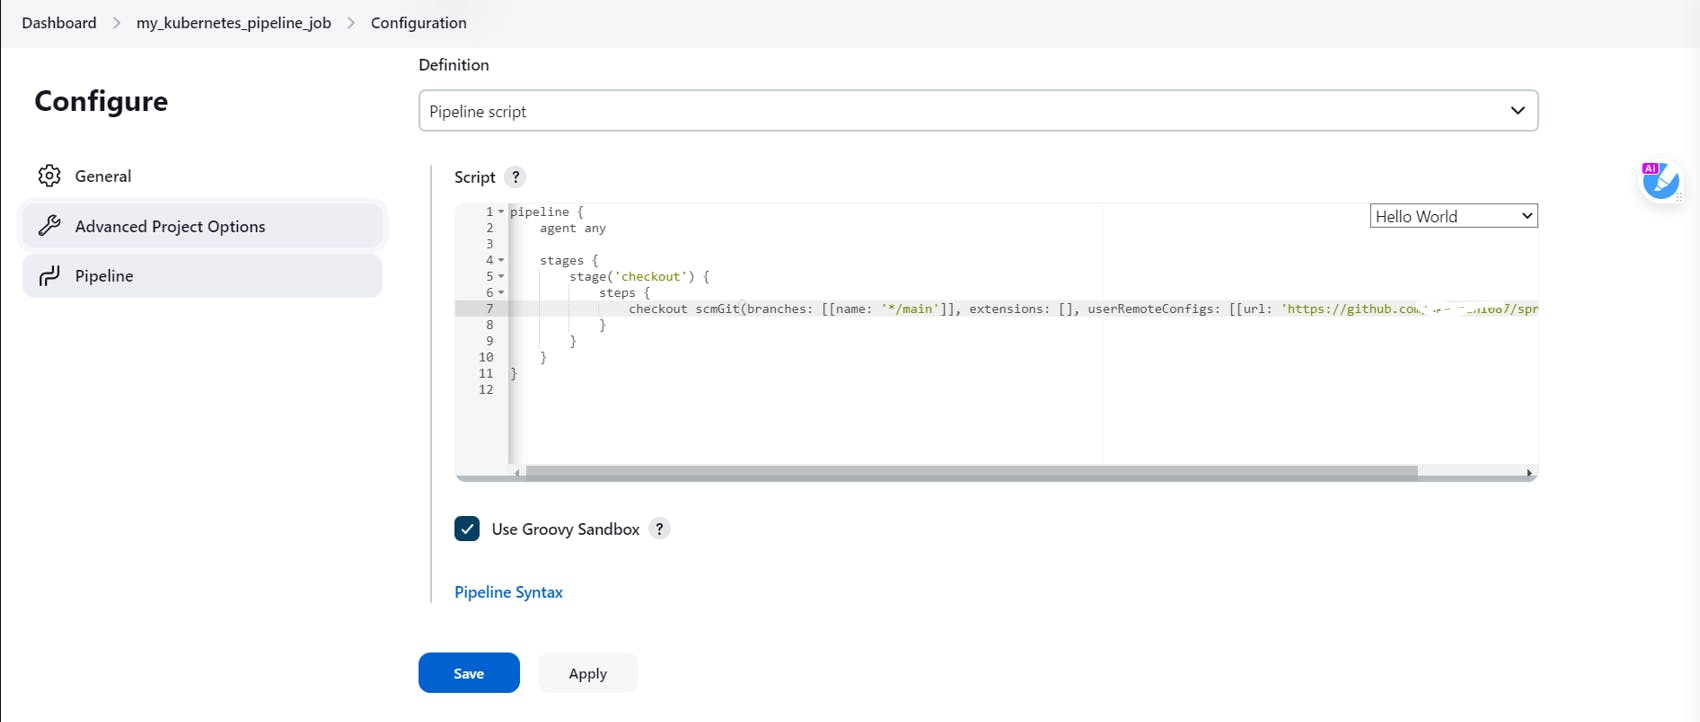
Next in the Definition, select Pipeline script
In the try sample Pipeline select Hello World
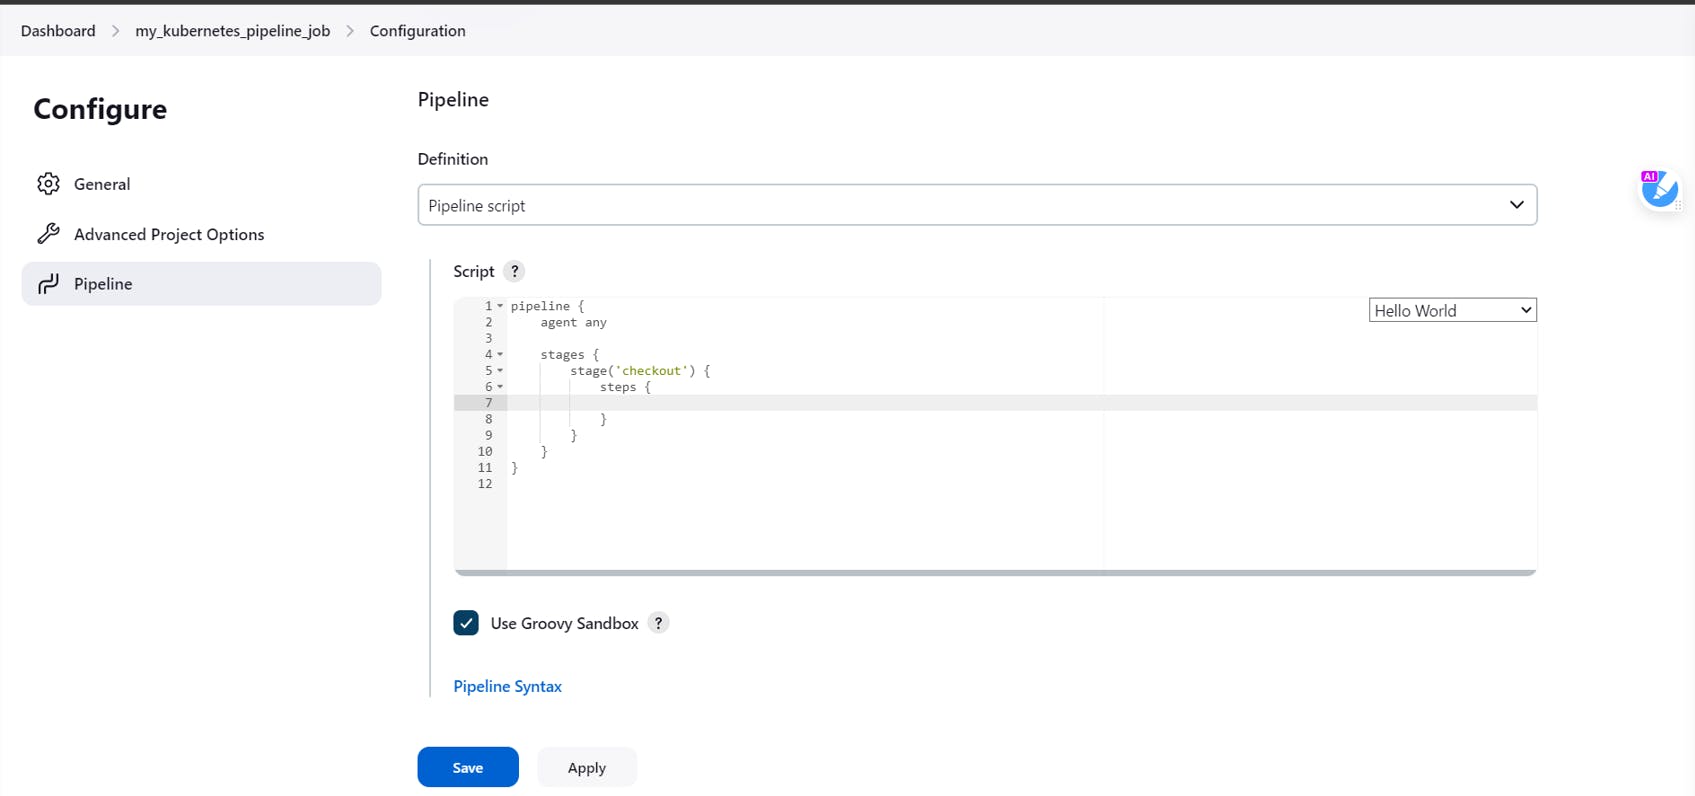
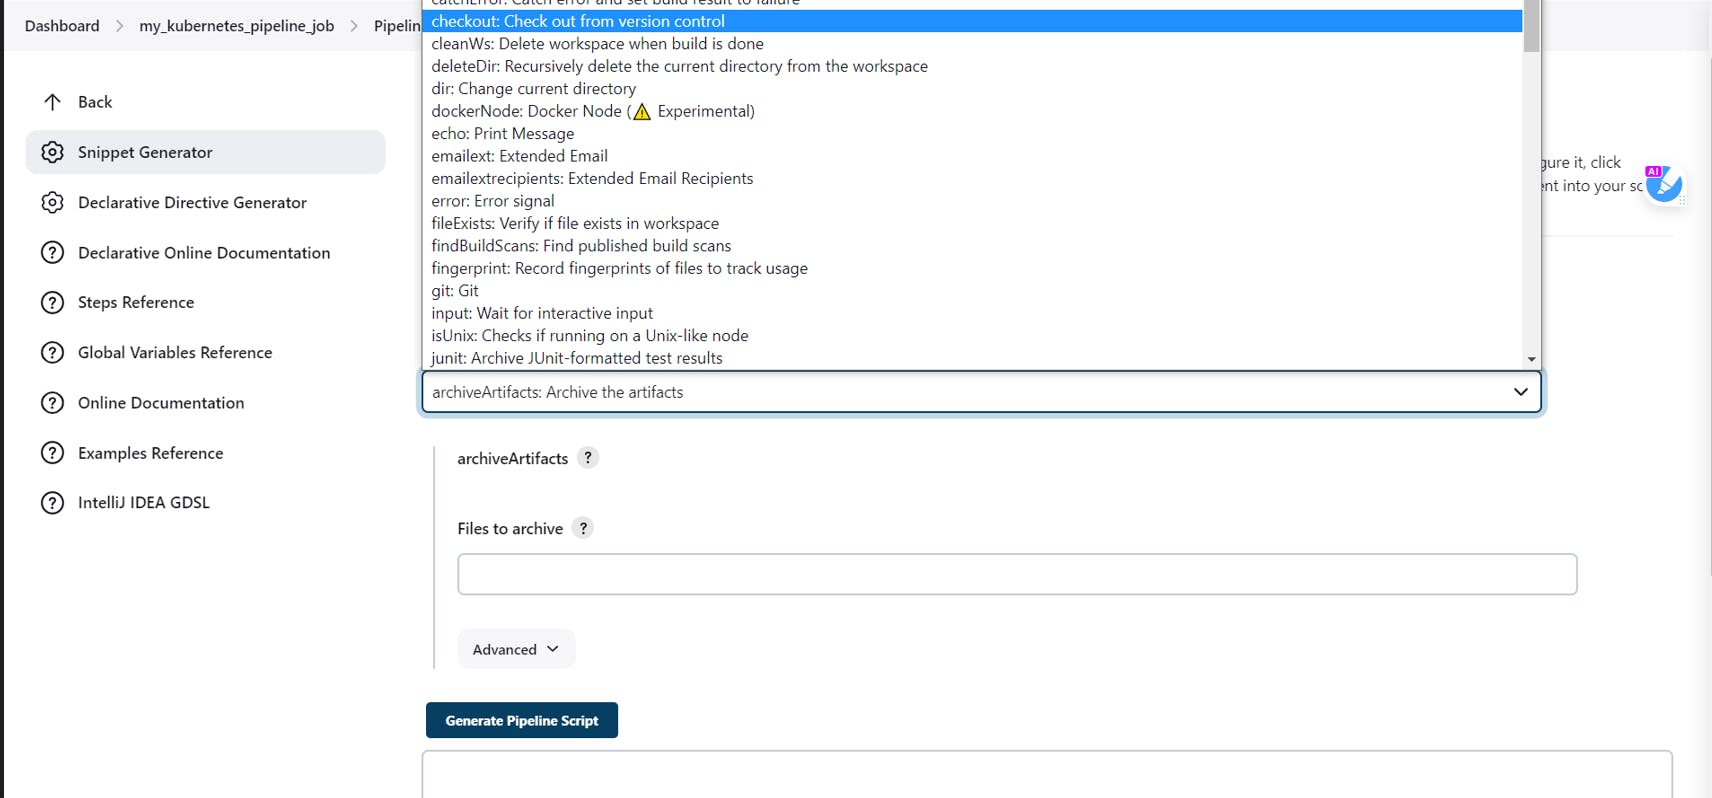
Click on Pipeline Syntax
In the Sample step, select checkout from version control
Fork my given Repository and add your repo link
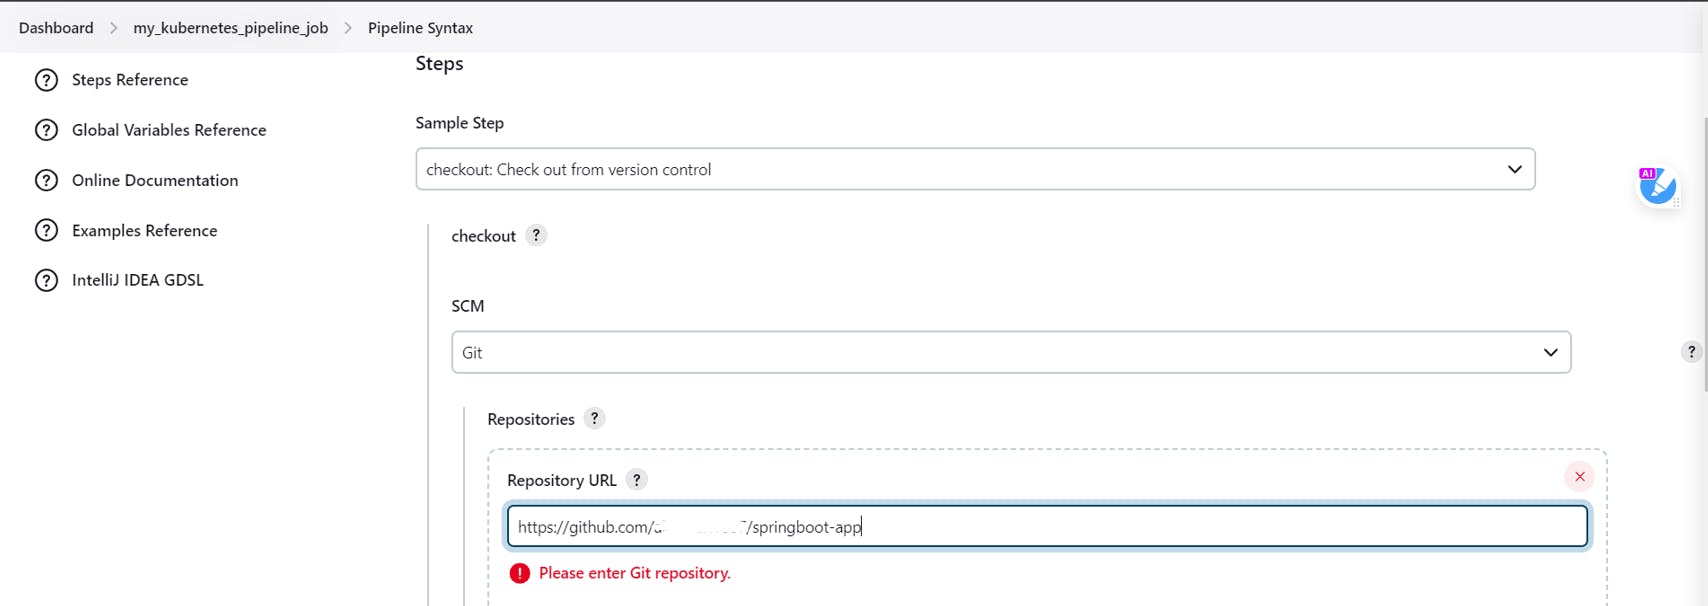
In the Branches to build specify main

Click on Generate Pipeline Script
This should be your output

Copy that output
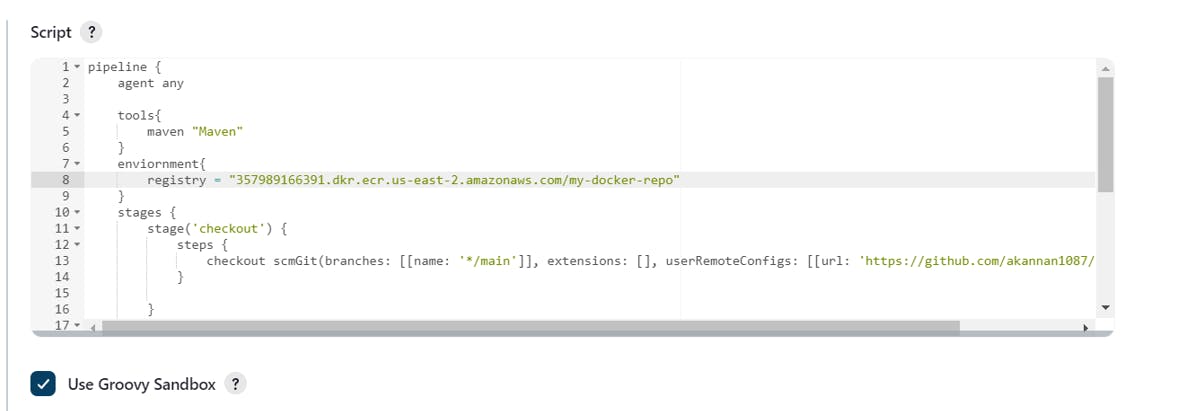
Come back to your pipeline and paste it as shown below
In the next stage, we will be building the Jar file

Specify the tools as mentioned in the above screenshot right above the checkout stage
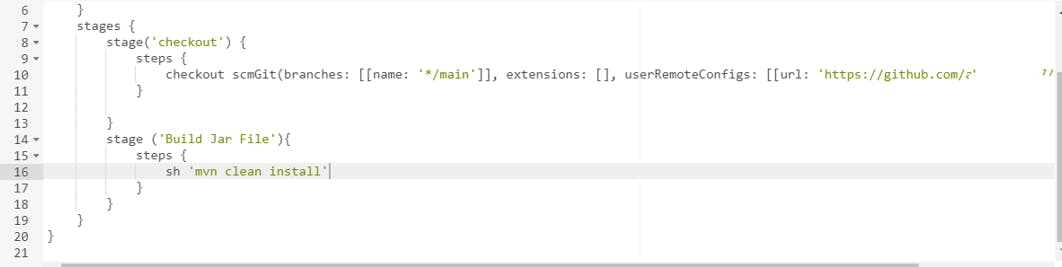
Your script should look similar like this
Now go to the AWS ECR dashboard
Copy the repo URI
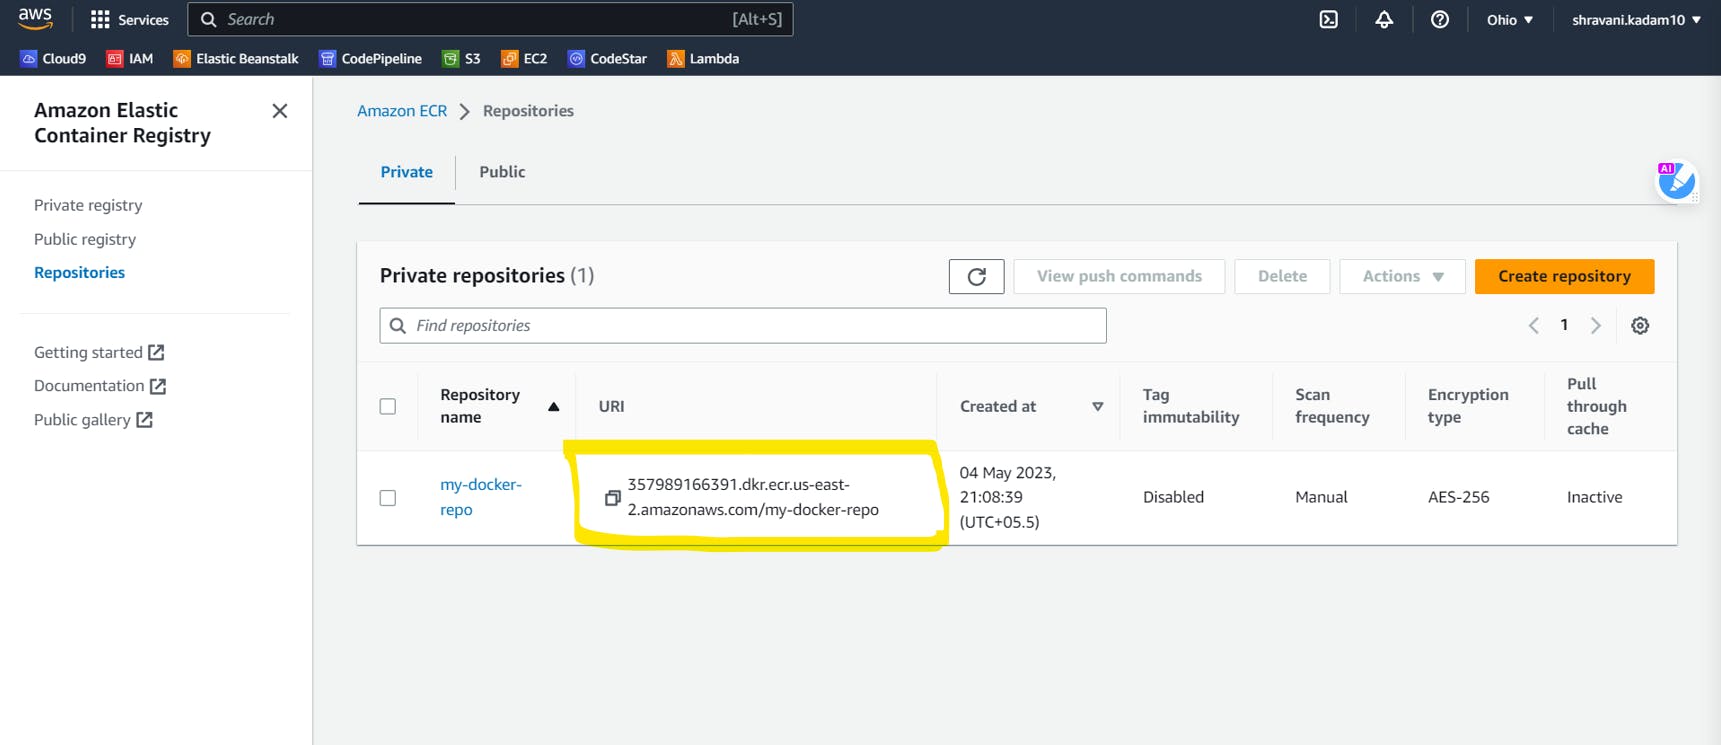
Come back to your pipeline script and in the environment, paste the repo uri right below the tools in the script
Now let's create our next stage i.e. the Building stage
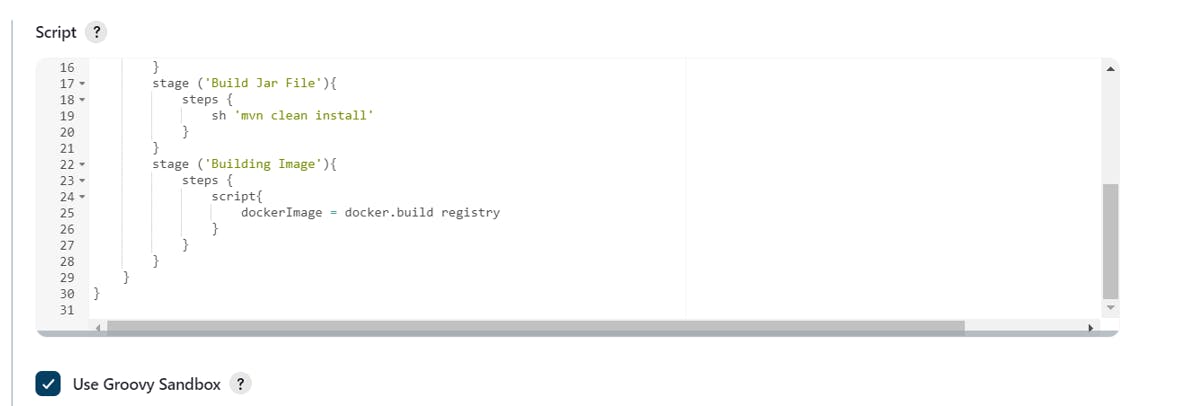
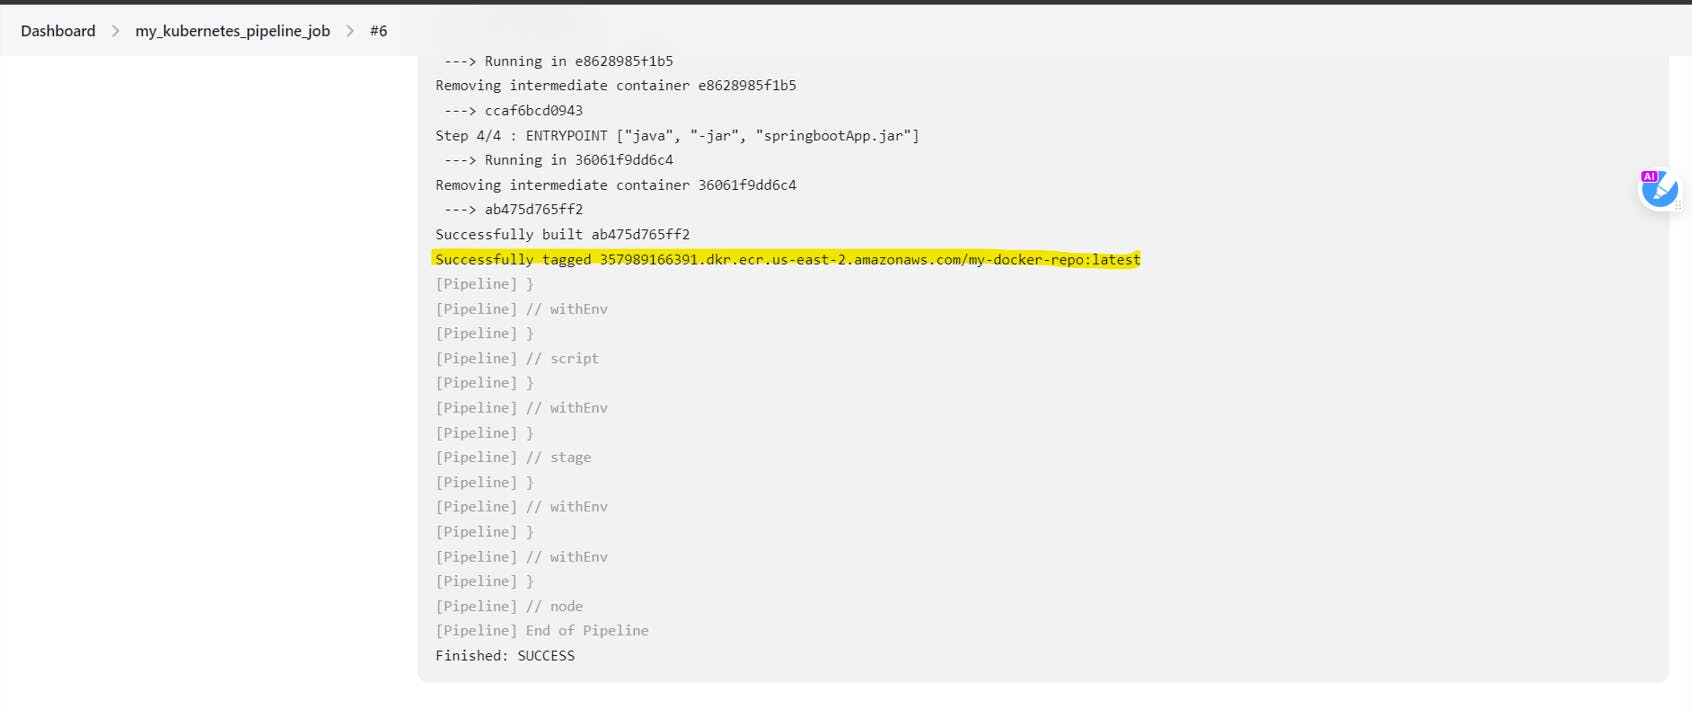
Click on save and build
You will be able to see that we are successfully able to tag our image
We can even see the docker images in our EC2 terminal

Now, go back to your ECR and Click on View Push Commands
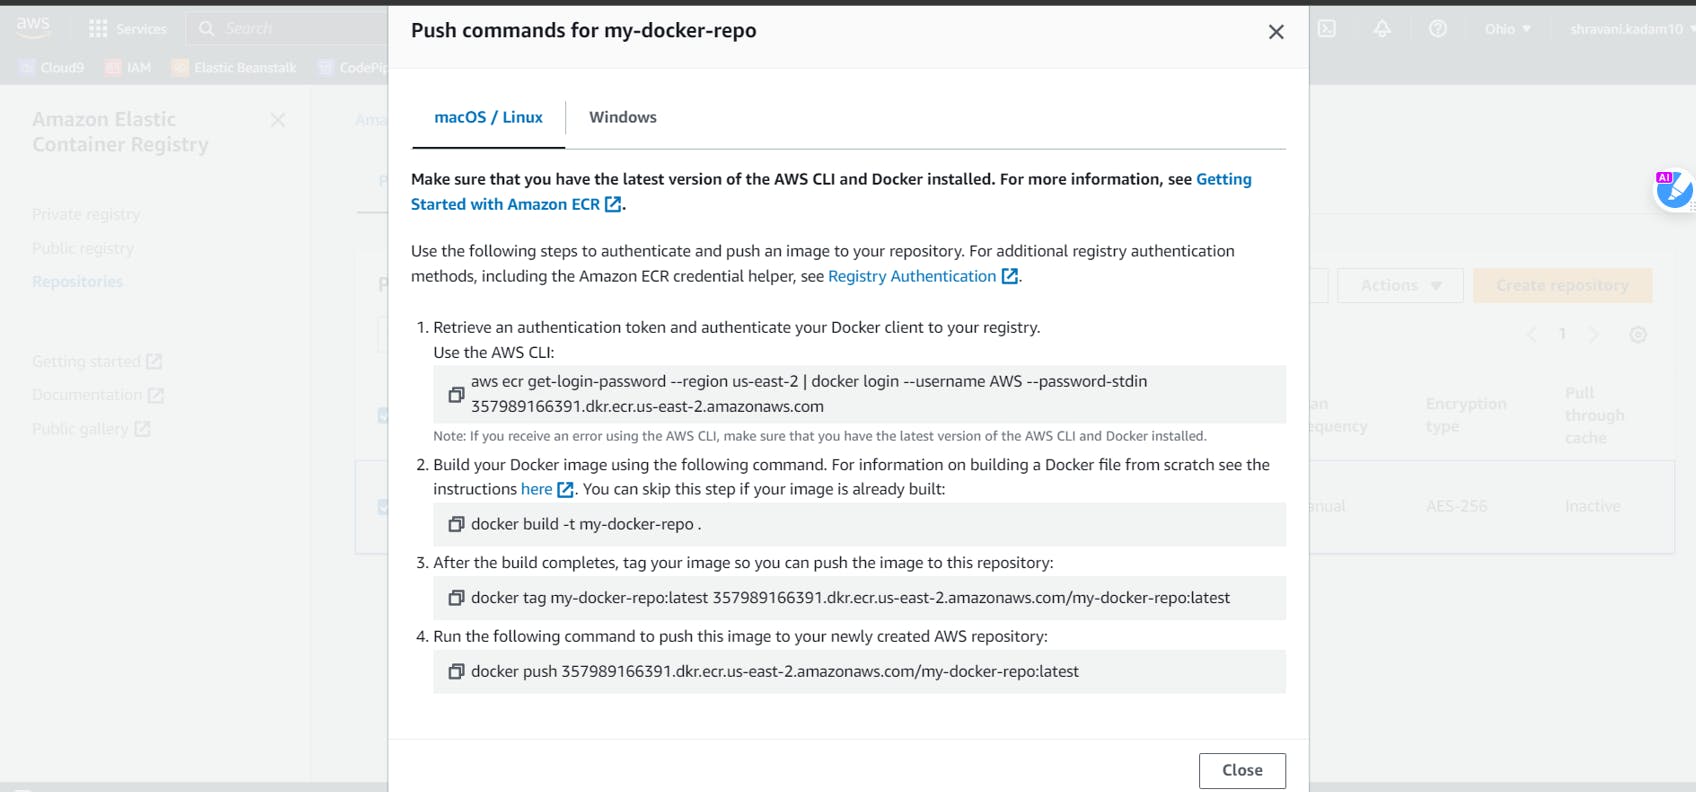
Copy the first command and paste it into your terminal to verify if you can log in to docker

Copy the push command
Come back to Jenkins
Now let us create our next stage where we will push the image into the docker repository
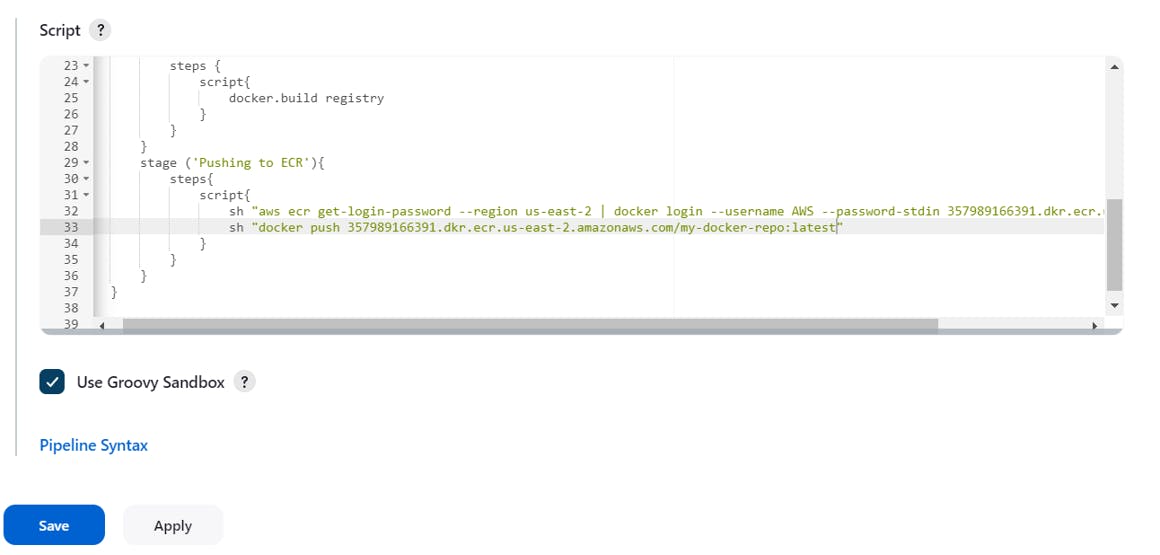
Paste your login and push command we copied earlier in this way
Now come back to your EC2 terminal and enter the following command
cat /home/ubuntu/.kube/config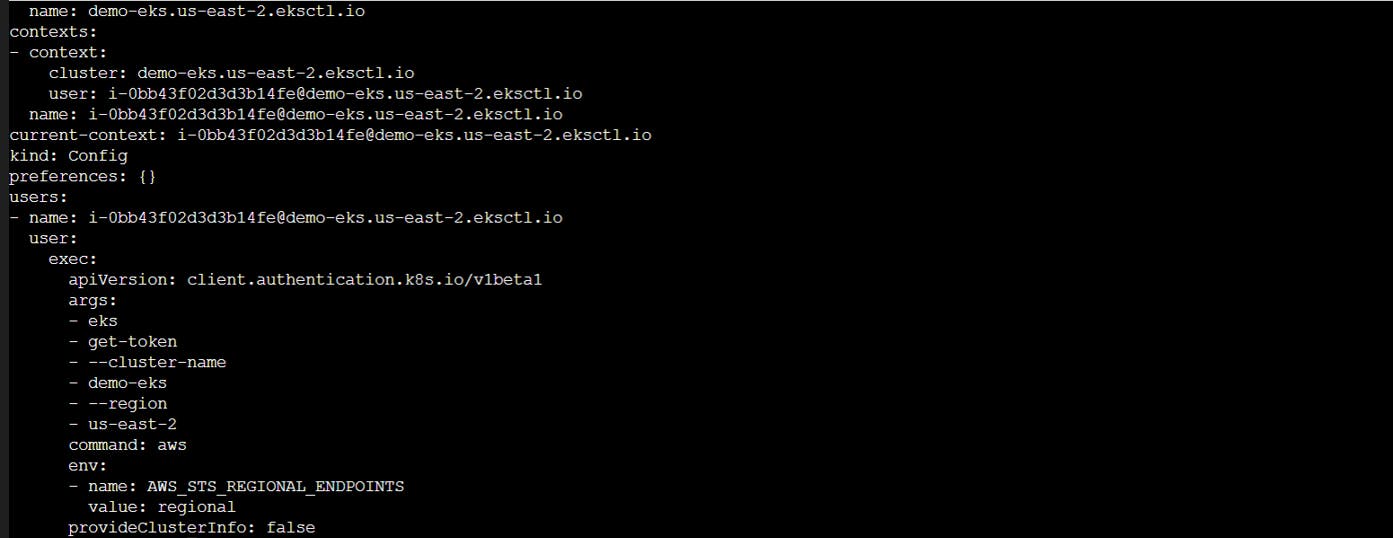
Copy the entire kube config file paste it in your editor ( I am using Notepad++ )
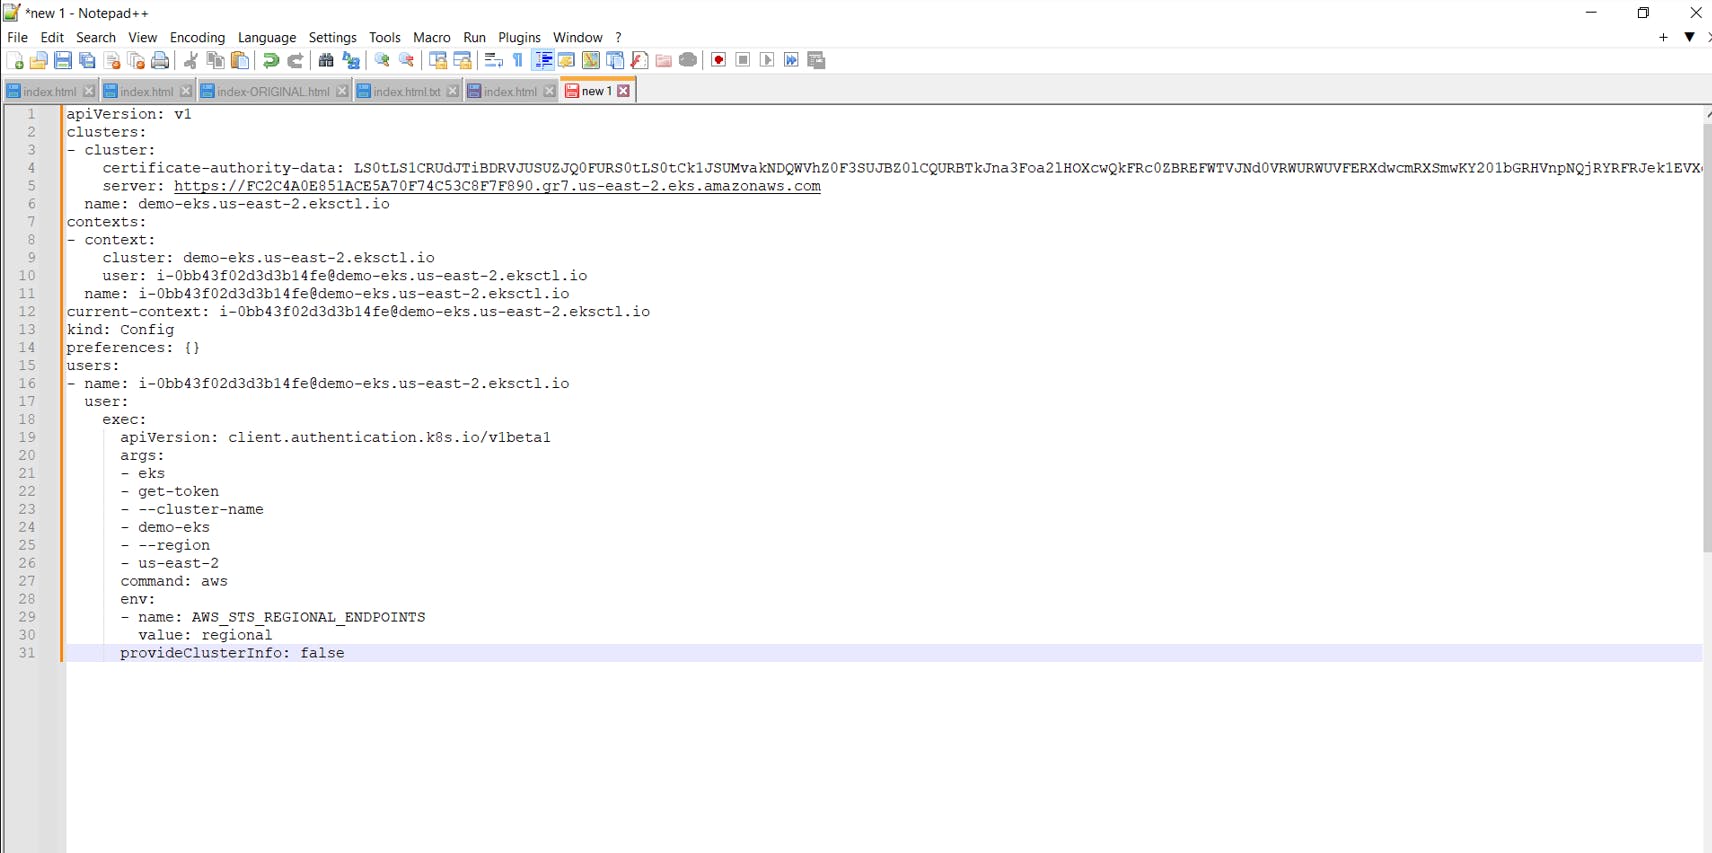
Save the file on your Desktop
Come back to Jenkins>>Dashboard>>Manage Jenkins>>Credentials>>System>>Global Credentials (unrestricted)

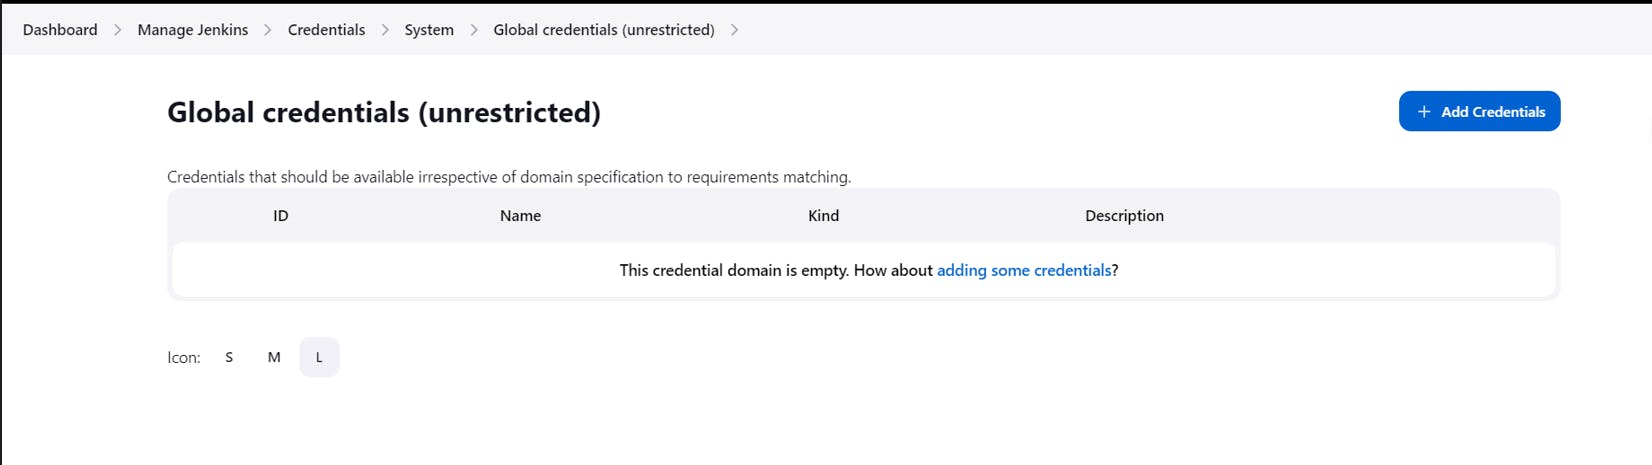
Click on Add Credentials
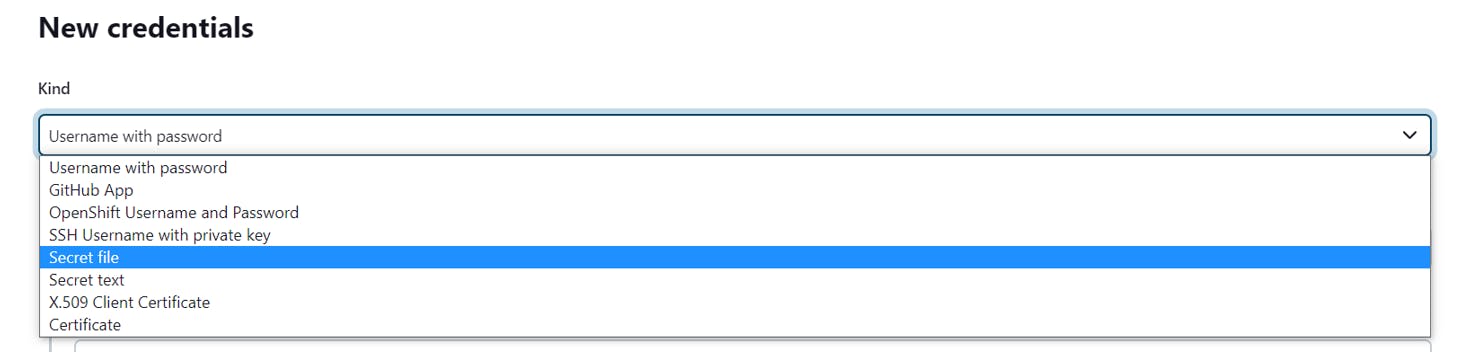
In the kind, select secret file
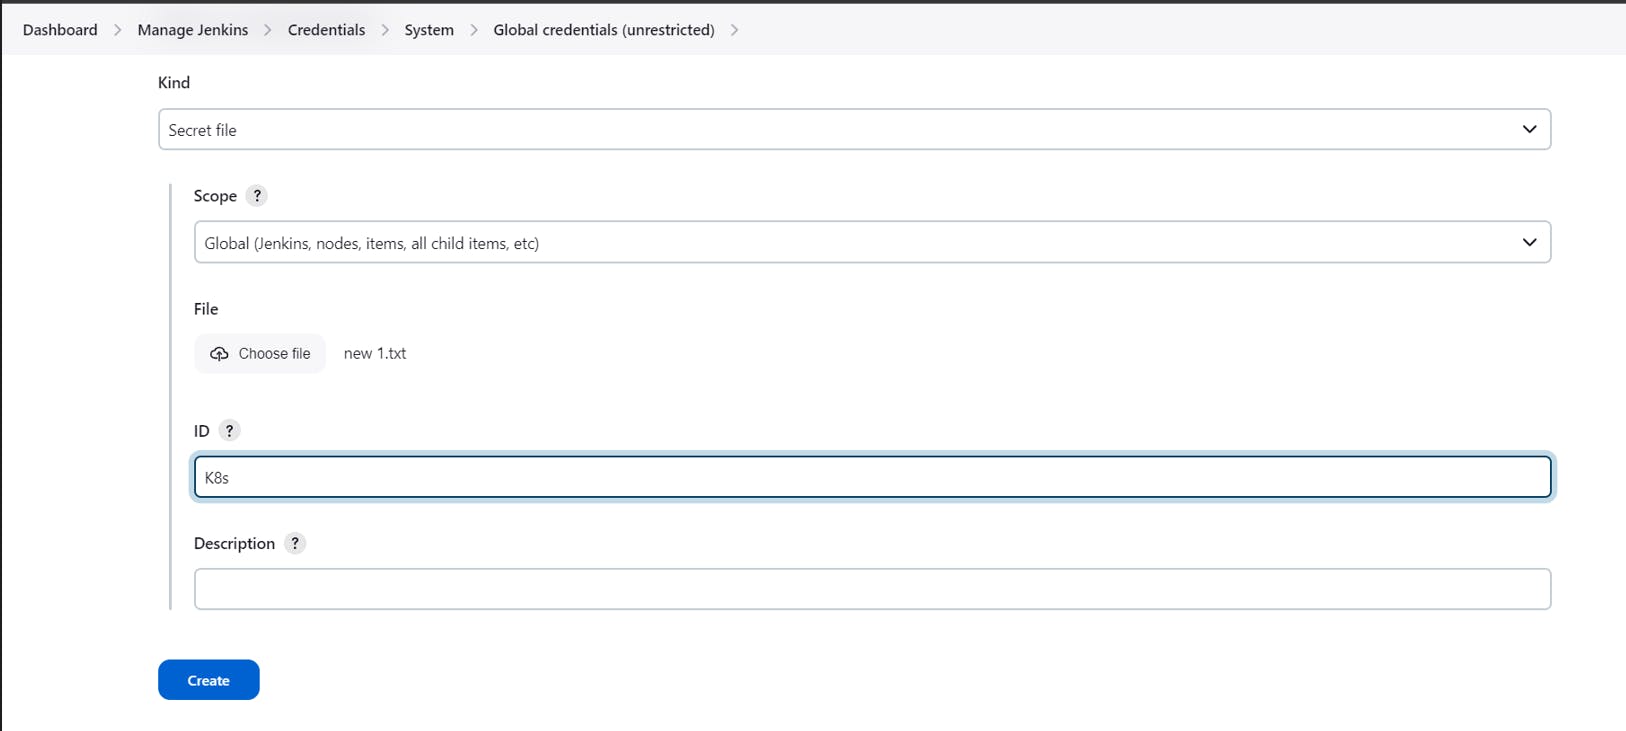
In the File, Upload your KubeConfig file saved on your desktop
Give id as K8s and click on Create

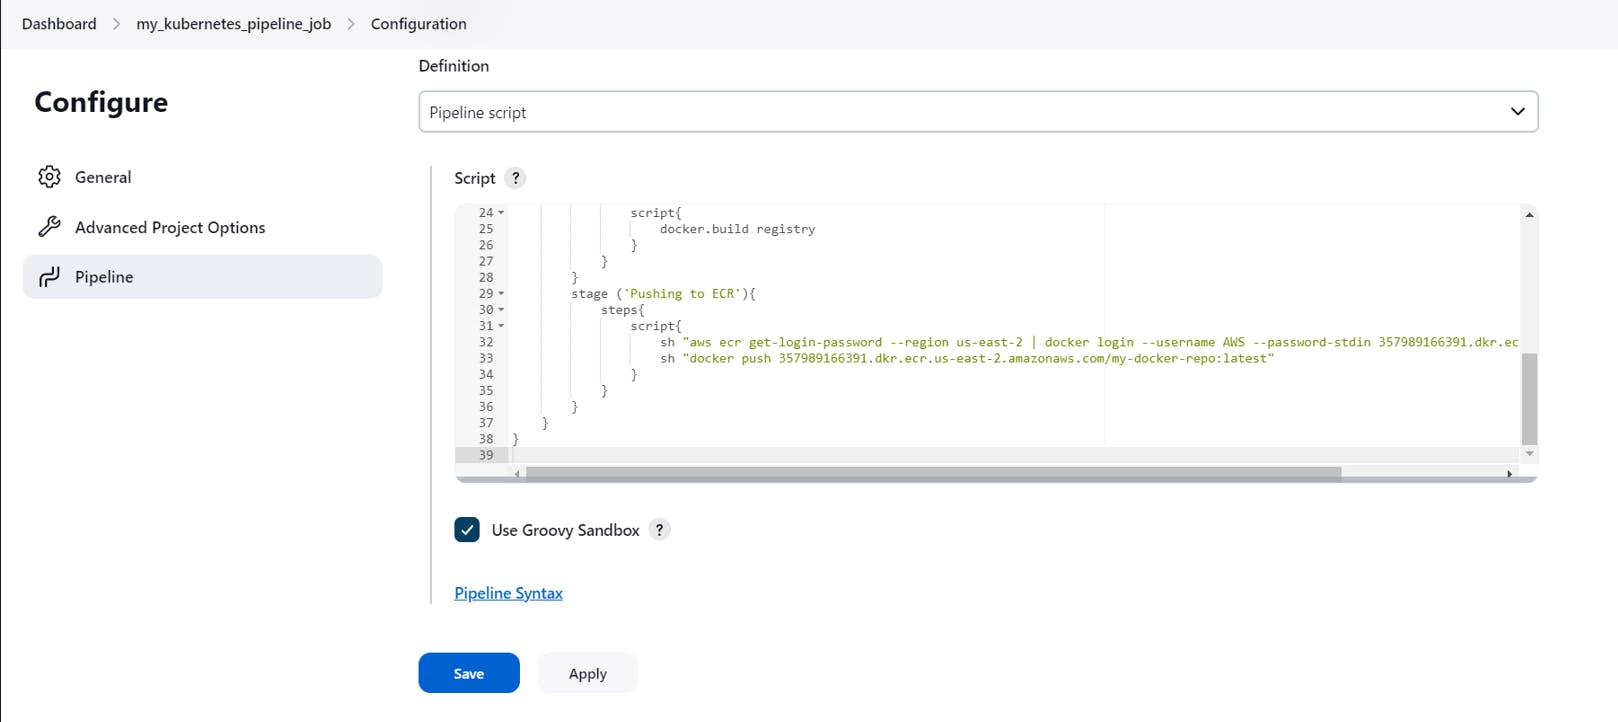
Come back to your Pipeline Script
Click on Pipeline Syntax
In the sample step, select withKubeConfig
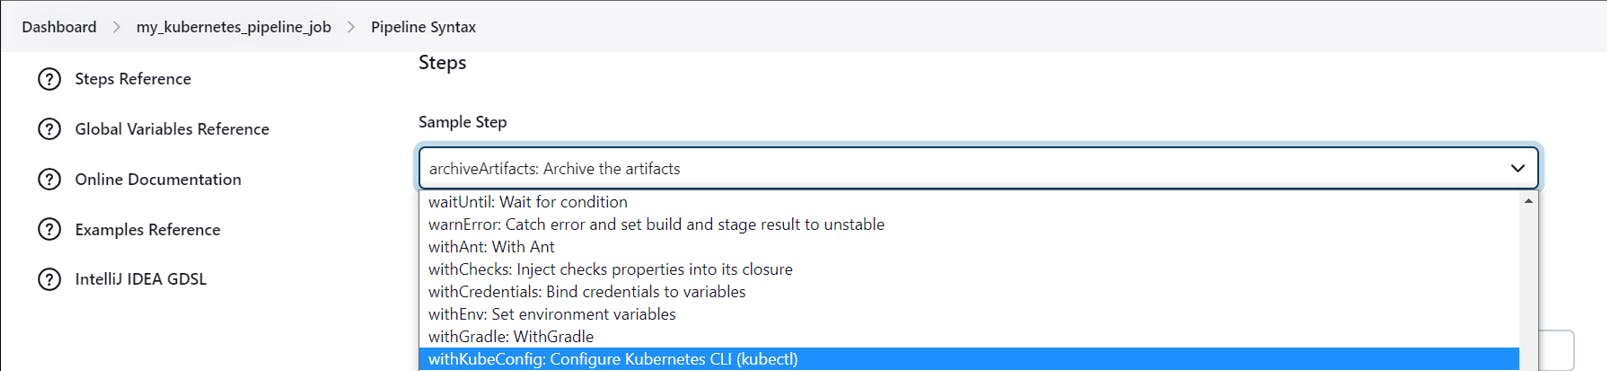
In the Credentials, select your KubeConfig file which you have uploaded earlier

Click on Generate Pipeline Script

In your Github Repository, make changes in eks-deploy-k8s.yaml to pull Docker image from your AWS ECR repo.
Add your ECR repo uri here

Now let us build the final deployment stage
Copy the Pipeline script we have generated earlier withKubeConfig and paste it as shown below
Remove //some block and enter the following command
sh "kubectl apply -f eks-deploy-k8s.yaml"

Click on Save and then Build

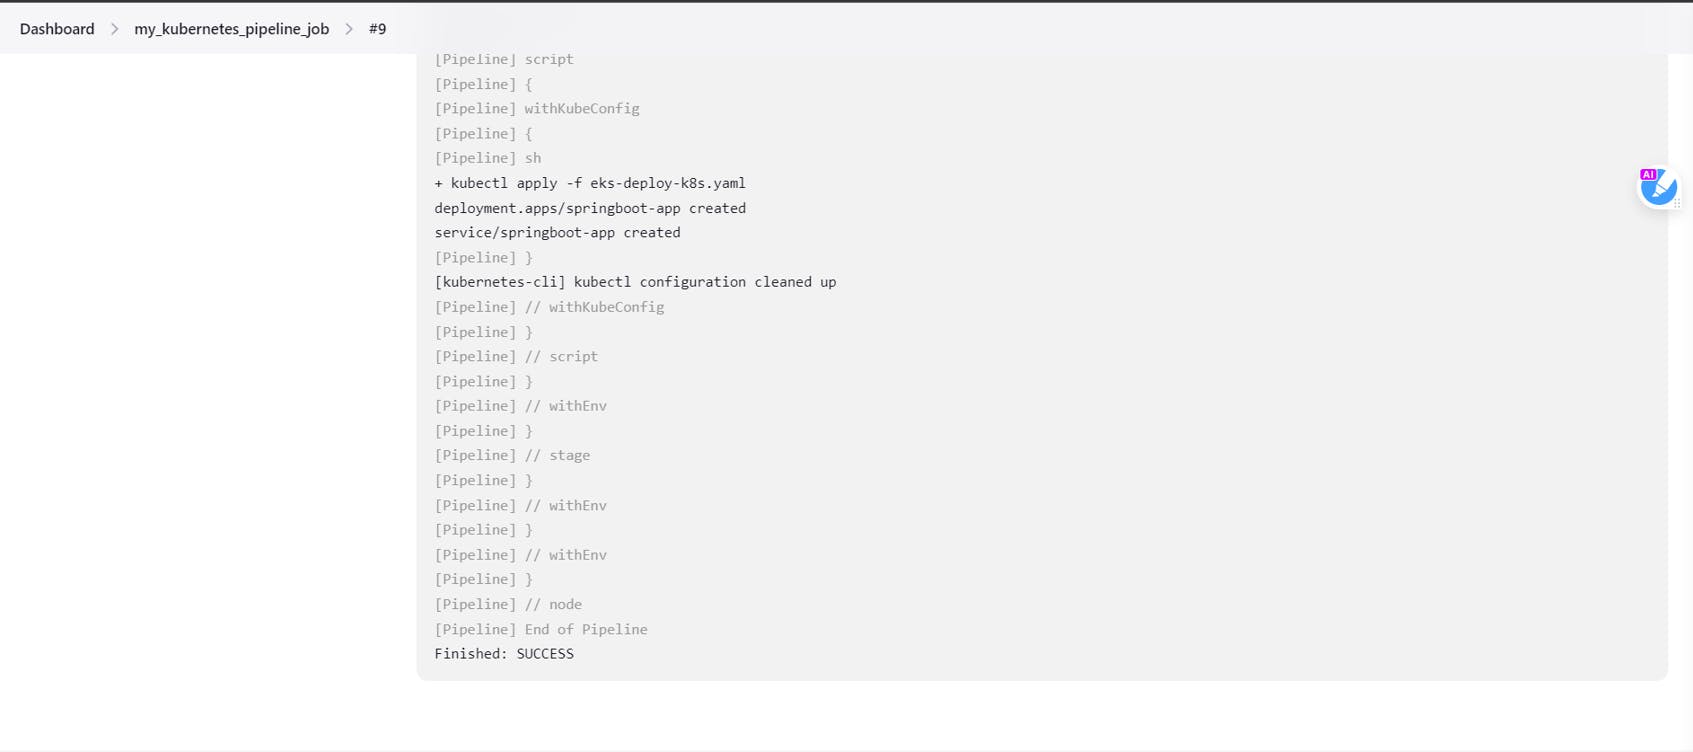
So that's a SUCCESS!! We are successfully able to deploy our application into EKS using Jenkins 🎊 🎉
Verify your Pipeline Script
pipeline {
   tools {
        maven 'Maven'
    }
    agent any
    environment {
        registry = "account_id.dkr.ecr.us-east-2.amazonaws.com/my-docker-repo"
    }

    stages {
        stage('Checkout') {
            steps {
                checkout([$class: 'GitSCM', branches: [[name: '*/main']], doGenerateSubmoduleConfigurations: false, extensions: [], submoduleCfg: [], userRemoteConfigs: [[credentialsId: '', url: 'https://github.com/shravani10-tech/springboot-app']]])
            }
        }
      stage ('Building Jar File') {
          steps {
            sh 'mvn clean install'
            }
      }
    // Building Docker images
    stage('Building image') {
      steps{
        script {
          dockerImage = docker.build registry
        }
      }
    }

    // Uploading Docker images into AWS ECR
    stage('Pushing to ECR') {
     steps{
         script {
                sh 'aws ecr get-login-password --region us-east-2 | docker login --username AWS --password-stdin account_id.dkr.ecr.us-east-2.amazonaws.com'
                sh 'docker push account_id.dkr.ecr.us-east-2.amazonaws.com/my-docker-repo:latest'
         }
        }
      }

       stage('K8S Deploy') {
        steps{
            script {
                withKubeConfig([credentialsId: 'K8S', serverUrl: '']) {
                sh ('kubectl apply -f  eks-deploy-k8s.yaml')
                }
            }
        }
       }
    }
}
Verifying deployments to K8s
Enter the following commands to check if your application is successfully deployed
kubectl get deployments

kubectl get nodes

kubectl get pods
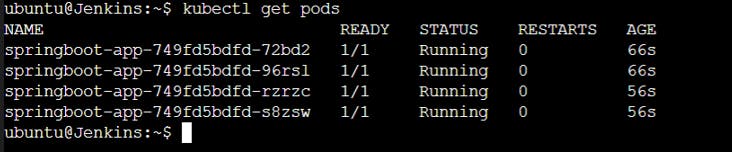
kubectl get svc

Let us now access our application
Copy your public IP address along with loadbalancer IP address (the one highlighted)

public_ip_address:external_ip_address
3.21.234.93:a1e2cd39a2ce4455a......
Go to your browser, you should be able to see your application
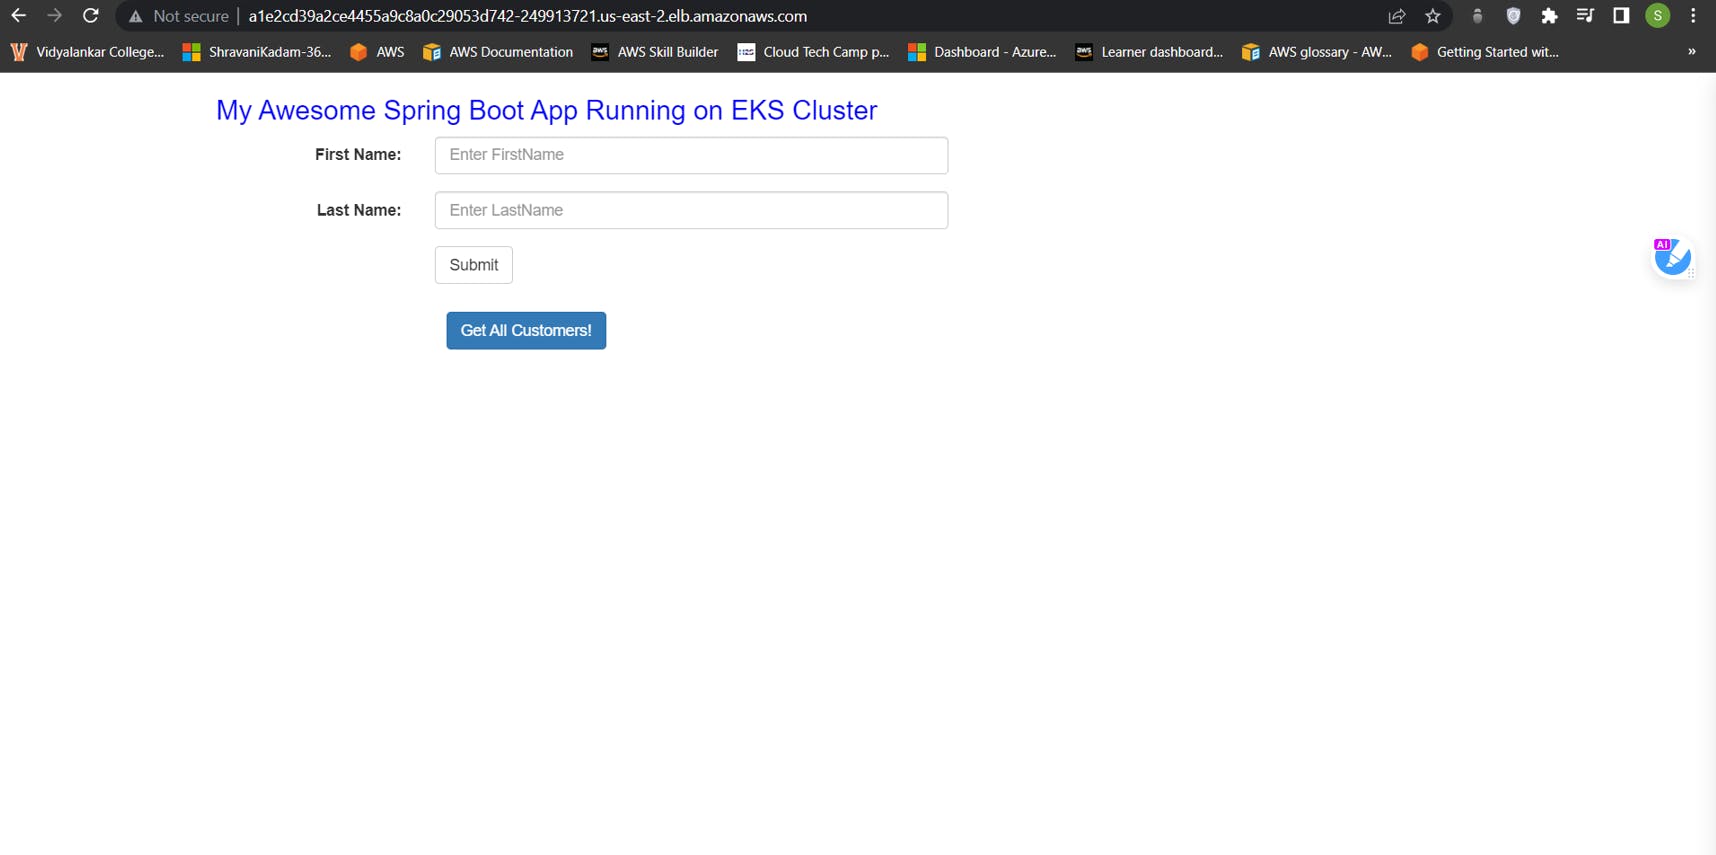

Hurrayy!!!🎉🤖🎊 🎉
Thank you for reading, if you have anything to add please send a response or add a note!